Tips When Installing A Built-In Cat Tree

We may receive a commission on purchases made from links.
If you're a cat lover, you might have seen those ultra-cool built-in cat tree shelves and decided to try one out for yours. After all, we all know cats have an instinctive need to climb and use their claws. Offering them their own "indoor tree" to satisfy their inherent cravings can be an effective way to deter them from destroying your furniture. Cats not only like to climb, they like to climb high, preferring to sit atop their throne and observe their surroundings from above. Putting in these wall-mounted cat shelves can give them the perspective they desire.
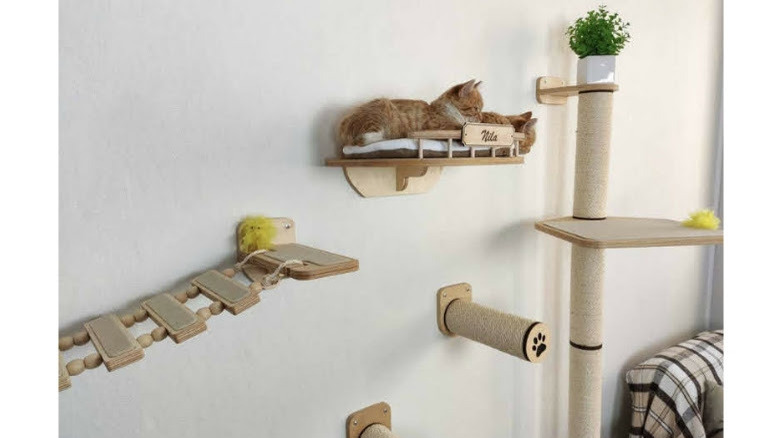
There are many different materials from poles to baskets to wood shelves, and an endless variety of placement designs. There are also extras you can upgrade these wall-mounted cat trees with, in order to entice and delight your feline's fancy. Personalizing the structure will help your cat know it belongs to them. Adding things like scratch pads and favorite toys and fabrics or a cubby hideout with a hammock are all good ideas! But first, let's get you some valuable and practical tips for installing a built-in cat tree.
Choose the design
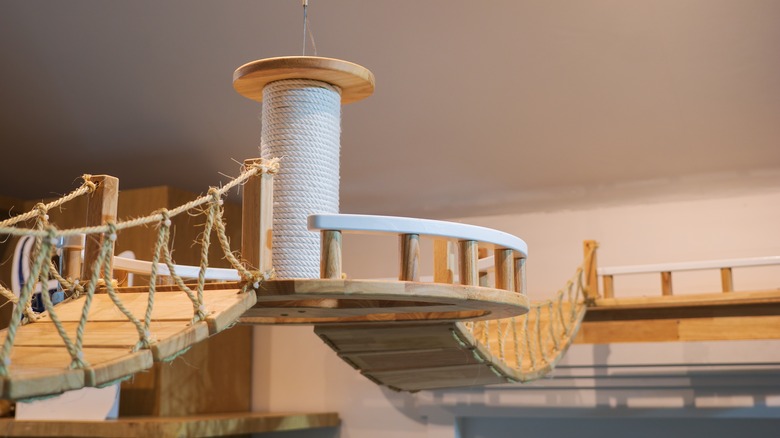
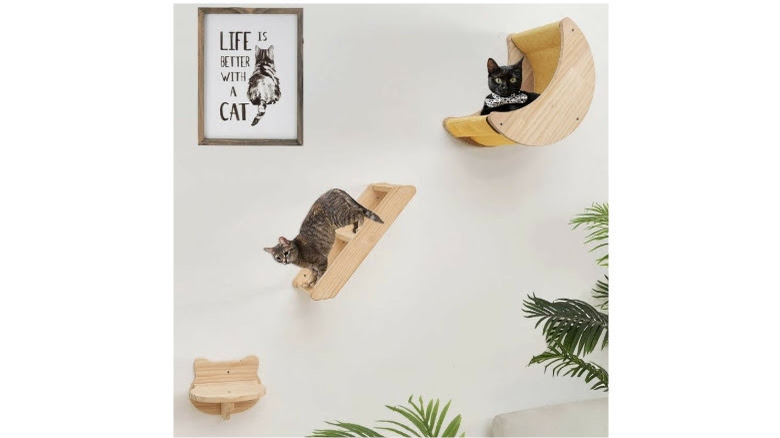
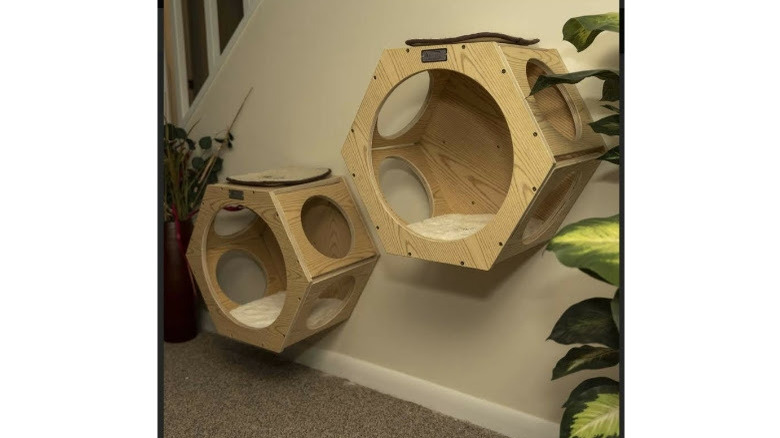
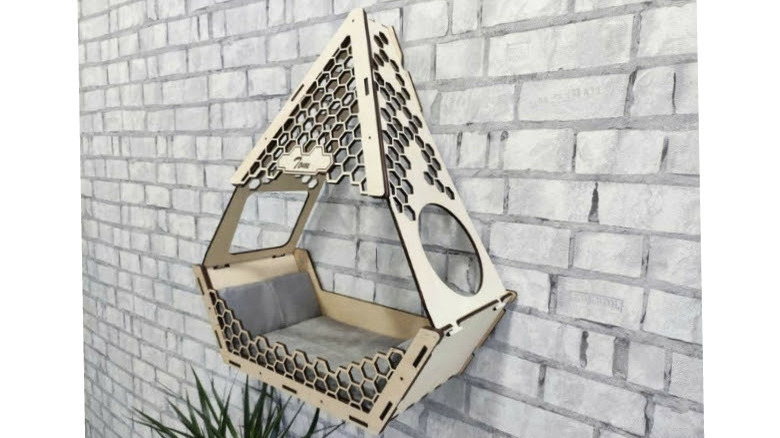
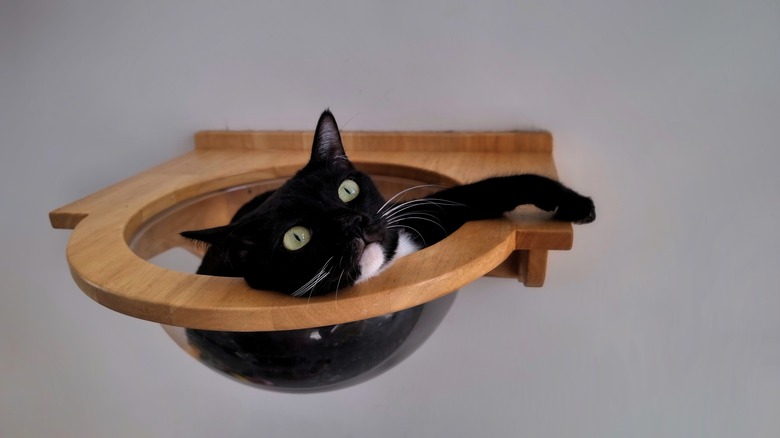
There are some really innovative and elaborate wall-mounted cat trees that contain all sorts of features to keep felines amused. Besides just traditional shelves, there are also round or square cubby-hole shelves, baskets, poles or rectangular step-type shelves, angled shelves, designer shelves, you name it. Once you have the one you want, it's going to be important to lay out the design before placement. You can then decide how you want to attach it to the wall and how you want it to be spaced out. You can do this by laying it out on the floor in front of the wall first.
If you're feeling ambitious, you can use craft paper to trace and cut out silhouettes of each piece, and place them on the wall (temporarily) first, to get a better idea of where you want them to go. Another thing to think about is the placement of the first step, in order to get the cat onto the tree. Some people choose a staircase design, with two or three steps leading up to the first shelf or feature of the cat tree. Others may be built-in to the overall design, but you still want to make sure you place the bottom shelf or pole low enough that the cat can easily jump to it, and on to the next.
Choose the best spot

There's a lot to think about when catifying your home, including trying to find the best spot to install a built-in cat tree. You will want to choose a spot where you have enough blank wall space, of course. Additionally, you don't want to put it in a room where the cat never goes, but rather where it spends most of its time anyway. Make sure they have a window to look out, as well. Cats like to be where the action is, or at least where they can see some activity. If your cat has a spot they seem to enjoy hanging out in the most, try to find a wall in this room to install the cat tree.
The tree will give your cat many things, including a place to climb, scratch, hide, and nap. But keep in mind the nature and weight of your feline before deciding where to place the shelves. For example, if you have an older cat, or one that's lazy or overweight, you might want to place the perches closer together and start lower to the ground. On the other hand, if you have a younger cat or one with a high level of energy, you'll need to place them higher up and farther apart. These cats will want to be able to leap and jump and play.
The other great thing about these built-in cat shelves is that there are some really aesthetically pleasing designs to keep your home stylish when you have pets. You should be able to find one to match the decor of whatever room you decide to put it in. You might have to get a bit creative, but you'll be rewarded by watching your cat frolic and play on its new real estate.
Determine the obstacles in the room
One of the things to consider when hanging your cat tree is the other obstacles in the room. After all, you don't want your feline mistaking the curtains or television screen for part of its playground! Not to mention the fact that you don't want to be constantly picking up toppled furniture or pictures knocked off the wall. Take into consideration any doors or windows, and the height of any surrounding furniture.
Another thing to keep in mind if you have other pets, your cat will likely use the tree to get away from them. This means the probability of an accident is high, so be sure to "pet-proof" the room. You don't want to be watching your breakables get knocked off nearby perches, either. Be smart about what you place within easy reach of your built-in cat tree.
Locate the studs
The next thing you're going to want to do is locate the studs in the wall you'll be using. Studs are usually placed 16 inches from the center of one to the center of the next. The shelves or features of your cat tree will need to be attached to the studs, so they won't simply fall off the wall as soon as your cat jumps on them. For this part, you'll need to use a stud finder. You can get one such as the Craftsman stud finder at Lowe's for $21.98, if you don't have one. This handy little gadget makes it easy to locate the center of each stud in drywall. It can also locate metal studs.
Keep in mind that stud locations change around doors and windows, which could give you other possible locations for placement. Get a roll of painter's tape, which incidentally can also be found at Lowe's for $5.48, and mark the wall where the stud finder lights up to tell you where the studs are. This step will show you where you can attach each piece to the wall, and so will largely determine the way it can match up to the design you want. If you made cutouts of silhouettes of each piece, you can stick them up on the wall where the studs have been marked to get an even more accurate representation.
Take specific measurements for spacing
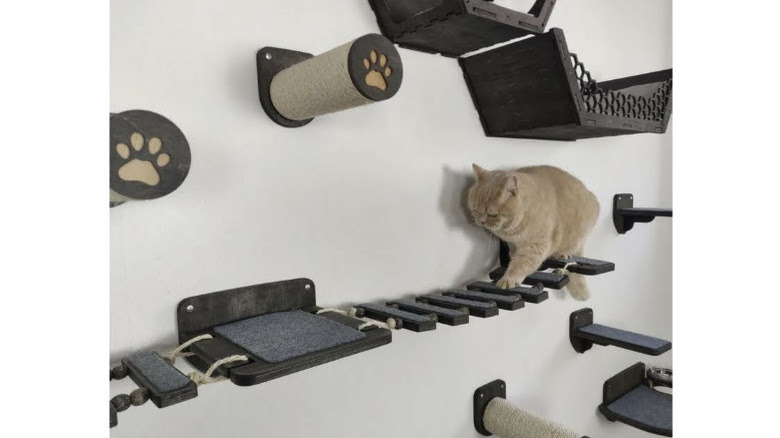
For this step, you'll need a tape measure and a pencil. It's important to get your spacing right, and you will want to take into consideration the agility of your particular cat. Make sure the access points for the tree are reasonable for your feline. That said, the average vertical spacing is about 10 to 17 inches between each shelf. For horizontal spacing, about 11 to 18 inches between them should be about right. Most cats can jump these distances easily, but it presents enough of a challenge to make it enjoyable for them. Additionally, keep in mind the top shelf or perch should be placed high enough, at least five to six feet up.
This distance should also work with most stud alignments. As long as you know where the studs are located, you can now measure out carefully between each shelf or major attachment of the cat tree. Measure and mark with a pencil on the wall where you want each shelf or attachment to go. You should then be able to see how the arrangement will work on the wall you've chosen. Rearrange the elements until you're happy with it and you have a design that works for your cat.
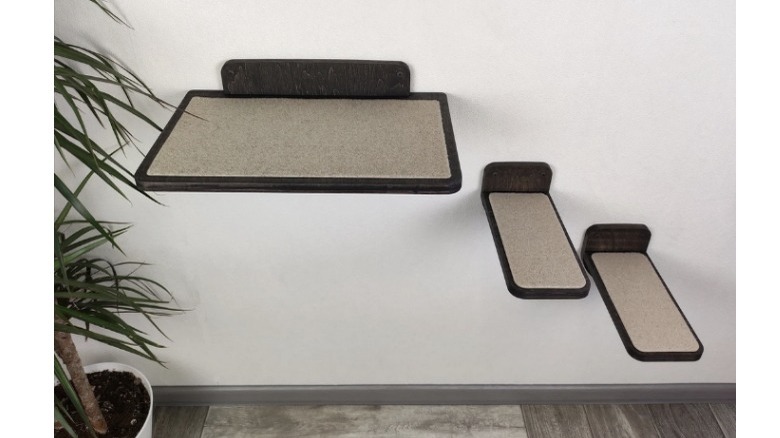
Attach carpet to the shelves
One of the most important steps is attaching carpet to the shelves. You don't want your feline to slip right off the cat furniture, so you'll need to attach carpeting to the surface. If the cat tree doesn't come with pieces of carpet for this purpose, you'll need to get some. You can sometimes go to a place that sells carpet and ask them if they have any scraps. It really doesn't matter whether it's short or shag carpet, unless you happen to know your cat's preference. As for color, find one that matches the colors of the room.
Measure the size of each shelf or trace them out on the back of the carpeting. Cut out the pieces using a sharp utility knife or Exacto knife. Once you have them cut to size, you can attach them to the shelves. This should be done with nails or screws that will hold the carpet down firmly. You can also use a staple gun, but be sure to anchor with plenty of staples because cats can pull them off over time. This step is absolutely essential to your cat's safety when leaping from shelf to shelf.
Be sure to use shelving reinforcements
Since most shelves aren't made for holding much more than about 10 pounds, you're going to want to use wall anchors to reinforce them. Wall anchors are made to hold up to 50 pounds, to keep your cat safe on its new furniture. Typically, cat shelves are made to withstand higher but specific weight limits. It's always a good idea to use wall anchors if you have more than one cat, or a very heavy cat, as well. You can find E-Z-Ancor 50-pound wall anchors in a package of 50 for $18.98 at Home Depot.
If you just feel you need a little additional support, you might just consider using thicker brackets. You can find sturdy brackets such as the EZYDECOR 6-piece "floating shelves" heavy-duty brackets for $47.11 at Sears. Using these not only works great for better support but also makes your shelves appear to "float" on the wall. As an added benefit, having hidden hardware on your cat shelves makes them safer for your cats when jumping on them.
Make sure to have some elements near the ceiling
If you have a design with a hammock integrated into it or some other kind of perch or basket, you'll want to place this at the top of the built-in cat tree. As we previously discussed, cats like to perch atop a high vantage point. They want to be high enough to be out of reach of other pets and even humans. This means putting elements nearer to the ceiling if possible. Ideally, this is where your cat will spend much of its time.
Many designs incorporate a cat hammock, a cubby hole shelf, a basket perch with a pillow for catnaps, or some other spot where your feline friend can watch the world go by. When you're laying out the pieces, remember to place these kinds of features five or six feet up if possible. Make sure there's a clear path for your cat to follow to and from the top.
Reinforce the scratcher pads
Many people wisely decide to attach wall-mounted scratch pads next to the cat furniture. Another option is to use these kinds of scratch pads to cover the surface of one or more of the shelves instead of carpet. Either way, scratch mats can be very useful to add to the design and help keep your cat from scratching walls or furniture. You can greatly reduce that risk by installing at least one surface they can sharpen their claws on.
You can find scratch mats like the PetLinks Scratch and Play Cat Scratcher Toy with Catnip for $26.29 at Chewy. The thing about these mats, made to attach to the wall or the floor, is that they have an adhesive back which is very sticky. They can be extremely difficult to remove once you stick them down, and they leave a sticky residue if you do.
A better idea is to attach it to the wall next to the cat furniture or on the surface of one or more of the shelves by using a drill and four screws, dowels, and washers at each corner. Not only will that enable you to move it around if you want to and eventually remove it with ease, but it will also reinforce it so it doesn't come off easily. Cats can be hard on scratch mats anyway, and this solution kills two birds with one stone. (You've got to be kitten me!)