The Simple DIY Window Treatment That Adds Quick Value To Your Home
Window trim, though often barely noticed due to its common appearance inside modern American homes, can add a hint of dimension to a space while tying together all the incorporated features that make a house unique. If you're a homeowner looking for an easy do-it-yourself project that benefits your wallet, installing wooden or plastic trim around your interior windows can add character to your residence and increase its resale value by catching the attention of appraisers and potential homebuyers alike.
It's widely known across the real estate industry that staged homes, and those with added embellishments, tend to sell faster than homes listed and sold while empty. Staging your home can make it feel more cozy and inhabitable, allowing homebuyers to picture themselves better living inside the space when touring with an agent. These enhancements also encourage buyers to spend more money on a property when looking for a house, enticed by the idea of not having to complete home improvement projects of their own after moving in.
While many real estate professionals agree that interior upgrades involving trim and crown molding increase overall property value, it's challenging to determine by how much exactly since appraisers calculate the resale value on a case-by-case basis. It is proven that adding or upgrading window trim is a relatively inexpensive investment that shouldn't take too much time or energy to bring to fruition. Here's how trim can augment a home's value, along with how to install it by yourself.
How adding trim benefits your home
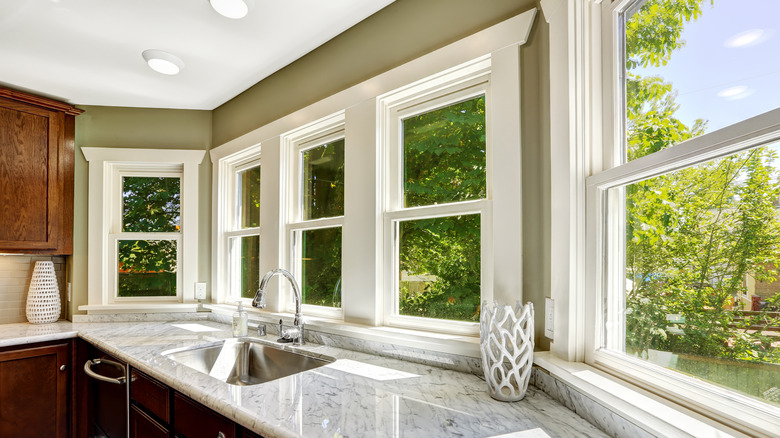
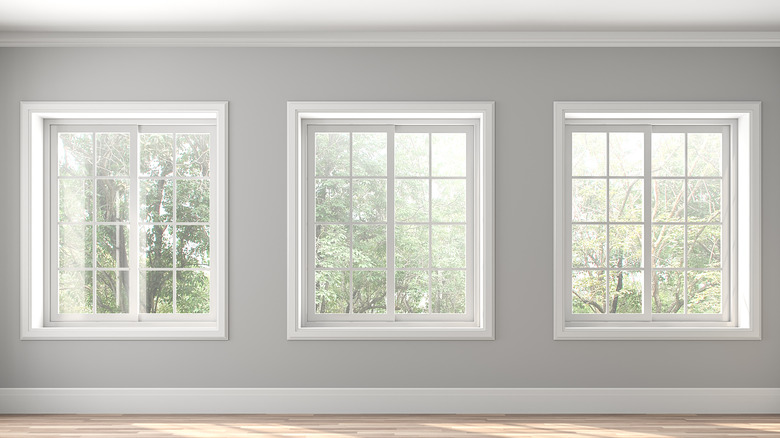
Perhaps the most significant advantage trim adds to an existing home is eye-catching style. Of all the variations of trim that homeowners can apply to their houses' interiors, trim that specifically adorns windows and doors is considered to yield the greatest reward in terms of resale value. While visitors tend to notice better the decorative trend along the floors and ceilings of homes instead, window trim can add an architectural "pop" that elevates a home's interior design to even greater heights. Trim for windows is also versatile, as it's available in many different designs and can be installed using a variety of techniques that can completely change the look of your space.
It's important to note that worn and dilapidated casing or trim that is haphazardly applied often negatively affects a home's resale value, even when compared to homes with no window trim at all. Trim that doesn't compliment the other decorative features of the house also proves to yield weaker returns on investment in comparison to trim that matches the space.
Window casings also offer their share of practical benefits, as well. Like baseboards and wainscoting, window trim provides an extra layer of protection to drywall, protecting it from potential bumps, nicks, and scratches from household members. These casings can also close pre-existing gaps in windows, helping prevent heat and air leakage from inside the home and, in doing so, decreasing energy costs.
How to trim your windows
Trimming your windows should take about half an hour to prep and another three hours to execute from start to finish. Begin by measuring the length and width of the windows you'll be trimming, so you'll know how much casing to purchase when it's time to shop for supplies. Next, gather all necessary materials, including window casing, nails, a miter saw, caulk, a nail punch or nail gun, sandpaper, and interior paint, all of which can be found inside a hardware store.
To cut your casing strips to the appropriate length, place each piece atop your window sill, marking with a pencil or pen where the casing meets the top corner of your window. Remember to cut off the tips of your casing so they form 45-degree angles and align with the additional piece of casing that will adorn the top of your window. Nail one of the side pieces of casing into your drywall, followed by the corresponding side of the top piece, after cutting it at the matching 45-degree angle. Before cutting the top piece on the opposite side, place the pre-cut piece of casing on top of it, marking where to snip the excess casing off with a writing utensil before clipping and nailing it into the wall. Once all pieces are fixed into place, fill in any corner gaps with caulk and finish by painting the trim in the color of your choice.