What Is A Grout Float And How To Use It
You've decided to take on the project of tiling a backsplash, floor, or shower in your home. It's an exciting opportunity to transform the look of your space, and with some patience, a few tutorial videos, and the right tools, tiling doesn't have to be complex. A grout float is one of the necessary tools for the job. This hand-held tool allows you to spread the grout mixture out over the top of the tiles and into all the cracks, creating a smooth and durable surface. It's a critical step to get just right since this ultimately holds the position of your intricate pattern or leveled tile.
Do you have to have a grout float? It's highly recommended you do because this trowel-like device is specifically designed to provide enough even pressure to allow the grout to penetrate all of the crevices. That's important since the grout seals off that area, holds the tile in place, and offers some water resistance. You'll still need to purchase the right type of grout for your space and follow all mixing and preparation steps for applying it. Once you're ready, using a grout float is pretty easy to learn to do, though there's often a learning curve.
What a grout float is and how it works
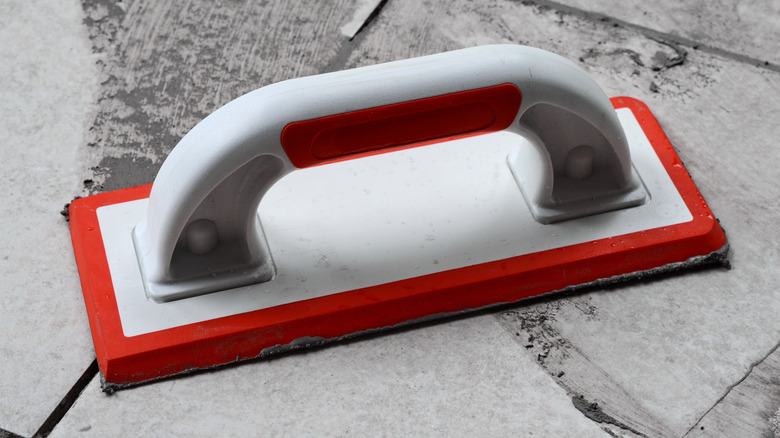
Tile installers will need a grout float as a core component of their toolbox. This device looks like a trowel but has a rubber-like sponge along the bottom. You'll use this portion to move the grout across the tile and into the grooves. It won't scratch or damage the tile (unless your grout isn't the right mixture consistency or the wrong product). Many times, the rest of a grout float is made of plastic, wood, or steel, depending on the type and age. While you don't need to have a high-quality, highly expensive version, buying the least expensive option for a big project isn't ideal since it could snap in half mid-way through.
When selecting a grout float, size can play a role in just how easy it is to use. Don't purchase something too large, thinking it will help you get the job done faster. Instead, look for one that's comfortable and lightweight enough to hold in your hand, especially if this is a big job. You'll also want smaller versions for more intricate areas, like the backsplash over your bathroom vanity or corners of a closet you're tiling.
How to use a grout float properly
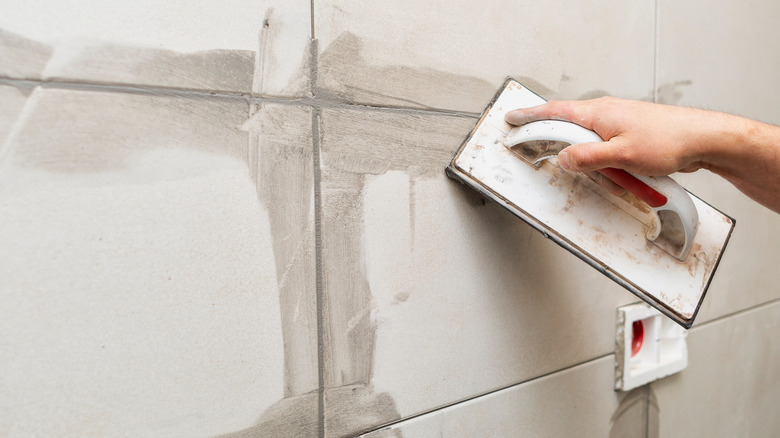
How hard can it be to use a grout float? There are a few things to remember here. First, buy and prepare the grout the way the manufacturer recommends. Once it's ready to go, place a small amount of grout onto the float's bottom. Hold the float in one hand, and flip it over so you can see the sponge-like bottom. Then, place some grout toward the top edge. Limit the amount placed on the side, as you'll likely use just the top portion initially to push the grout into each of the spaces between the tiles.
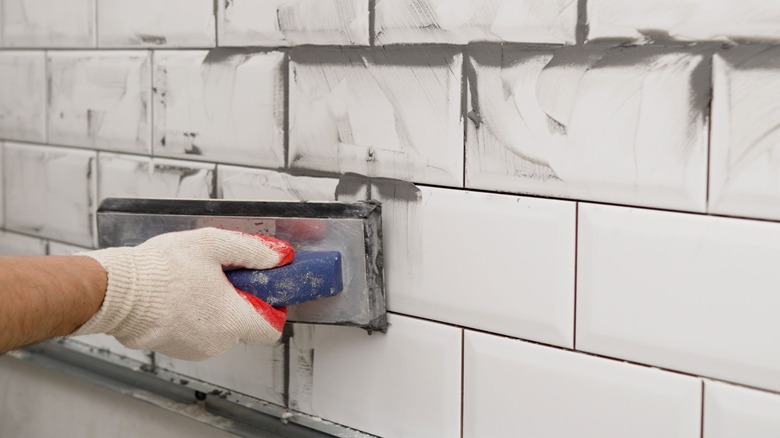
Start at one corner of the tiled surface and slowly work around it, pushing the grout float at a 45-degree angle to fill in all of the gaps. Minimize the amount of grout wasted on the tile and keep moving the float over the surface to create evenly filled spaces. Do this to a small section of the space, then use a damp sponge to wipe off the entire tile surface. This removes the excess material without removing the grout from between the tiles.
For example, if you're installing a subway tile backsplash with black grout, it can seem unnerving to allow the black material to get onto the tile itself. Don't worry, as it should wipe right away if you work in small spaces with the float.