What To Do When You Blow A Fuse
When you blow a fuse, you replace it. Except this is often not your first step, and sometimes you won't replace the fuse at all. Let's start at the beginning. Something electrical has stopped working ... probably more than one, all close to each other. Chances are your mind will immediately turn to circuit breakers and, maybe, fuses.
Fuses (replaced by circuit breakers for new construction starting in the 1960s) were, essentially, the weak point in a home's electrical wiring by design. When there was a short circuit or too much current was being drawn through the wiring, the fuses would fail, effectively turning that circuit off. Without this protection, the weak point would necessarily be somewhere else in the wiring, so a failure would happen inside the walls, which usually means fire.
When a fuse was blown, you had to locate the fuse box, typically in a garage, basement, or the corner of a closet. Good fuses would have a clear window (made of mica) through which you could see an intact copper strip; blown fuses would have their strips melted or burned through, usually blackening the mica window in the process. So far, so good: You know a fuse is blown and which one it is. If you have an old home with a fuse box, here's what to do next.
Figure out why you've blown a fuse

Until you know why you've blown a fuse, you won't know how to replace it. In some situations, you've simply overloaded a circuit by running too much stuff on it. In other cases, you've introduced a short circuit in a way you can diagnose and correct.
There are some obvious questions you can ask yourself to figure out what went wrong. Did you plug in something new recently? If so, perhaps it introduced a short circuit or was the final straw that caused the electrical load to exceed the circuit's capacity. Did you use a bunch of stuff at once? Or did you use multiple items that draw large amounts of current? (Think fans and hair dryers.) Were you experiencing an electrical storm when the fuse was blown, in which case a lightning strike could be to blame?
Unplug anything that might be the culprit, and make sure things are turned off before replacing the fuse. There's no sense in putting in a new one only to repeat the same situation. Because this is a possibility, buying two fuses will probably be wise, but it's not quite time for that yet. We still have a few pieces to unpuzzle.
Decide if you need a pro
It's important to recognize that there are also cases where you can't figure out the cause of repeated blown fuses, and if the problem continues, you'll likely need professional help. Such causes as rodent damage and poor wiring are likely to be invisible to the homeowner and must be diagnosed by an electrician.
In fact, if anything mysterious is involved, it's probably best to call in some help. While factory-condition fuses and fuse boxes are reasonably safe devices, worn or modified ones (or the electrical system they're attached to) often aren't. Remember that homes with fuses were typically wired for 60-amp service (or even 30 amps for older homes), while the modern standard is 200 amps. Unfortunately, people have done all manner of unsafe modifications in the futile attempt to make modern electrical life fit into an outmoded electrical system. Many factors can make older wiring worth a look, and it's not something you can train yourself to do before you need to use the blender again.
If you find signs of trouble in and around your fuse box (burn marks, melting, fuses bypassed with a penny, modified fuse holders), you should stop touching anything electrical and immediately call for professional assistance.
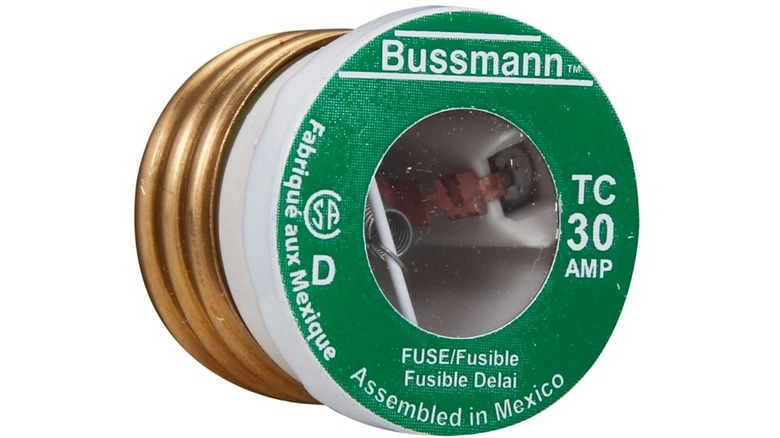
Determine which plug-style or cartridge fuse you need

The first step to getting a handle on identifying your replacement fuse is to determine what type of fuse you need. That is, which one is compatible with your fuse box? We're mostly talking about plug (screw-type) fuses, which come in two varieties: type T (Edison-base) and type S (rejection-base or tamper-proof). T-style fuses have been banned in new construction since the 1940 National Electrical Code was published, but the boxes still survive, and replacement fuses are still manufactured. The bases of all T-style fuses are the same, which is a problem because there's nothing to stop you from screwing in a fuse that's rated higher than its connected wiring (say, a 30-amp fuse with 20-amp wiring), creating a fire hazard.
T-style fuses were replaced with type S fuses, for which each amperage has a unique base, preventing the over-amp scenario. They're sometimes called "rejection bases" because they reject incorrect fuses. Adapters are available to convert Edison bases to one S-style threading, and the process is irreversible.
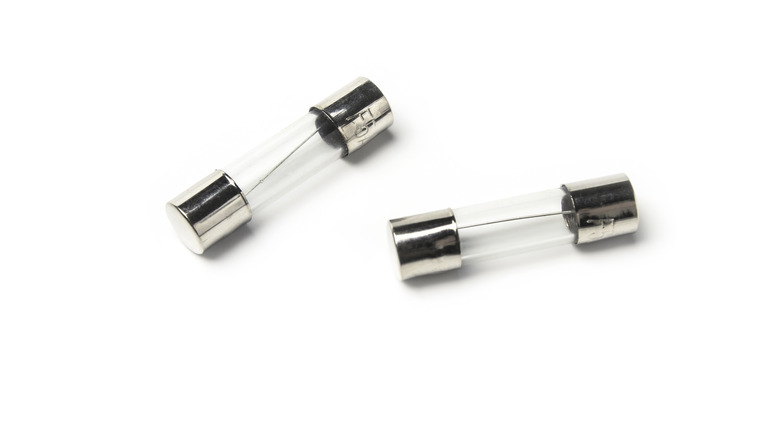
You'll often see a tubular cartridge fuse (or, more likely, a pair in a pullout with a D-shaped heavy wire handle) handling one of your home's electric circuits, rather than the more familiar screw-in fuse. Cartridge fuses are designed for 240-volt applications, and are often seen where appliances like electric ranges are used.
Find the right amperage
Fuses are, as we've said, designed to be the first thing to stop allowing electricity through, thereby protecting your home's wiring and everything plugged into it when there's a dangerous surge. In most cases, when something besides a fuse or circuit breaker becomes the weak point, you have a serious fire danger. All of this is governed by your circuit's amp rating, which is determined by the wire gauge used, which is, in turn, determined by the type of devices you will power with that circuit. In general, 14-gauge wiring calls for a 15-amp fuse, 12-gauge wires use a 20-amp fuse, and 10-gauge wire use a 30-amp fuse.
Fuse amperage can't be increased for a given electrical circuit without rewiring that circuit. If you encounter any sign that a fuse or fuse holder has been tampered with, or any evidence of over-fusing, it might be best to call in a professional. Such tampering is extremely dangerous. Fuses are disposable, full stop. You don't fix them, you don't modify them, and you don't replace them with anything other than the correct fuse.
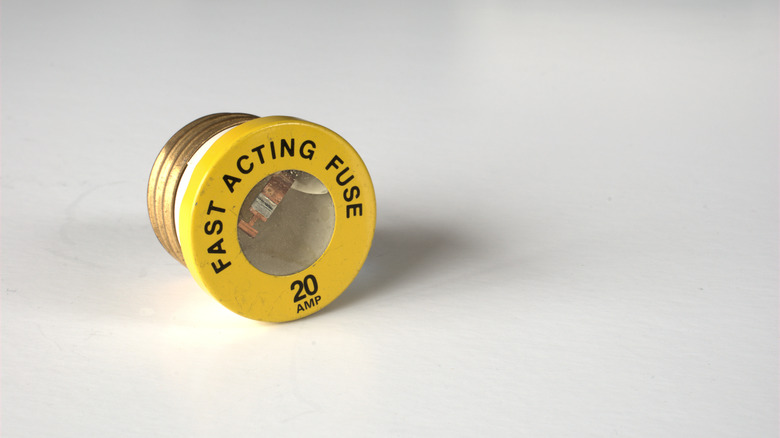
Decide if you need a time-delayed fuse
Fuses can be replaced with fast-blow fuses that trip immediately or time-delayed slow-blow fuses with a brief built-in grace period. Time-delayed fuses give devices a minute to settle into their normal rate of power draw. This usually involves circuits where something with a large electric motor, such as a refrigerator, is plugged in.
Time-delayed fuses use specialized solder that melts to absorb the excess energy, and if the amperage doesn't immediately return to normal, the copper strip is burned through, and the fuse is, therefore, blown. But there are different kinds of time-delayed fuses, and it can be difficult to choose the right one. For example, there are TL, SL, and D fuse types, as well as fast-acting W fuses. TL, W, and D are all Edison-base fuses. SL is the time-delayed version of S-style fuses. If this is confusing, the thing to remember is that if you have a powerful electric motor somewhere in a circuit (say, a refrigerator compressor), you will probably need a TL, SL, or D fuse.
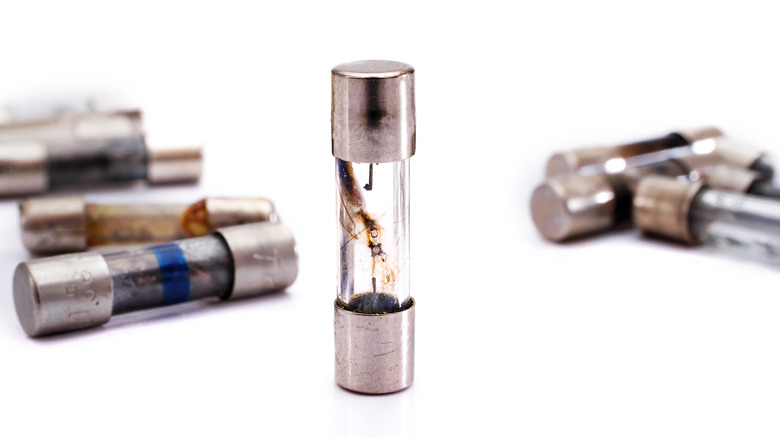
Figure out which fuse has blown
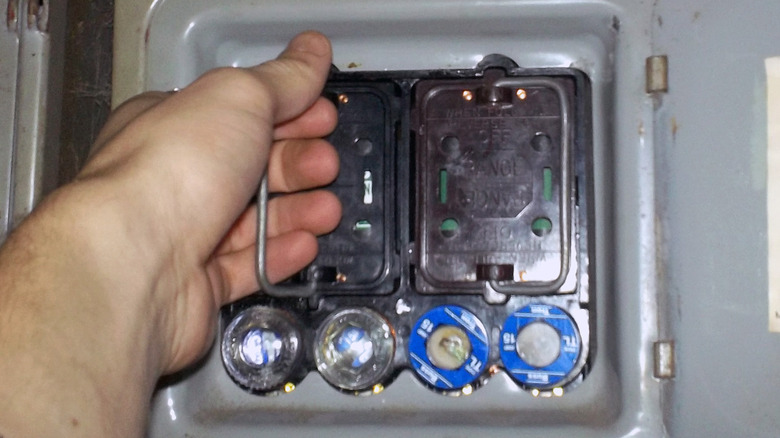
Obviously, you're not going to want to replace all the fuses in your fuse box when one blows, so you have to figure out which one is bad. You might have a properly labeled fuse box and a very clear idea of which fuse needs replacement, but it's always a good idea to verify that the fuse in question has, in fact, blown. The methods for this vary between screw-type and cartridge fuses.
We've already touched on the method for a plug fuse: Look at the mica window and determine if the copper element has been severed, or if the window is blackened thanks to the fuse-blowing fireworks.
Cartridge fuses are slightly more difficult to diagnose. They generally protect 240-volt circuits that include a major appliance like a range, air conditioner, or clothes dryer, or to fuse electrical subpanels. If you're not experiencing trouble with any such circuit, there's probably no issue with your cartridge fuses. If you are, you must remove the fuse by firmly pulling on the pullout. This is the removable enclosure the cartridge fuses are in. This allows you to remove and replace cartridge fuses safely. Inspect the fuses. Indicating fuses have a built-in panel that indicates if the fuse is blown. For non-indicating fuses, you'll have to test them with a multimeter(a tool that measures electrical currents) by either checking for continuity or resistance.
Consider a mini-breaker instead
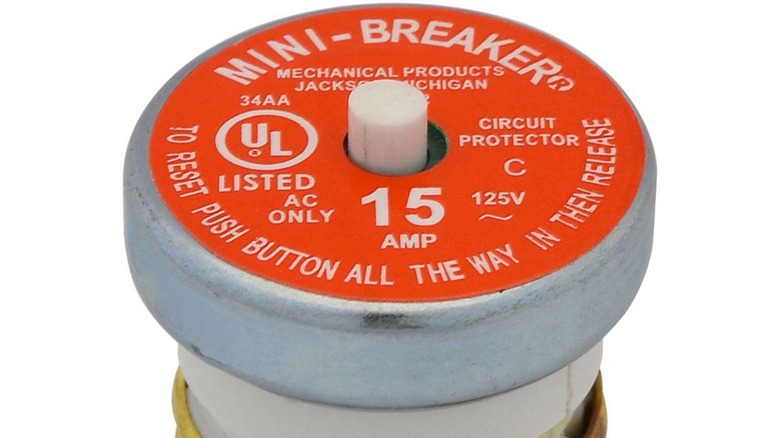
If you're looking for a better way to deal with frequently blown fuses and replacing your fuse box with a modern load center isn't in the cards, it might be wise to consider replacing your fuses with resettable mini-breaker fuses. These function like circuit breakers, but are in the shape of a plug fuse. Rather than breaking a resistance wire or strip, rendering the fuse useless, mini-breakers pop out a button when tripped. All you have to do is press in the button to reset the "fuse" and continue using it.
There are a few important caveats with mini-breakers. First, if they are continuously tripped, you have an ongoing electrical issue on that circuit (usually a short circuit of some sort), which needs to be diagnosed and corrected before you can use it. Resetting it over and over only increases the chances the mini-breaker will fail, leaving your circuit unprotected. If you can't keep a mini-breaker active, stop trying and locate the problem or bring in an electrician.
Another caveat is that mini-breakers only appear to be available with Edison-style bases. Since the Edison-to-S-type adapters are irreversible, you can only use mini-breakers if your fuse box hasn't been made compatible with S-type fuses.
Finally, keep in mind that some resettable fuses don't function as well after being tripped and reset many times. If you have a problem circuit and have reset your mini-breaker repeatedly, consider replacing it before it stops working properly.
Replace the fuse, at last
Once all of this has been settled and you have bought a replacement fuse (or mini-breaker), it's time to do the actual replacement. The physical process is pretty straightforward for screw-type fuses, but there are some things to be on the lookout for. Replacing it is a matter of unscrewing the old one (turn it counter-clockwise), discarding it, then screwing in a new one (turn it clockwise). Don't force it under any circumstances. If you meet unexpected resistance, back out the new fuse and try again. Don't use tools, and don't use anything metal or otherwise conductive. Only use your fingers. If screwing the new one in is too difficult, odds are you've selected the wrong base in your replacement. Forcing it won't work.
When you're replacing a cartridge fuse, things get slightly more complicated. These are usually seated in a pullout (also known as a fuse block) with a D-shaped wire bail that acts as a handle. Pull out the, umm, pullout, keeping everything as straight as possible. Then remove the cartridges, using a non-conductive fuse-puller if you have one. Make sure everything is in good shape (if not, it's electrician time), then replace the cartridge fuse(s) and push the pullout back into place, ensuring everything is lined up and moves fairly smoothly. If your cartridge fuses are not in a removable fuse block, you will need an insulated fuse puller because you're about to reach between two contacts with 240 volts of shock potential.
Make things easier for the next time
There are a few steps you can take to simplify things for yourself the next time you blow a fuse, and since you're already working in the fuse box, now's the time to take care of them. We just touched on one: You will be much safer in the future if you have a proper fuse puller for cartridge fuses, so pick one up at your local hardware store and keep it near the fuse box.
Since you know the area serviced by the fuse you just replaced, label that fuse clearly wherever there's space to do so safely. Use a label maker if you can. Do not use solvents to clean the surface to which you're sticking the label.
You should also buy plug fuses two (or more) at a time. Having to go to the hardware store because you blew a fuse is a drag, and it would be ideal to have a few of each base type and ampacity on hand. You can also pick up a cheap multimeter for testing fuses. Make sure it has a resistance mode and a continuity testing mode.
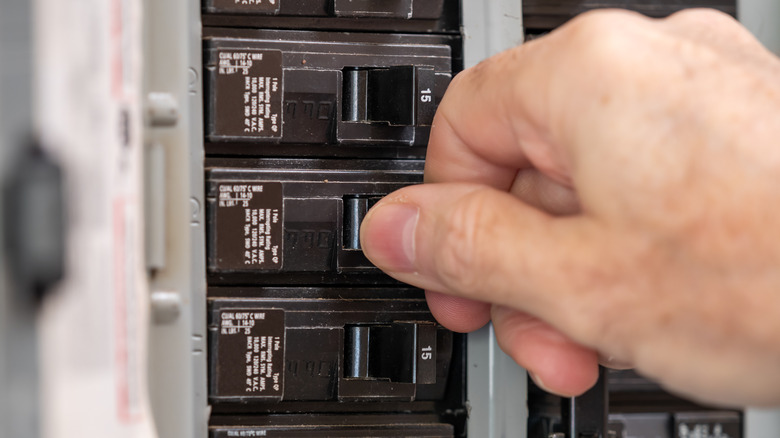
Lastly, consider replacing your fuse box with a circuit breaker load center. This is work for an electrician, so you're looking at several hundred dollars in materials, at a minimum, plus labor costs. But circuit breakers are a lot easier to deal with, and they will protect you against more issues.