The Best Way To Edge Your Curved Lawn
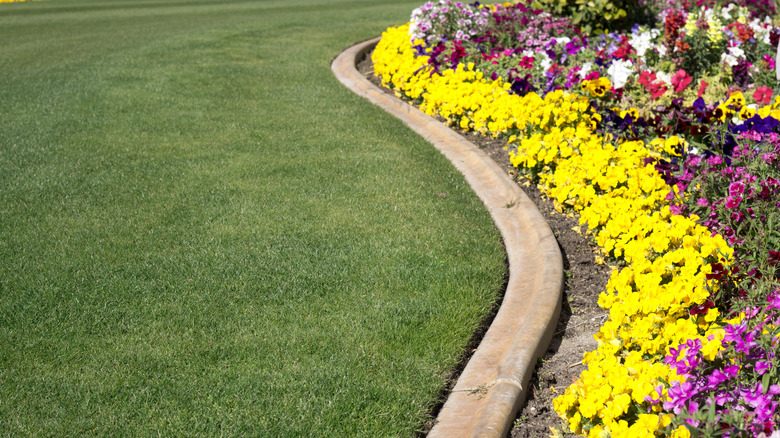
Improving the look of your property by adding landscaping and hardscaping can boost its value. If you want to go beyond the traditional look of edging your lawn in a straight line with hardscaping and give your property a unique look, consider creating a curved border edging for the lawn. One of the best ways to create lawn edging with a curve is by digging a trench in the shape of the edging and then filling it with concrete. Although this can be a challenging DIY project, many people can tackle it by themselves or with the help of another person.
Rather than mixing and pouring your own hardscape cement lawn border edging, some people may prefer to purchase curved bricks or pavers. Using these items for curved border edging can cause some issues, though. For example, pre-built pavers limit the design options you have. Additionally, connected pre-made curved pavers may not precisely fit the shape of your existing flower bed.
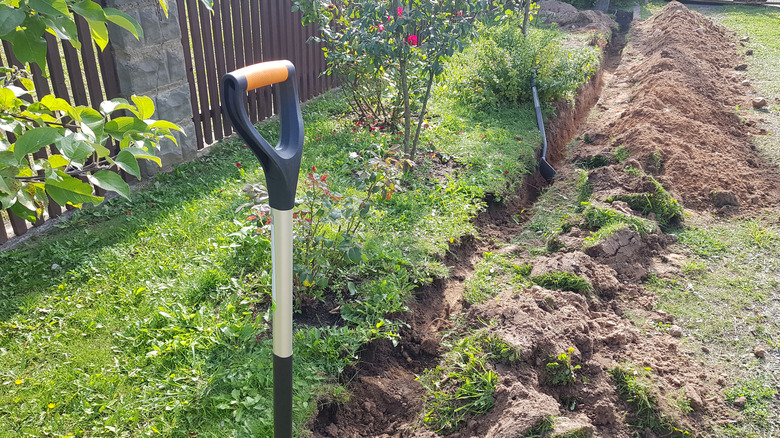
If you prefer to give your curved hardscaping a unique design, the concrete trench is the best option. You will need a few tools, like a wheelbarrow, to complete this process and a place to mix concrete safely. The trench needs to be several inches deep, so it takes a lot of effort to dig it. Some people rent power tools, like a trencher or a sod cutter, to simplify this process.
Dig and line the trench
For starters, use a segment of rope to visualize the curved border edge you want to create. If you already have a flower bed where you want to add hardscaping, just lay the rope along the edge of the bed. If you are starting from scratch as part of a complete landscaping plan for your property, the rope layout can help you visualize what the space will look like after everything is in place. Most concrete borders used as hardscaping will be 4 to 8 inches wide, and some people lay out two ropes to show the full planned width.
Then start digging the trench. Use the shovel's edge to cut the edges into the lawn and then scoop out the grass and soil. The trench should be four to six inches in depth. After digging, tamp down the soil at the bottom of the trench to create a firm base.
Drive 1-by-1-inch wooden stakes along the edges of the trench every couple of feet. Lay a flexible plastic or hardboard material on the edges of the trench, screwing it into the wooden stakes to hold it in place. Cut some of the wooden stakes to the desired width of the trench and place them randomly between the edges as spacers to hold the border material at the desired width. The plastic or hardboard may try to move as you're working on other sections, but the spacers will keep it in place.
Add concrete to create the curved edging
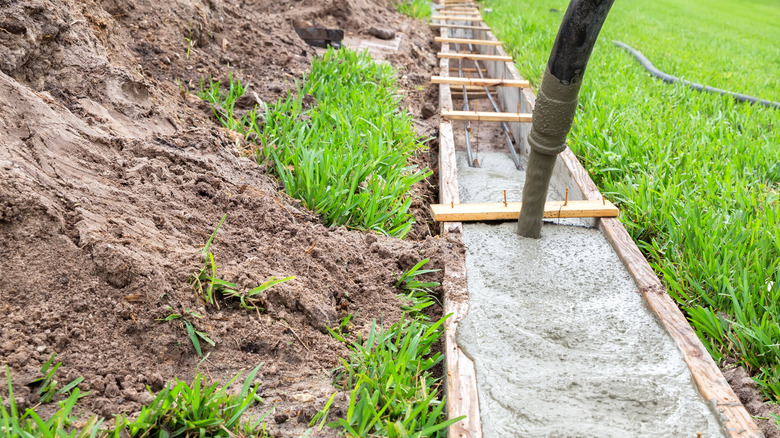
Follow the directions for mixing the concrete until its consistency is similar to oatmeal. Pour the concrete into the trench between the borders. You may want a second person helping you mix more concrete while you pour, especially for a long trench, so you always have a fresh batch available. Pull out the spacers as you move along the trench before pouring concrete into that area. Use a trowel to spread the material as you pour it, keeping it at the desired height. You don't need to smoothen the concrete yet.
Once water is no longer visible along the surface of the concrete, it's ready for smoothing. Use a float to create a smooth surface on the concrete. Employ the trowel to cut an expansion line about an inch deep along the concrete every few feet, which allows it to expand and contract in varying temperatures without cracking. After the concrete dries, you can remove the stakes and the border material. Use soil to fill any gap along the edge after removing the border. Add a sealant to the concrete to protect it.
Admittedly, creating a curved hardscape border for your lawn in this fashion is a lot of work. If you have no experience with pouring concrete, you may want to consider hiring a landscaping company to do the work.