What It Means To Back Butter Your Tile And Should You Try It
"Back buttering" your tile refers to the process of spreading a thin layer of adhesive, typically thin-set mortar, onto the back of the tile before setting it onto the surface (floor, wall, etc.) that has also been prepared with adhesive. The terms "flat backed troweling" and "notched back troweling" are often used interchangeably with "back buttering" to describe the same procedure with more specificity. Each term provides further insight into the technique, whether it involves spreading a flat layer of adhesive (flat-backed troweling) or applying adhesive with a notched trowel (notched back troweling) on the back of tiles before installation. The technique you choose will depend on the type of tile you're using, as well as the surface you're tiling.
There's debate in the tiling industry regarding the necessity of back buttering tiles. Some professionals argue that back buttering isn't always required, especially when the substrate is well-prepared, flat, and free of imperfections. However, when you back-butter your tiles (especially those made from natural stone), you take full control of your tiling project, ensuring superior adhesion and durability. We'll explore these benefits and offer vital steps to back butter tiles like a pro.
Benefits of back buttering
The National Tile Contractors Association recommends back buttering for natural stone tiles. Natural stone tiles tend to absorb moisture from the adhesive, potentially compromising the bond between the tile and substrate. Back buttering forms a protective layer, helping to mitigate this risk and prolong the lifespan of your tile installation. The layer of mortar must be thick enough to prevent cracking caused by gaps in the underlying layer. It should also cover at least 95% of the area without any gaps larger than 2 square inches or completely devoid of mortar. This guarantees an optimum bond between the tile and the substrate, significantly reducing the risk of tile movement and potential damage over time.
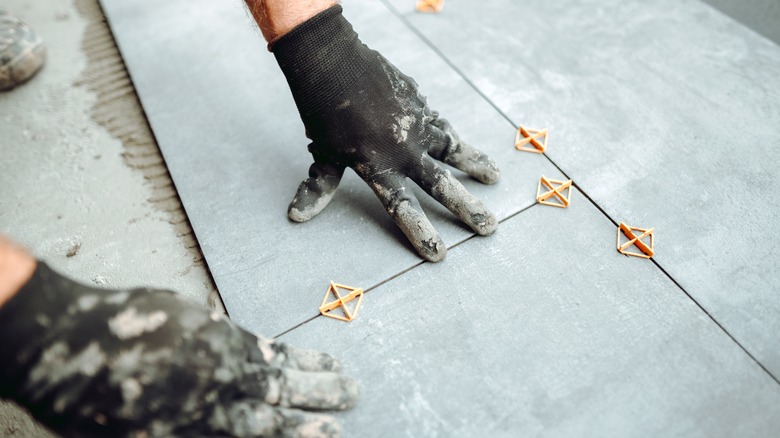
Using this technique also significantly reduces tile lippage — that is, the unevenness between adjacent tiles — and promotes a more level, uniform tile surface, resulting in a more professionally finished appearance. Back buttering is even more beneficial if you're using larger tiles. These tiles typically require more adhesive to ensure a solid bond. By spreading adhesive on the tile back, you ensure full coverage, leading to a sturdier and safer installation.
How to back butter tiles
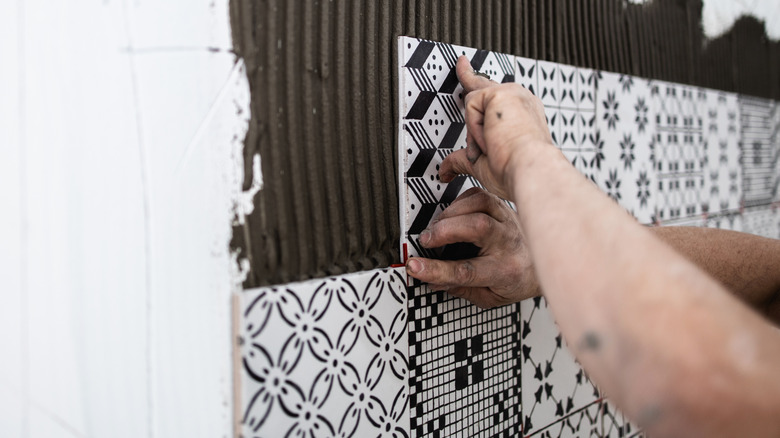
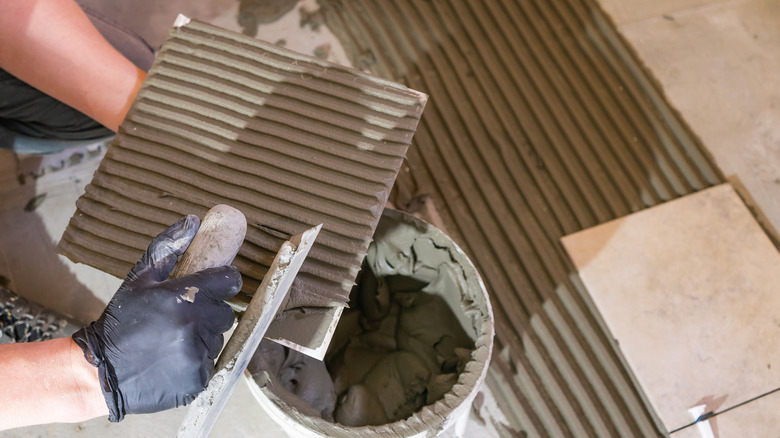
It's advisable to use flat back troweling when installing stone and large-format tiles, as this method ensures a strong adhesive bond. To start the application, use the flat edge of your trowel, and spread a layer of the mixed adhesive onto the area where your tile will go. After you've covered this area, use the notched side of your trowel to comb over the adhesive. This combing motion creates ridges in the adhesive, which help to secure your tile.
With your surface prepared, you can now back butter your tile. Holding your tile in one hand, use the flat side of your trowel to spread a thin layer of adhesive onto the back of the tile. Make sure to cover the entire back of the tile, as this maximizes the bond between the tile and the surface. After back buttering, carefully place your tile onto the adhesive-covered area on your surface. Apply pressure to the tile and twist slightly. This action helps to ensure that the tile makes good contact with the adhesive on the surface.
Remember to occasionally lift your tiles to check for adhesive coverage. This step is crucial because it helps ensure that your tile is fully bonded to the surface. If you spot areas with insufficient adhesive, add a little more and continue laying your tiles.