9 Ways To Transform Old Keys Into Creative Home Decor
We may receive a commission on purchases made from links.
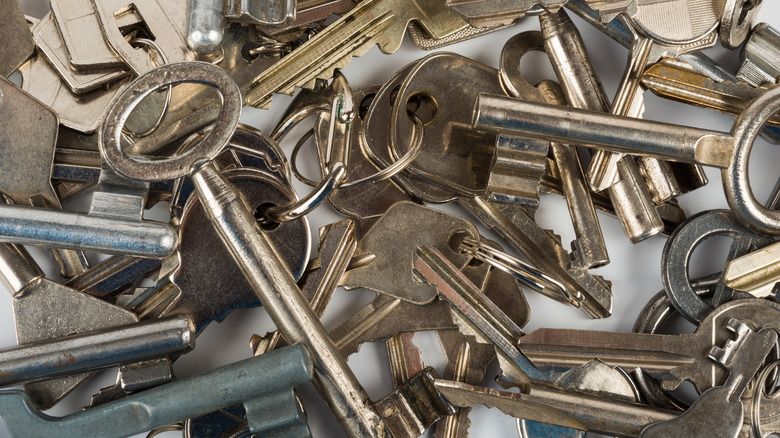
If you've moved a lot in your life, you likely have quite a few old keys that no longer serve a purpose like those to previous houses or ones to items like storage boxes or sheds. You may also have some hotel keys from travels, and some people even collect antique keys. Obviously, you could continue to ignore these keys and leave them in an old box. However, we think it's in your best interest to recycle them for a fun project for your home. This way, you'll have some sustainable, unique, and slightly industrial home decor that's made out of items you already own.
Now, you might not even have the faintest idea on how to make something worth displaying out of old keys. For some inspiration, check out this list of DIY projects, like turning them into a wind chime, key holder, or piece of wall decor. Feel free to put your own spin on each of these ideas so the items are personalized for your home and specific style.
Transform some old keys into a delightful wind chime
For this beautiful wind chime, gather up several old keys, wire, beads, and a mason jar band. First, twist and thread the wire through the top of the keys, beads, and band. Use more wire to place the wind chime wherever you find most suitable outside. Personalize this project by painting the keys (once they are thoroughly cleaned) in your favorite color. Changing up the color of your keys won't cost you much. Just repurpose a bottle of nail polish from your collection and give your keys a couple coats.
Make a fun key holder for your entryway
There's something just wonderfully kitschy about making a key holder out of recycled keys. For this craft, get a block of wood, some keys, and a screwdriver. After securing the keys onto the wood with your screwdriver so they stick up off the top edge, just hang your key holder wherever you'd like. While you could round the edges of the wood with a jigsaw, this step is optional. Further, while wood stain can be used to personalize this craft, you could also easily paint the block. But before you do so, remember to complete these three important steps.
Craft a rustic clock with some keys
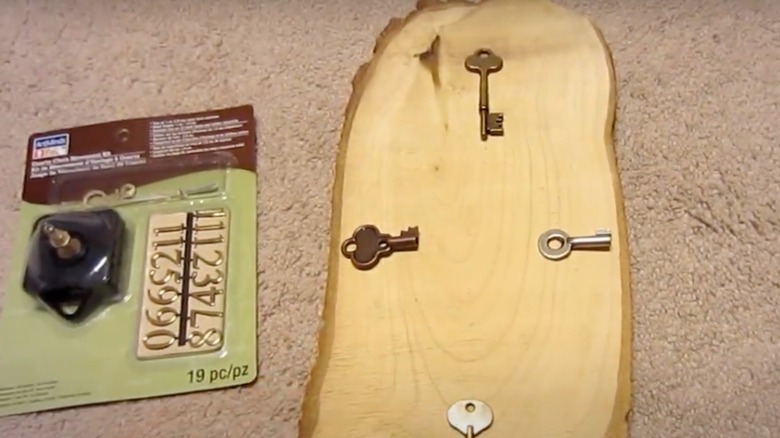
For this craft, get four keys, a piece of wood, and a clock kit, like this Tikround Youngtown High Torque Long Shaft Clock Movement Mechanism. Before assembling your clock, you might want to give the project a wash of wood stain. If you haven't worked with wood stain before, consider reading up on these helpful tips savvy DIYers will want to know. Then, place the keys at the 3, 6, 9, and 12 positions and install the clock mechanism in the center.
Antique keys work as gap fillers in a gallery wall
When trying to create the perfect gallery wall, you may notice some unsightly small gaps. This is where a couple of antique keys can come in handy. Ideally, you already have some in your possession. If you don't, head over to a thrift store, antique shop, or estate sale. Hammer in two nails per key, ensuring they protrude out. Consider making the keys better fit the vibe of your gallery wall. For instance, you could wrap the keys with ribbon or get out your glue gun to adhere some rhinestones.
DIY a piece of sentimental artwork with your old keys
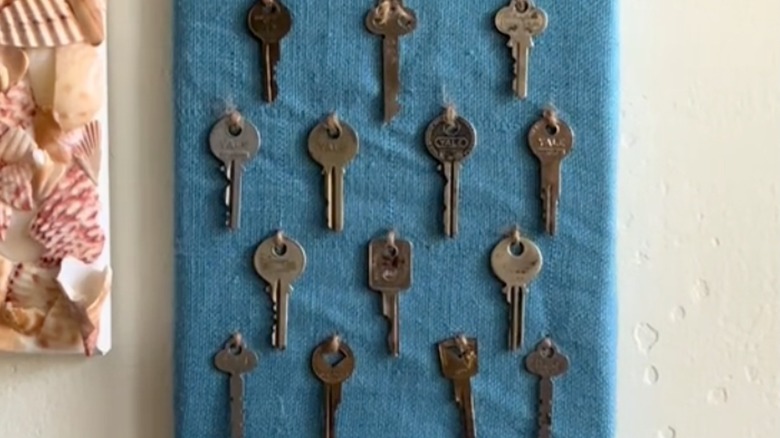
If you've moved around quite a bit over the years (and never returned any of your keys), you'll love this sentimental craft. Decorate a fabric-covered canvas with several meaningful keys, attaching them with glue or some thread. Now, there's nothing wrong with keeping it simple. However, if you happen to be artistic, you could paint locations that best represent the places you've lived as a backdrop (i.e. the forests of the PNW, the NYC skyline, or gorgeous Midwest fields).
Add some whimsy to your home with this key craft
If you've seen the "Harry Potter" film franchise, you'll probably recognize these magical keys from the first movie. Decorate your home like Harry Potter by displaying this fun flying key craft. Make wings out of pages from a book or opt for some sturdy cardstock instead if you'd rather not cut up a novel. Hang them with clear fishing line. Add personalization to the wings with a unique design like delicate florals, fun geometrics, or simple stripes with a pen or some paint.
Your collection of old keys can become a beautiful garland
While garlands are usually associated with winter holidays, you could display this craft in your home all year. Fishing line or thread can be used to connect miniature brass horns, bells, and old keys to create a garland. However, don't be scared to make the garland your own. For instance, those who want something a little bolder can use Paraor Colored Aluminum Craft Wire in a fun shade like deep pink, sky blue, or purple. You could also just use keys instead of the other elements if you've got an extensive collection.
Create a gorgeous side table with some keys and epoxy
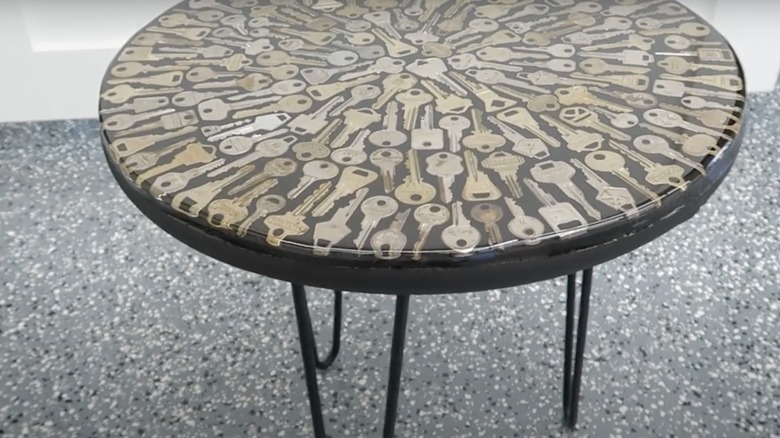
If you've accumulated lots of keys, this project is perfect for you. Paint a piece of circular wood in the color of your preference. Once dry, glue on your keys using superglue. Secure duct tape around the wood before pouring in your epoxy. After using a blow torch to dry the resin, finish up the project by adding three hairpin legs. Alternatively, skip the legs and hang the circular piece up on your wall as decor.
Use hotel keys to decorate a tray (and show off your travels)
If you travel often, you might have quite a few hotel keys in your wallet. For a great way to incorporate resin art in your home, display said hotel keys in a tray. Pour some resin in the tray and place the keys in a circular pattern. Then start embellishing your project. Gold foil, dried flowers, or shells you collected during your travels would be lovely additions to the tray. You could also add some printed out pictures, too.