How Plastic Bottles Can Be Used To Protect Young Plants In Your Garden
Although gardening is pretty straightforward, beginners tend to struggle with the same things over and over. One of the most challenging processes to get a grasp on when learning to manage a garden is growing new plants from seeds. It's even more problematic in areas with high susceptibility to frost. Seedlings tend to be fragile, and a good environment during those first stages is essential for them to thrive.
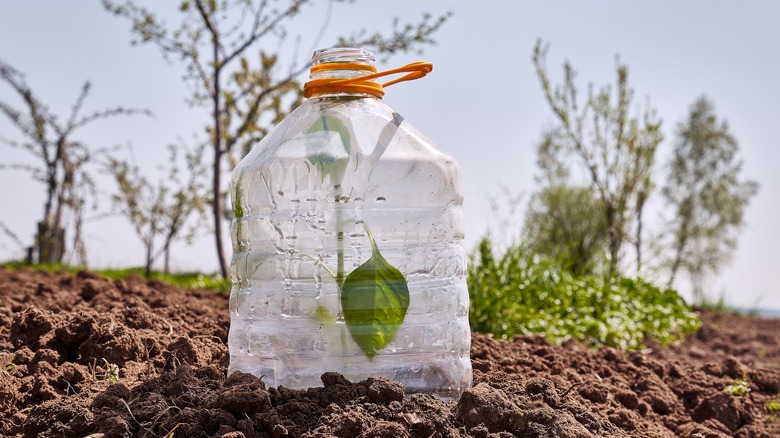
Whether it's caused by planting too early in the year or because your garden got hit with an unexpected frost, your seedlings won't survive in the open. The best way to protect your plants is by covering them with a bottle; it'll serve as a micro greenhouse/nursery, allowing them to grow correctly without any hindrance. It can even extend their growing period. While you could use glass bottles for this project, we recommend plastic bottles for most gardens. Glass can easily break, is more expensive, and is harder to work with. Plastic is so flexible that even beginners can feel comfortable with it. Keep reading to learn how to protect your seedlings with cheap plastic bottles!
Choosing and cutting the bottles
First, you'll need to choose suitable plastic bottles for the job. You're looking to create a warm environment utilizing the greenhouse effect to your advantage, so you'll need clear plastic bottles to create that microclimate. Make sure to peel off anything that might prevent light from passing through.
You must also consider the size of the plants you want to protect; narrow bottles work great to protect isolated plants, while bigger bottles can cover groups of seedlings before they're strong enough for their own space. If you get bigger bottles, you could also protect fruits or any produce growing in your garden. There are many options.
Now, it's time to cut. After washing your chosen bottles, cut their bottom halves with a utility knife. You're trying to create little greenhouse domes by placing them upside down and pushing them into the soil. Be careful, though; plastic can feel very slippery when cutting it. If this causes issues, use adhesive tape over the cutting line and try again.
Tips for better protection

If you plan on using plastic bottles regularly, consider hardening their cut edges for a more sturdy micro greenhouse that's easier to put firmly in the soil. To do this, you'll need a heated nonstick skillet. Remove the bottle's cap and press the cut edge to the skillet; move it slowly in circles until the edge starts curling.
After that, push the cut edge into an inverted 2-cup measuring glass. The now soft edges will curl into the bottle's inside before cooling so it can cut firmly through the soil when putting it over your plants. You'll be surprised at how much better working with these modified bottles feels.
We recommend that you take the lid off these bottles most days for ventilation purposes, but don't throw them away. When temperatures are extremely low, putting the cap back on can make some of your most fragile plants survive. Also, mulching around the bottles after they're already settled in place will help with even lower temperatures. This is especially useful when protecting more fragile plants.
Gardening is hard work, but knowing that everything you've worked for is protected from the harsh weather can be a great relief. Even if you're not into modifying your bottles, try using them for protection to make sure your smaller plants get through the cold without issues.