How To Keep Your Space Mess-Free With Painter's Masking Film
When it comes to painting the inside of your home, taking preventative steps is much easier than trying to remove paint from your carpet or clean spilled paint off hardwood floors and furniture. Usually, the process of taping and covering all your baseboards, windows, and furniture takes longer than the act of painting itself! This might lead you to wonder, how do professional painters get everything done so quickly? And leave the room looking spotless when it's finished? The answer is painter's masking film. Masking film is a thin plastic film that can be used to protect furniture, floors, cabinets, and other surfaces while painting. It's very quick to apply, totally damage-free, and easy to remove when the project is done.
Investing a little time and effort into masking film is the best way to ensure your painting project looks clean and seamless. Luckily, you don't have to be anything close to a professional to reap the benefits of painter's masking film. Here's what you need to know about masking film, how and where to apply it, and other tips and techniques for using this versatile material.
How and when to use masking film
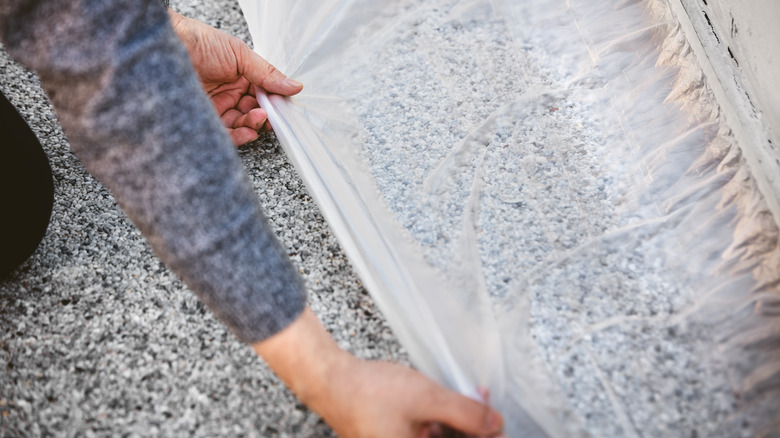
Painter's masking film is a thin plastic sheet that can be unrolled and laid over surfaces to protect them from paint drips, spills, and splatters. There are essentially two kinds of masking film: adhesive pre-taped and non-adhesive. Pre-taped masking film has one sticky edge that is perfect for creating straight edges around windows, doors, and baseboards. Non-adhesive masking film is ideal for covering large walls, floors, cabinets, and furniture. Painter's tape can be used to secure the film in place, but masking film mostly depends on static electricity to cling to surfaces, ensuring it won't leave behind any sticky residue. Unlike traditional newspaper and masking tape, masking film provides a seamless barrier on windows without blocking light, so every corner of the room is visible.
Painters film is especially useful when working with canned spray paint, a paint sprayer, or large paint rollers, but they can be used any time you're concerned about making a mess. Trimming masking film can be tricky, so it's best to measure your area and buy a roll that is slightly too small than one that is too big. To apply masking film, simply tape the film or apply the adhesive edge to the surface you want to protect, then gently pull the roll to unravel the film and cut to the desired length. Smooth out the film, and static should adhere it to your surface automatically, but you can secure it with painter's tape if needed.
Removing masking film and other uses

Masking film makes it easy to avoid mistakes, but you should still ensure that your edges are tightly sealed and avoid misdirecting any paint underneath the film. Removing painter's masking film is even easier than applying it! Because the film uses static to cling to surfaces, it shouldn't put up much resistance when it comes time to take it down; simply unpeel the taped edges and gather up the film. However, it's best to wait until you're completely done with your painting project before removing the film. Taking it down while the paint is still wet may allow the paint to drip onto unwanted surfaces. At the same time, handling film that is spattered in wet paint may stain your clothes or accidentally spill onto the floor.
Aside from the obvious painting, painter's masking film is also useful for a variety of other home improvement needs. When laid out on the floor, the film is perfect for catching sand, sawdust, and other airborne particles. In fact, the static electricity in masking film actually attracts particles to its surface! If you're preparing for a big move, you can also wrap your furniture in masking film to protect it from scratches, dirt, and dust. While it's not likely that you're trying to DIY your vehicle at home, painter's masking film is even used for detailing and repainting cars to avoid overspray onto windows and headlights.