We Tried DIY Renter-Friendly Stained Glass Windows
Houses with many windows can be amazing, but they don't offer a lot of privacy. Of course, you can install some window coverings such as blinds or curtains. But if you want something more colorful that also lets in plenty of sunlight, there is an inexpensive and renter-friendly choice you can make. One way that online crafters, like @want.zamora on TikTok, have covered their windows is with stained glass paint. Using this paint and some faux lead lines, the influencer beautified his large multi-paned window with some colorful and modern designs. Removable window paint in several different colors allows you to get as creative as you want. You could make a large mural that totally obscures whatever is outside, or you could make some simple shapes that bring the otherwise bland space to life.
In our one-bedroom apartment, we have a few multi-paned windows that could really use some color. The first one we would like to paint is built into our front door. Not only does it let in quite a bit of light, but it also looks directly into our tiny foyer, which can feel very exposing. We're hoping that the DIY for renter-friendly stained glass windows will both prevent strangers from seeing inside too easily and decorate our entrance to impress those who we do know.
Gathering all of our supplies
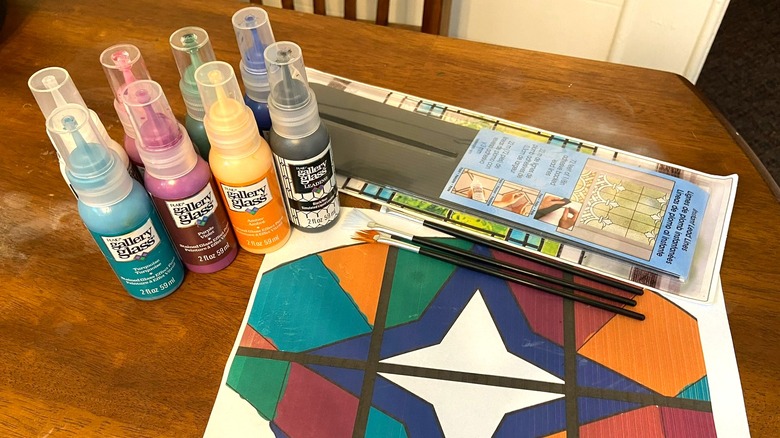
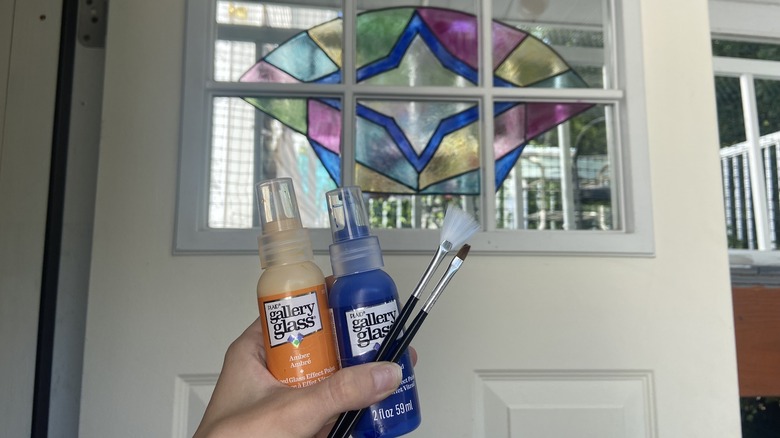
To create faux stained glass, you only need to buy two items. From the same store on Amazon, we purchased the Gallery Glass Jewel Tones Stained Kit for $30 and their Instant Lead Lines for nearly $18. Already in our home, we also grabbed a sharp box knife, microfiber rag, and some glass cleaner to clean the window ahead of getting started.
Before we got to work painting, we needed to have a clear vision of what we were trying to create. We knew we wanted some privacy, lots of color, and a geometrical stained glass design. So, we logged onto Canva and made a quick sketch of our window. Each pane has a height and width of about 6 ½ inches, with another half-inch piece of wood trim separating each of them. With that in mind, we figured out where each color and lead line would go. Finally, we were able to bring all of our supplies to the window and begin the fun part of this experiment.
Putting our paints to the test
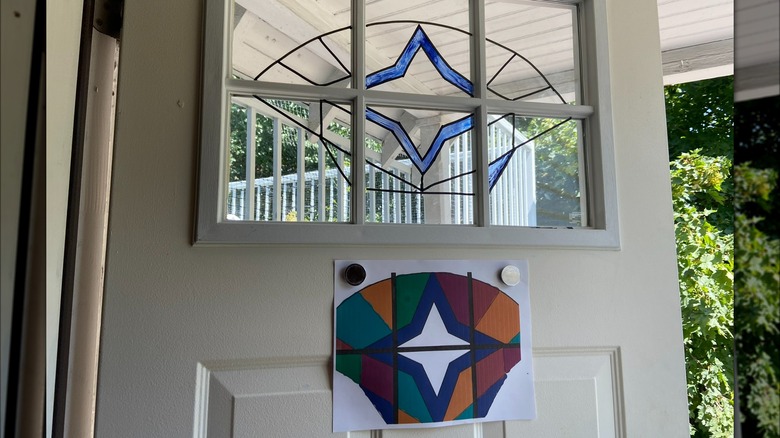
Once we were comfortably set up at our front door, we got started with our package of lead lines. Peeling each from the paper backing, we could position the flexible plastic where we wanted on the glass. They are simple to reposition, but we tried not to move them too many times as they would lose their stickiness. After some diligent cutting and measuring, we finally had the outline for our stained glass window. However, while taking a step back, we noticed a disconnect between the intersecting lines. Thankfully, the paint kit came with black lead line paint, which we used in these small areas to cover up the gaps.
Next, we broke out our six jewel-toned colors. Starting with the blue, we squeezed a small amount of the paint through the tip of the bottle and spread it around with a dining fork, as per the original video. Later, we found it easier to use a couple of small paintbrushes to fill in the shapes. The paint can go on quite dark but becomes more transparent as it dries. We started with a thin coat to avoid bubbles and dark spots as much as possible. Yet, we knew that if we messed up, the dried paint could be peeled off to start over. Throughout the process of applying the colored paints, we did three coats of each color, including clear, until outside the door was plenty blurry from the inside.
Our honest opinion of DIY stained glass
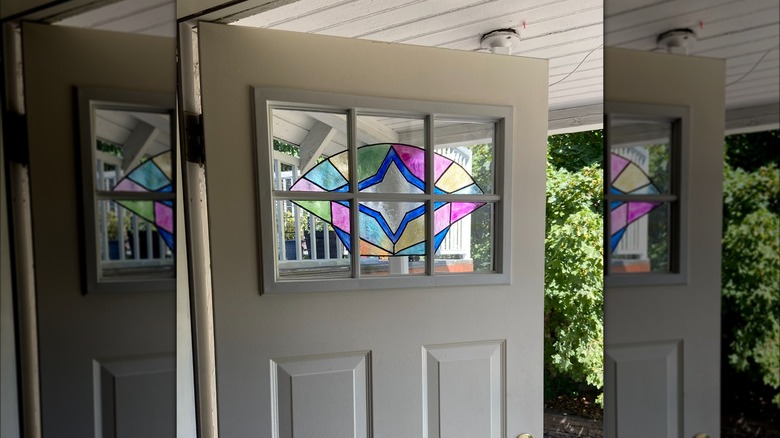
We finished up our final touches on the colorful window and took a step back to see it in full. In the end, it turned out nice. But at what cost? We spent several hours trying to get this small window just right, and the paints require some trial and error before you figure out how much you need at a time. If you want to add a quick privacy screen to your window, this is certainly not the way to go. For those people, we would suggest pre-made and easy-to-apply window appliques (like the Volcanics Window Privacy Film on Amazon).
On the other hand, if you love somewhat challenging art projects such as this, we're sure you could create something incredible out of the inexpensive window paint and fake lead lines. We enjoyed being able to create any shapes we liked and filling them in with the paint color of our choice. So, while we can't recommend DIY stained-glass windows to everyone, there is no doubt that the Gallery Glass kit is an effective product that some will find very worthwhile.