Clever Caulking Gun Tricks That Are Total Game Changers

We may receive a commission on purchases made from links.
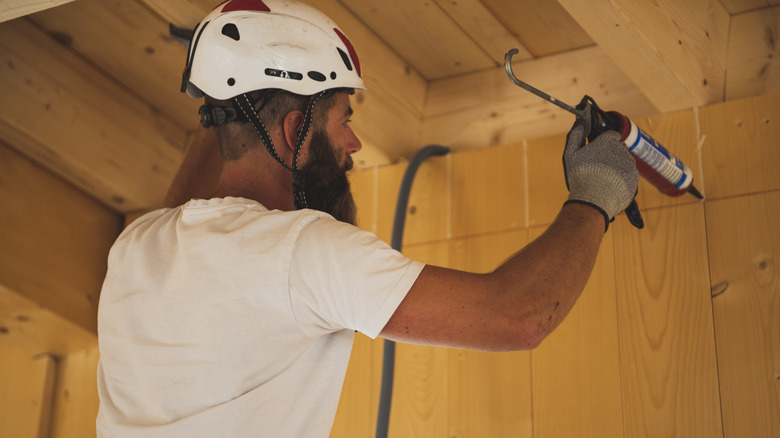
Caulking isn't everyone's idea of fun. But with a few tricks up your sleeve, you can avoid having a bad experience and, more importantly, avoid having to do the work more than once. It's easy to outsmart yourself and save a few bucks on a cheap gun, but you may never quite get it to work well. So, start by buying the best caulking gun within your budget. Then, learn these tricks to use it properly for the best results.
What you'll notice about these tips is that many of them emphasize the symbiotic relationship that should exist between your caulk gun and the caulk or sealant you're planning to use. For example, high-torque-ratio guns should be used with certain caulks, but aren't required for others. And no amount of torque might help you if your caulk is practically frozen or is beyond its shelf-life date. Think of the caulk and the gun as two parts of a system, and let's take a look at how smoothly we can make that system work.
Keeping it consistent using markings
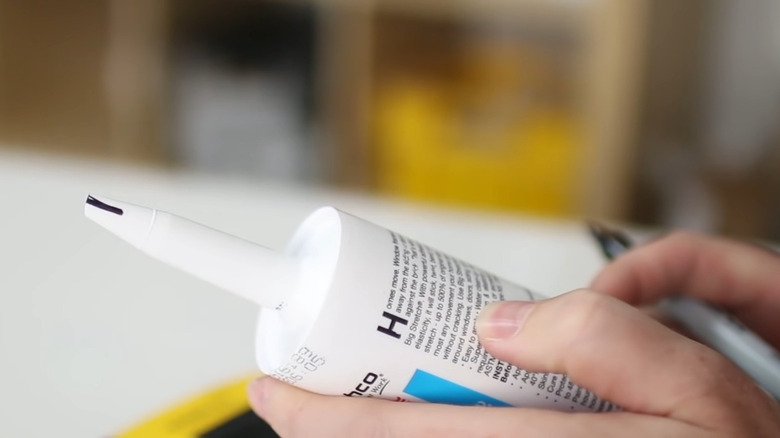
It's obvious that the closer to the end of the nozzle you cut, the smaller your bead of caulk will be. And experts generally agree that you're better off in general with a small bead. But how do you keep that bead consistent when working through a case of caulk in one space? Some caulk brands even include embossed markings on the nozzle tip to help you size your cut. Start at the same marking and use the same angle each time, and every bead you put down should be consistent.
The markings are a useful point of reference, but keep in mind that you can still get a large range of bead sizes from the same small hole by varying the rate of application and angle of the gun. The more you can hold those two variables constant, the more the nozzle markings trick will help you. This is easy to do, especially if you cut your nozzle with a shallow angle. YouTuber Nils Rasmusson has a handy trick for this: simply mark the top (the longest part) of your cut nozzle with a Sharpie, so you can easily see the tube's orientation.
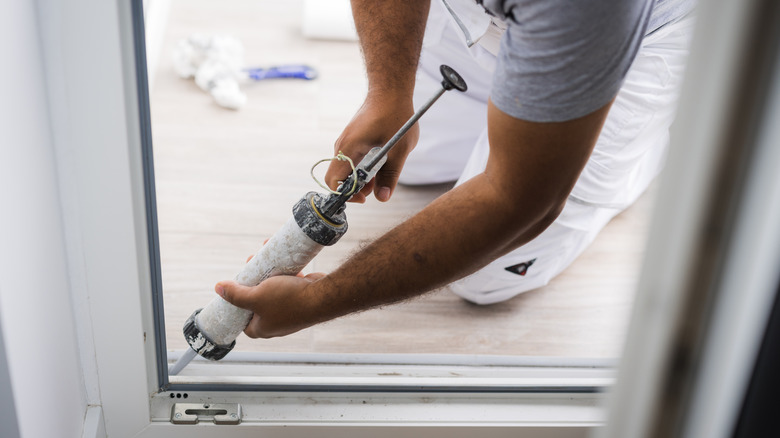
Relieve pressure when pausing
When you stop squeezing a caulk gun's trigger, you usually want the pressure (and the flow of the caulk) to stop as well. The trouble is that, because of the viscosity of the caulk, there's a moment of lag between the squeeze and the flow stopping. On a typical, inexpensive caulk gun, the flow is actuated by a pushrod that's advanced when you squeeze the trigger. This rod exerts its force against a disc in the base of the tube, resulting in pressure that's most easily resolved by squirting caulk out the other end.
Because the pressure is maintained by a latching mechanism at the back of the device, most caulk guns don't provide any automatic means of reducing the unused pressure. To manually relieve the pressure from the rod whenever you pause, simply push the release mechanism's latch (the same one you use to pull the rod back when you're replacing the sealant tube). It's a good idea to just get in the habit of releasing that latch and eliminating the pressure whenever you finish putting down any bead of caulk.
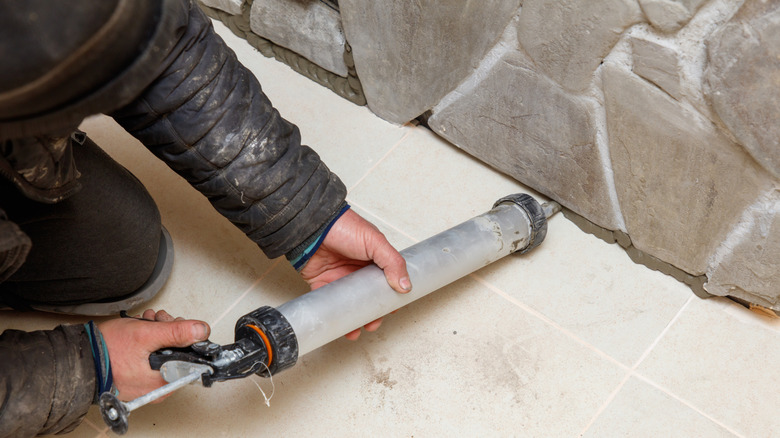
Puncturing the bottom of the tube

If you've done everything else right and you still have drips, there's one more way to stop caulk from leaking from your tube. You can carefully cut some small slits in the base of the cartridge. But note that if your caulk or adhesive is too thick or cold, or if you don't make the cuts correctly, this trick could make things much worse.
What's happening here is that air bubbles within the caulk are storing some of the pressure even after you flip the latching mechanism. As the air slowly decompresses it grows, pushing caulk out the nozzle tip. Cutting very small slits in the disc that pushes the caulk out can relieve this pressure.
But note that there is no mechanical seal between the disk and the caulk. If your caulk is too thin (if it's hot, for example) it might find its way out of the tube through the back. Similarly, if it's too thick you'll find yourself exerting more pressure when using the trigger, which could have the same result, especially if you make the cuts too large.
Getting a dripless caulk gun is your best bet
A lot of this effort to stop caulk from dripping can be alleviated by buying a drip-free gun in the first place. It does what the best hacks do, only better. Or at least easier. Dripless, or drip-free, caulk guns automatically remove the mechanical pressure of the driving rod by backing off when you release the trigger. It basically does the same thing that manually flipping the lever does — you just don't have to remember to do it. This seems like a no-brainer: remove the extra step and you'll be drip-free every time, no matter how busy or distracted you are, right?
Not quite. Again, our foe here is the air bubble. Dripless guns don't have any particular advantage over regular guns when there's compressed air within the caulk or sealant, so you'll sometimes get drips from a dripless gun. One solution is to buy premium caulk that's less prone to air bubbles. To find one, read reviews to see which brands are more or less likely to include trapped air.
Give yourself an extension
Sometimes, the length or rigidity of a caulk tube and gun will prevent you from getting the stuff where it needs to go. Smaller squeeze tubes might occasionally eliminate the problem, but they don't always work and it can be an expensive proposition if you're using a lot of caulk. Before you resort to slathering all the caulk on with your finger or a butter knife, remember, there is a better solution. You can buy extension tubes and nozzles for your caulk cartridges, like these from Menard's. They're not terribly expensive, they come in a variety of shapes and sizes, and some are even reusable.
But the most flexible option might be to keep some thin-walled vinyl tubing on hand, such as this selection from Home Depot. You can make these as long as you need, and they are quite durable. Just slip the tube over the tip of your caulk cartridge's nozzle and caulk.
Make sure your caulk is the right temperature
Cold caulk will not cooperate with your plans. So, in cold weather, rather than leaving your caulk in an unheated garage, bring it inside and give it time to get up to room temperature. Whatever temperature you're comfortable at will likely make your caulk work more fluidly with even the flimsiest caulk gun.
If you forgot to bring your caulk inside and need to get it to room temperature quickly, there are a variety of caulk-warming tricks. These are varied, everything from submerging in warm water to a toasty engine compartment, but they have one thing in common. They are warm, but not hot. Too much heat can cause some caulk to break down and might present a fire risk with flammable caulk. It's best to stick with mild heat, not anywhere you wouldn't feel comfortable putting your bare hands. If you work outdoors or need to travel with caulk frequently, Arctic Warmers makes a line of caulk-warming bags and sleeves to keep them warm.
Use a wire hanger for temporary sealing
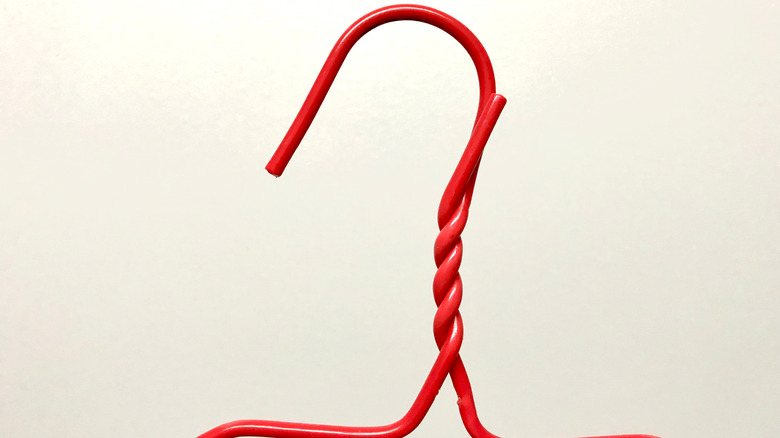
If you have to stop mid-caulking, a wire clothes hanger can be used as a plug to protect the unused amount in your tube. You'll need a length of wire at least three or four inches. Insert the wire into the open tip of the tube. The real magic is in the next step: Let the caulk do what it does best and squeeze gently so it will seal any gaps around the hanger wire. This will prevent any air from getting in and drying out your caulk.
For easy removal of this DIY tube plug, bend the part sticking out of the nozzle into a loop you can grab to remove the plug. The better your seal, the stronger this loop needs to be. So, if necessary, you can wrap the end a couple of times for a stronger loop, or use a pair of pliers.
Rotate your caulk without the expensive caulk gun
Sometimes you'll find that your caulk gun puts you in an awkward position. In small spaces, tight corners, and anywhere your nozzle bevel might be facing the wrong direction, you'll want some way to get things pointed in the right direction. Some caulk guns have barrels that rotate to help you orient your caulk tip to the space you're working in. This is not only nice to have, but kind of indispensable when working in small areas or when you have to change direction a lot. The trouble is that caulk guns with rotating barrels tend to cost considerably more than those without.
Good news: you can easily have the rotation without the pricey feature. Since you're already releasing pressure between the drive rod and the caulk cartridge, it's a simple matter to simply rotate the cartridge within the caulk gun's cradle. Nothing could be easier!
Cut the tube tip with the built-in tool
There's one simple way to open your caulk tube you might not know, and it's hidden in plain sight right on the tool. If you look closely at the gun's handle, you'll likely see a small hole. This opening is just the right size to accommodate the tip of the caulk tube. Carefully insert it into this hole, lining it up to the point on the tip you'd like to snip. Then, pull the trigger and the mechanism will snap right through the plastic, giving you a clean opening.
Some pros use a knife to further refine the shape of their nozzle's bevel, which can't be done with the built-in cutter. But an easier and more consistent way to do this is to pass the newly cut nozzle along two pieces of scrap wood or sanding blocks angled together at 90 degrees, as demonstrated by The Funny Carpenter. This shapes the tip to your most common caulking angle without delicate and precise cutting.
Then, to puncture the internal seal, look for a swing-out wire on the gun. This can be inserted into the tip to fully open the tool. Make sure to wipe this clean before swinging it back in to keep it from sealing itself to the gun's surface.