Common Mistakes That Are Sure To Kill An Orchid
Indoor orchids are finicky but not impossible to grow. If you believe that, keep reading. If a Phalaenopsis or a Dendrobium has foiled you in the past, then definitely keep reading. These lovely, delicate, quirky-looking flowers require care and attention; there's no doubt about it. But that shouldn't deter you from experiencing their majesty. We all make some common mistakes from time to time, and while they may not have a big impact on most of our houseplants, our orchids may be at greater risk simply because they're sensitive.
If you think about the epiphytic nature of orchids, that will make more sense. The roots of an epiphyte usually remain exposed to all of the elements and lack the nutrient and water delivery provided by soil. Yet you can't simply plant your orchid in soil and expect positive results either. Below you'll find a ton of information regarding subtle mistakes you can make that will strongly influence the health of your lovely orchids. From our perspective at House Digest, these beauties are well worth the effort and education.
Dry or stagnant air leads to suffocation and disease
The aspects of air quality that most affect an orchid are humidity and circulation. There are orchids that prefer cool, intermediate, or warm temperatures, meaning you should be able to find something suited to your USDA climate zone. But no matter the temperature, all orchids require moisture in the air to compensate for what they lose when they open their stomata to take in carbon dioxide. Low humidity translates to an orchid that can't breathe properly. In an ideal situation, humidity levels will rest between 40% and 75%.
So, if you've got an orchid situated in an arid area of the house, like next to a heating or AC vent, that's usually a mistake that can be fixed by moving it. If you live in a dry climate, though, that might mean purchasing a hydrometer, which is an indoor temperature and humidity gauge, and installing a humidifier. Actually, these tools will come in handy in the middle of winter for most orchid growers regardless of location, and they needn't be expensive or top-of-the-line to get the job done.
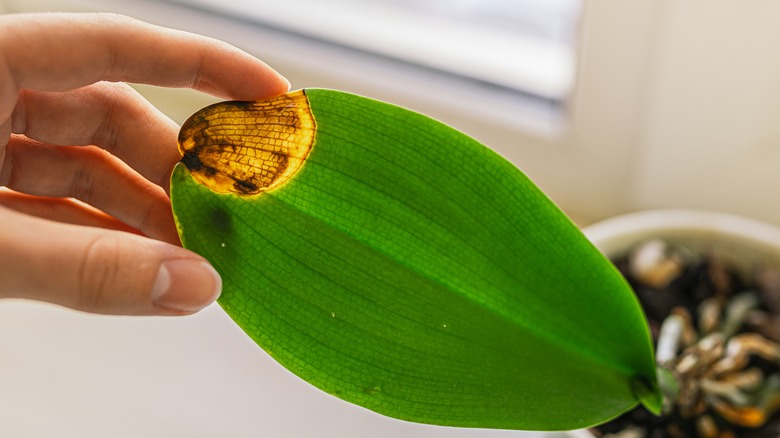
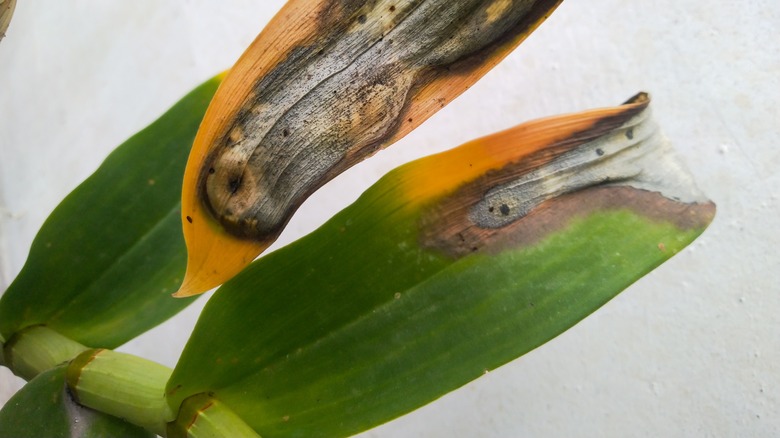
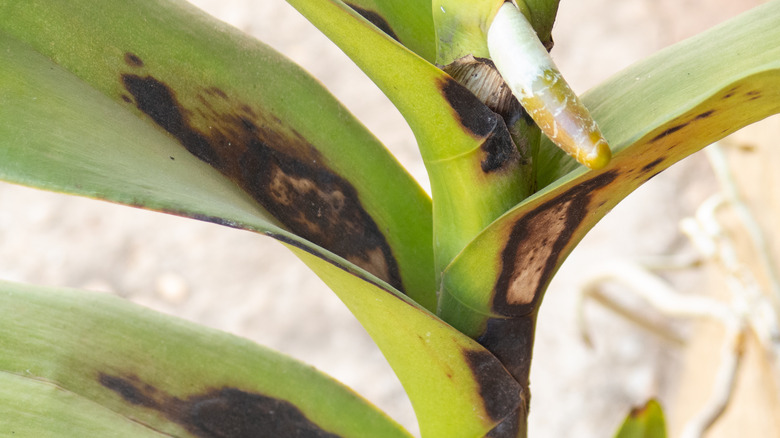
Once you've got humidity levels figured out, concentrate on circulation because stagnant, moist air will lead to the accidental creation of an exceptional breeding ground for bacteria, fungi, and disease. Effects from these issues may start down in the roots, or you may see them first as damaged and discolored spots on the leaves. Sufficient air movement can be achieved with a slowly circulating fan to keep things like fungus from settling and building up.
The wrong kind of fertilizer can harm an otherwise healthy orchid

A lot of gardeners rely on standard 10-10-10 or 20-20-20 fertilizer formulations that contain a balanced amount of the primary macronutrients needed for houseplants. These macronutrients are nitrogen (N), phosphorous (P), and potassium (K). For the most part, this should get you by with orchids, but there are a few other things that could become accidental traps.
You want to avoid adding ammonia or urea-based nitrogen. Instead, choose a nitrate-rich formula, because it is absorbed better by orchids and allows them to take in more of the micronutrients calcium and magnesium. Furthermore, you may want to avoid urea-based fertilizers altogether. There are orchid-specific fertilizers on the market that are formulated and labeled as urea-free because there is concern that the roots cannot absorb the urea, and it just washes through the pot without being helpful. There is some debate on whether this is problematic enough to affect your flowers adversely, but it certainly wouldn't hurt to stick to nitrate-rich fertilizer when you can, and it could be a costly mistake over time if you're constantly feeding them with urea.
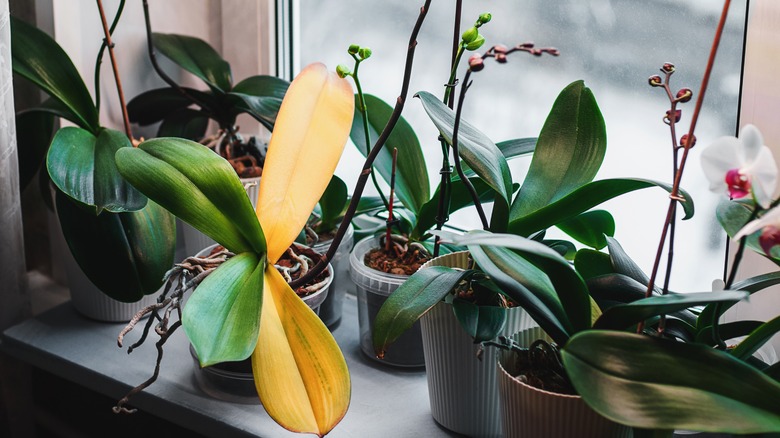
While focus is usually placed on those NPK macronutrients, it's also important to consider the micronutrients. Orchid leaves will turn yellow if they experience magnesium deficiency, so if you're using a formulation that is too low on magnesium, you might be accidentally starving your plant of this important micronutrient.
Fertilizing too often causes burnt roots and brown leaves
Understanding which nutrients your plants need is the first step; then comes adhering to an appropriate application schedule. The biggest mistake to be made here is over-fertilizing. Contrary to what may seem logical, too much fertilizer will hinder the growth of an orchid instead of encouraging it. It will also leave your plant with burnt roots and brown leaves.
There's a saying within the orchid community: "Fertilize weekly weakly." The thinking behind this is that because orchids are epiphytes, meaning (among other things) that they do not need soil to survive, they are adept at finding nutrition elsewhere. Fertilizing an orchid is indeed less important than ensuring proper sun exposure, air quality, temperature, and watering, but it's not as simple as that. Figuring out the best fertilization schedule comes down to assessing whether your orchids are actively growing, what potting media you're using, the quantity of soluble salts in your water, and what species you have.
Finding a balance that incorporates all of these factors will lead to the healthiest plants, and that will take some specified research. Unless all you do is take care of orchids (doesn't that sound divine?), you'll need to settle on a schedule that generally works for whatever kinds you have. This could mean applying a heavily diluted fertilizer to every plant with every watering — something along the lines of ¼ or ½ teaspoon of fertilizer dissolved in 1 gallon of water during the summer and about half that much throughout the winter. If you have a few particularly hungry plants, supplement them with time-release granules or a foliar spray.
Fussing leads to an unhappy plant
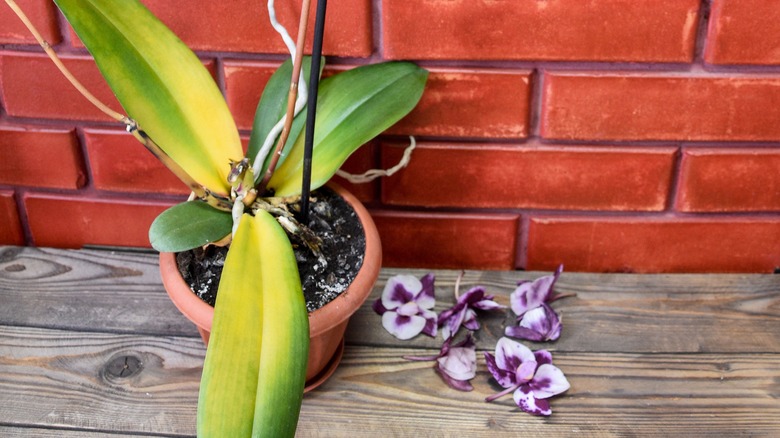
Just because your orchid is a little fussy doesn't mean you must be the same way. Too much touching and moving can have unintended negative impacts — like root rot and transplant shock — on plants that would rather be left alone. For example, orchids can seem like they are dying when they're really just experiencing a period of dormancy that can last up to nine months. You can think of this as a hibernation between each bloom cycle, and it's critical to overall orchid health.
That said, it's normal to be concerned about any plant that has not been growing new leaves or flowering for months on end. Before you start changing up the environment, moving the plant to a different window, or unnecessarily transplanting your orchid to a new pot, consider the time of year and look for typical signs of dormancy. After a spring and summer bloom, the flowers will fall, the stems will become woody and dry, and the leaves will turn dull and a bit limp. Believe it or not, this is all normal. Just look outside during winter to see the same things happening in your garden. Reduce your watering and fertilizing schedule, and trust that the plant will flourish again in its own time.
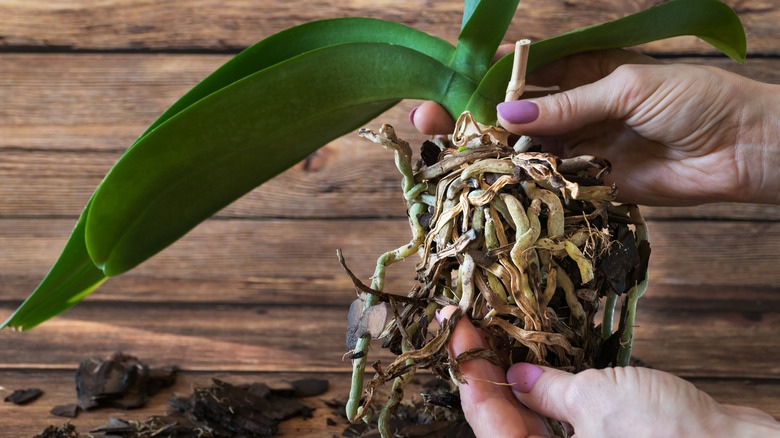
The wrong planter will inhibit epiphytic root growth
If you've closely examined an orchid, you know its aerial root structures are different from most other houseplants. You've probably also noticed that store-bought orchids come in different grow pots than other plants — they're clear plastic instead of opaque, solid green, black, or terracotta-colored plastic. These transparent pots allow in the maximum amount of light for the benefit of those epiphytic aerial roots. Without light, the roots suffer, so it's often a bad idea to repot an orchid in a dark-colored pot.
The next piece of the planter puzzle is ensuring proper drainage. Some orchid pots come with multiple large holes in the sides. While these are effective, they're not required. Any pot with drainage holes at the bottom or clear plastic grow pots with slats or cut-outs for additional ventilation will suffice. If your planter is lacking these, break out the drill or cutting shears and make some holes; it will be a big mistake not to. An added benefit of transparent pots is that you can keep an eye on the media and the roots to know for sure when it's time for the next watering.
Using inappropriate potting media suffocates roots
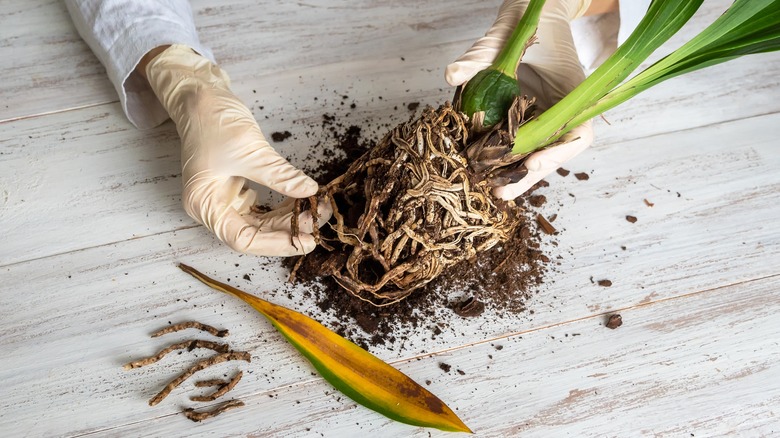
With most of your houseplants, you might think of potting soil as a comfy blanket in which to wrap up their fragile root systems. The same is not true for orchids due to their epiphytic nature. Those roots want their freedom just like they would have if they were climbing up the side of a tree in the jungle. The fact that epiphytes don't need to be planted in soil does not mean they can't be, but choosing the wrong type of potting medium for an orchid is a mistake that will have the unfortunate effect of suffocating the root system.
The spaces between chunky pieces of pine bark, for example, do for air what the transparent plastic grow pots do for light: They let it in. Thick, compacted, soil-based potting mixes do the opposite by keeping air out. Soil conditioners for aeration suffice for other plants, but your orchid needs more than a cup of perlite or vermiculite mixed into dirt. Fir bark is far and away considered the gold standard here. It's conducive to airflow as well as water retention, and it maintains its constitution as it takes a long time to break down. You might be surprised to learn that bark chips are all an orchid really needs, yet it's true. You can amend the medium as you see fit with wool rock or clay leca balls for even better moisture control, but you don't need to. If you do so, keep a close eye on the roots and pick up the plant to gauge its weight before watering. This will tell you the amount of water the media is holding and whether or not it needs a drink.
Pruning too much or at the wrong time affects bloom quality
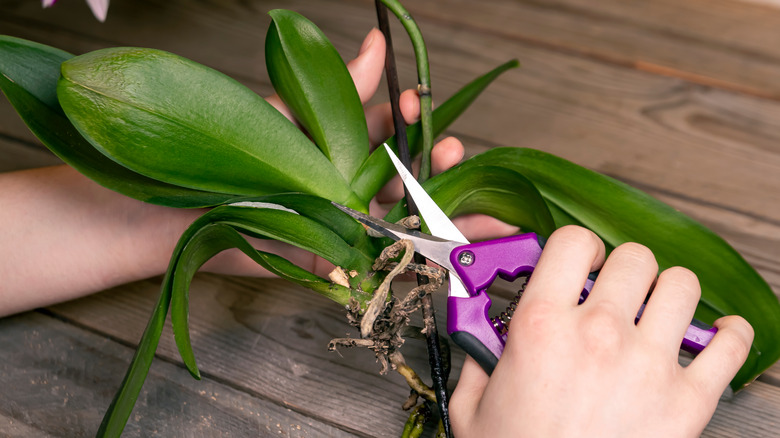
Pruning an orchid is better referred to as trimming, since you're never going to cut back large amounts of the plant like you would a shrub or apple tree. Timing matters with trimming. For example, it's not something you want to do when an orchid is actively flowering because it will interfere with the bloom cycle and curtail the plant's growth for the rest of the season. Instead, aim for a gentle trim when only the roots and new leaves are growing, or do it at the end of a bloom cycle. Focus on wilted or discolored leaves, and be sure to check the root system for damage that can be cut away.
One common pruning mistake for all plants, not just orchids, is using unsterilized equipment that spreads viruses and diseases from plant to plant. You can use Lysol and other household disinfectants to sterilize your sheers or scissors, as well as chlorine bleach and isopropyl rubbing alcohol. Remember that there's a difference between cleaning and disinfecting. Cleaning removes dirt and other debris; disinfecting kills disease.
Intense direct sun exposure destroys leaves
Plenty of houseplants desperately crave that seat against the window pane on the south-facing sill; your orchid is not one of them. Imagine yourself standing in a tropical forest, looking up and around. It's not the best place to get a sun tan, right? Sure, there's plenty of ambient light, but little of it is hitting you directly on the face. Instead, it's filtered down through a thick canopy of tree leaves. This is where the ancestors of your little potted orchid came from; this is their natural habitat.
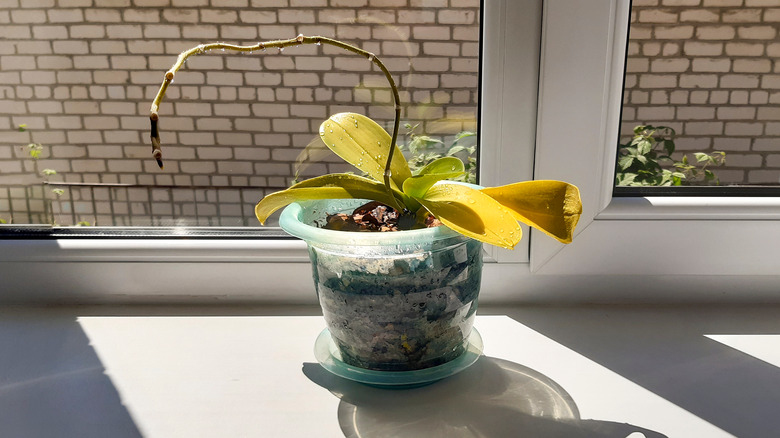
Direct exposure to the sun can do more damage than good to an orchid. Dehydration and sunburn are two major problems that occur. Leaves will start discoloring and washing out, turning from healthy green to pale yellow. Finally, they'll be covered in brown spots, and the plant's blooms will fall prematurely. Of course, the opposite holds true as well in that too little sunlight will be harmful. It won't cause leaf burn but will lead to a weakened plant that blooms less often.
Ultimately, it's the intensity of direct sunlight that does the most damage. Sufficient indirect sunlight is what you're shooting for when seeking out the best place for your orchid.
Frequent watering drowns the roots
We've discussed how too much fussing, fertilizer, direct sunlight, pruning, and restrictive soil are sure to kill an orchid. Next on the list, and equally to blame, is too much water. Overwatering plants is common no matter the species; it seems to be human nature to really want to give our houseplants a drink. With orchids, this is really detrimental and much more of a mistake than forgetting to water them. Root rot is one of the worst outcomes of overwatering because it's difficult to bring a plant back once it's damaged in this way. If the roots cannot function, the plant does not get fed and eventually dies.
Though it may feel a little nerve-racking, err on the side of letting your plant get too dry before watering it. This is easier for it to deal with, and it will give you the opportunity to feel out the best times to water.
Poor water quality can have a negative effect, too
For many of us, there won't be much we can do to differentiate the water we use to irrigate orchids, but if you want to get hyper-specific about their care, look further into the effects of water quality on the health of your plants. In nature, orchids are watered by pure rainwater free from soluble salts. This works out well, considering orchids fare better with less salt. In terms of pH, they do best with a moderately alkaline level. The more you can learn about the quality of your water, the better informed you will be when it's time to choose the most appropriate fertilizer. It's similar to getting a soil test before planting a garden in the backyard.
Some gardeners prefer to avoid tap water for their orchids because there is concern over damage from the chlorine content, though not everyone agrees. Other growers swear by reverse osmosis (RO) water, which requires a filtration system. As water is pumped through a filter, dissolved solids are removed, and the clean water is then used for the plants. Because the RO water is free of minerals at this point, plants that receive it as their primary irrigation will need to be fertilized to make up for the loss. This is where you'll do really well to focus on the nitrate-heavy formulations for best results.