Mistakes Everyone Makes When Growing Mushrooms At Home
If you've noticed more and more mushroom-related products as of late, you aren't imagining things. Mushrooms rose in popularity alongside the "cottagecore" aesthetic that gained traction in 2018, and there's no sign of this trend falling off anytime soon. People have always known mushrooms to have medicinal and tasty qualities, but they are now a popular choice for their unique appeal and bountiful harvests.
There is a misconception that growing mushrooms is the same as cultivating herbs, vegetables, fruits, and other flowering plants. Although mushrooms require a specific environment, watering routine, sunlight, and similar considerations as typical gardening plants, they require a deeper understanding to master.
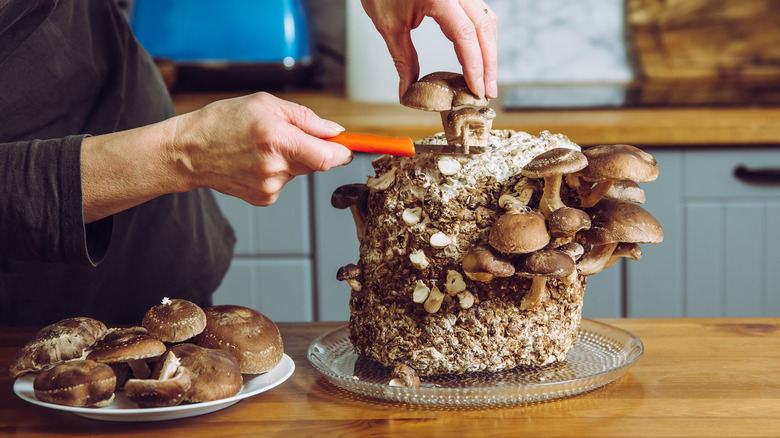
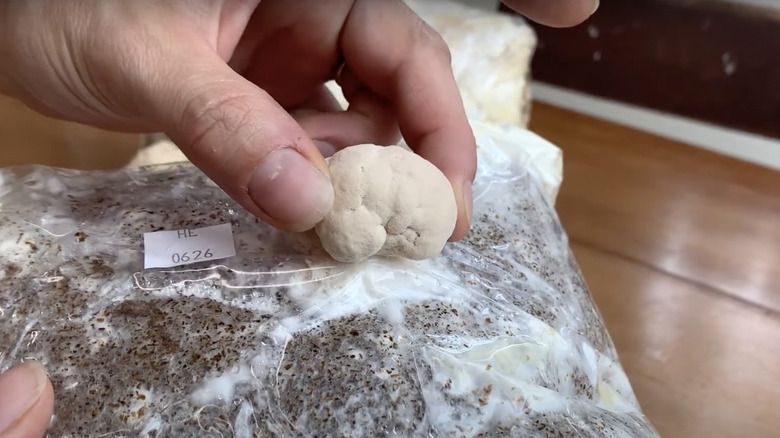
Instead of being planted as seeds or saplings, mushrooms come in bags called "mushroom spawn." These are essentially the mushroom version of seeds; more specifically, they are fungal cultures that contain genetic material. The cultures aren't placed in the ground but mounted on a substrate — such as a wooden log, newspaper, cardboard, or manure — to support them as they grow. The process of starting the fungal growth is called "inoculation," and it's only step one in the mushroom growing process. Learn more below about how to successfully raise mushrooms from spawn while avoiding some of the most common beginner mistakes.
Growing mushrooms from spores instead of starting with beginner kits

When first delving into mushroom growing, the processes regarding spawn bags, substrates, and inoculation can be a lot to take in. It's tricky to match a species to the correct substrate while maintaining an ideal environment and cultivating at the right pace. To simplify the process, several fungi companies provide kits that make mushroom growing a lot easier for amateurs. North Spore, Forest Origins, and Hodgins Harvest are some of Consumer Reports' top brands that supply dependable growing setups.
These kits take care of the first steps for you by providing a substrate already inoculated with spawn. For example, you can buy oyster mushroom mycelium on a log. All the aspiring cultivator must do is place the kit in their home and follow the instructions provided. The kits should inform you of how much natural light they need, as well as what the temperature and humidity of the room should be. Most kits don't require more than watering, waiting, and harvesting once the fungi are fully grown. This is perfect for a beginner, as it allows you to get comfortable with the mushroom-growing process and minimizes the chance of failure.
Lacking knowledge about the differences between mushroom spawn
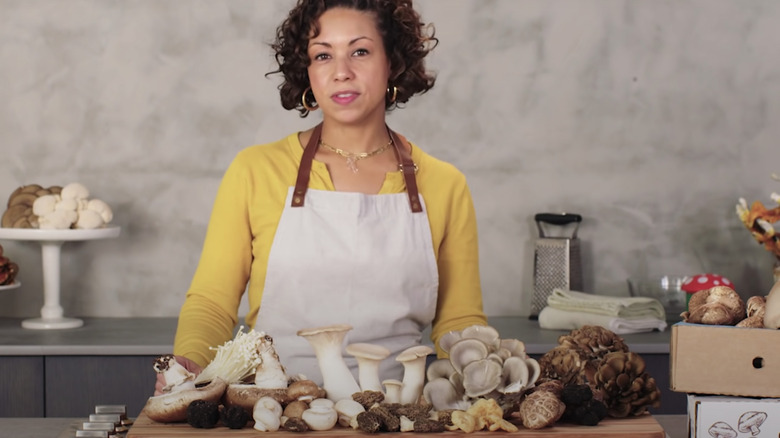
Like plants, different mushroom species flourish under various conditions and caretaking methods. If you're just starting out or have been struggling so far, your safest bet is to start with a mushroom type that isn't too finicky. Certain strains of mushrooms are easier to procure, flourish in a wide range of temperatures, and are more well-adjusted to different levels of sunlight.
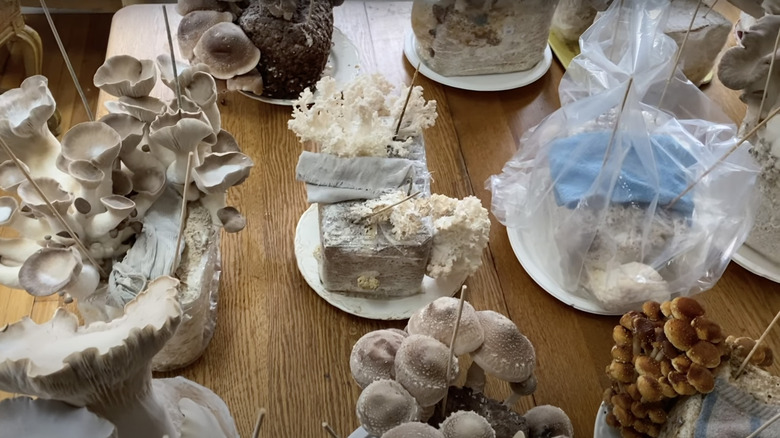
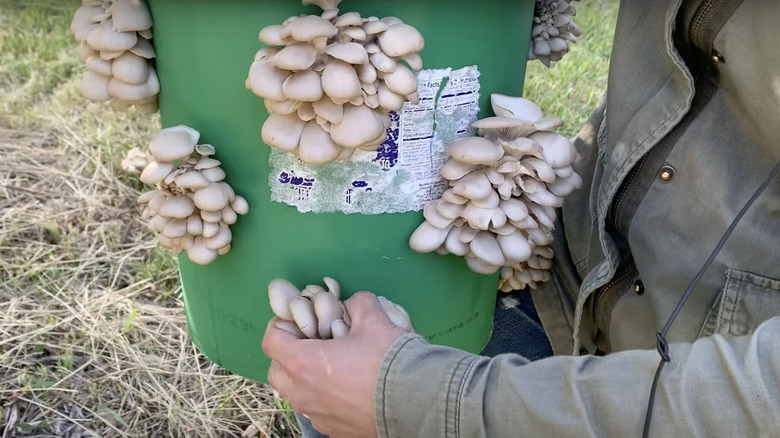
When it comes to mushroom varieties you can grow at home, consider starting out with Oyster, Shiitake, Wine Cap, Pioppino, or Lion's Mane mushrooms. These species have benefits that make them more suited for newcomers in "fungiculture." These species are favored for different reasons, but Oysters are generally agreed to be the best newbie mushroom to grow. Many substrates make a suitable base for oysters since they thrive on wood-based products, coffee grounds, paper, and more. Oysters are also resilient to mold, making it easier to prevent contamination throughout the growing cycle.
Regarding the other mushrooms, Shiitakes reproduce fruiting bodies for years, while Lion's Mane grows quickly. Wine Caps and Pioppino are favored because they can be grown either indoors or outdoors, giving them flexibility and an edge over other species.
Setting up a poor climate for growth
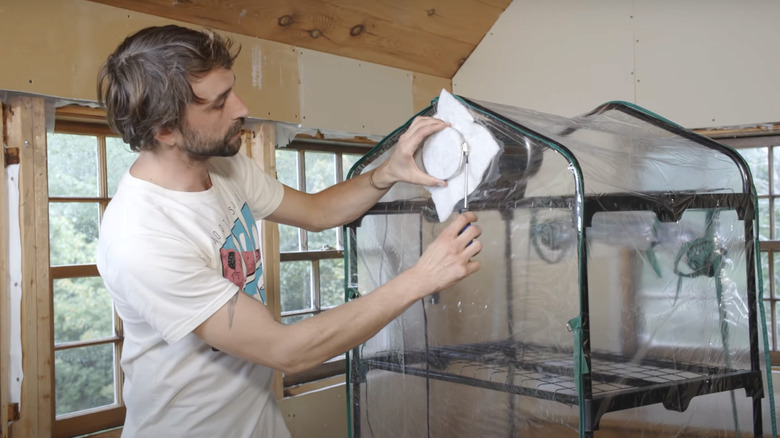
Knowing basic science is a prerequisite before you start growing mushrooms. You must understand how the characteristics of indoor and outdoor climates affect fungi because carbon dioxide, humidity, and temperature levels play major roles in their health and yield. You need to know the right combination for your chosen species so they can grow large enough to be harvested without risking their health and lifespan.
Too little humidity dries out mushrooms, while too much causes dangerous molds to grow. The ideal humidity levels are around 80 to 90%, which is achievable with a humidifier. Excessive carbon dioxide is also a potential issue that causes small caps and skinny stems, minimizing the size of a final harvest.
To avoid these common climate issues, you need to ensure you're placing your mushrooms in sublime conditions for their species. Shroom Stop has a helpful guide covering Oyster, Shiitake, Lions Mane, and other mushrooms that explains their ideal temperature and humidity levels. Keep in mind that this guide is in Celsius, and you may need to convert the temperatures to Fahrenheit. On another note, the "spawn run" column refers to the mushrooms before the heads form, while the "primodial pinhead" section refers to mushrooms that have sprouted heads and are starting to look more mature. But to summarize, most mushroom species and varieties prefer temperatures between 65 and 85 degrees Fahrenheit.
Not sterilizing the planting substrates
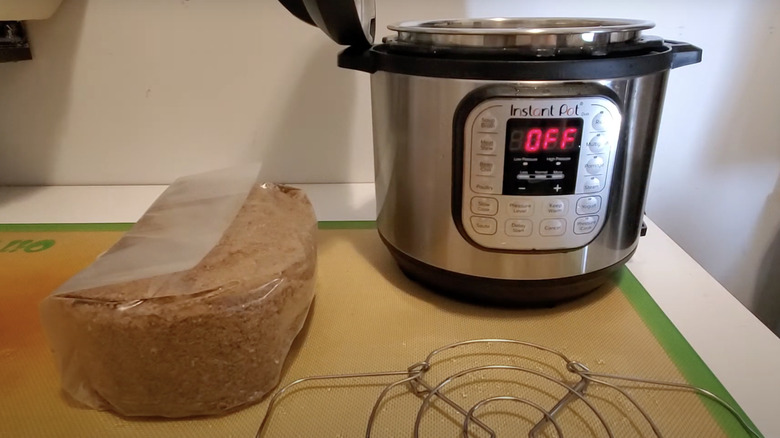
One of the biggest risks of growing your own mushrooms is accidental exposure to bacteria and mold spores that spoil the fungi. People with beginner kits don't have this problem, as the sterilization process is already completed. However, if you're using a homemade or outsourced substrate to support your mushroom colony, you're going to need to sterilize it before it's ready to house the culture. Skipping the sterilization will make your mushrooms highly susceptible to contamination, meaning they could grow mold or bacteria that make them inedible.
To pasteurize a substrate, you must expose it to high heat for a certain amount of time. Substrates under five pounds should be heated to 250 degrees Fahrenheit for around 1.5 to 2 hours. An autoclave is ideal for this task, but not everyone owns these devices purposed for sterilization. A pressure cooker makes a more practical and useful alternative.
All substrates have different rules to follow during crock pot-style pasteurization. For example, you need to enclose sawdust or woodchips in a water-tight bag before submerging them in a pressure cooker so they don't become bloated with water. In contrast, cardboard and straw should be directly submerged in the boiling water and drained afterward. Since they can be soaked, cardboard and straw can also be pasteurized by soaking them in cold water and hydrated lime for over 16 hours. If you're looking for the easiest sterilization method, keep in mind that coffee grounds are already in this state from being brewed, and you can skip this purifying stage entirely. If you're using another type of substrate, be sure to do your research beforehand regarding the specific practices.
Incorrectly combining the substrate with the mushroom spawn
There isn't one best substrate that fits all, and certain mushroom species are more privy to different types of bases. Many mushroom growers mistakenly assume they can grow any spawn on any kind of substrate, but this is not the case. North Spore has a free guide covering 15 edible fungi species and their potential indoor and outdoor foundations.
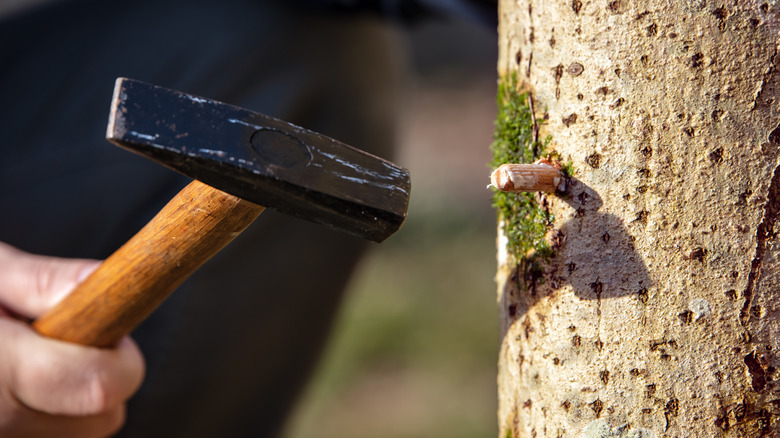
Logs are a common pick for mushroom growers. More specifically, hardwoods are preferred since they're more dense and have more nutritional value. Luckily, North Spore has another guide explaining which tree species are best suited for certain mushrooms, and Field & Forest also has a similar chart if you want to cross-reference which type would be best for your mushroom choice.
Choosing the right substrate is just step one of inoculation — you also must perform the process correctly. Make sure you only put one type of species on each substrate; you can't intermix fungi, or they'll compete for growth. The directions for preparing substrates after sterilization can vary. Logs need to be drilled with 5/16-inch holes that are 2 inches apart and roughly 1.5 inches deep, and the spawn is then hammered into those holes. Cardboard is quite easy; you simply have to sterilize it following the prediscussed methods and place the spawn on top. Coffee grounds are also excellent choices for beginners; it takes about two pounds of coffee grounds to house 3 ounces of mushroom spawn, and all you must do is mix them together.
Placing mushrooms in inadequate artificial or natural light
Unlike houseplants, mushrooms don't need light to photosynthesize and grow. Instead, the mycelium (fungi roots) absorb ingredients by feeding on their biodegradable substrate. Due to this fact, many first-time mushroom growers think they need to place their spawn bags in the dark. Although light isn't required to provide sustenance to fungi, it still plays a major role in how mushrooms develop throughout their life cycle.
Button and enoki mushrooms may be grown in the dark to encourage a small cap shape. However, most other species are preferred to have larger tops and smaller stems. Growing mushrooms with artificial or natural light darkens their color, increases their cap size, and increases their Vitamin D levels.
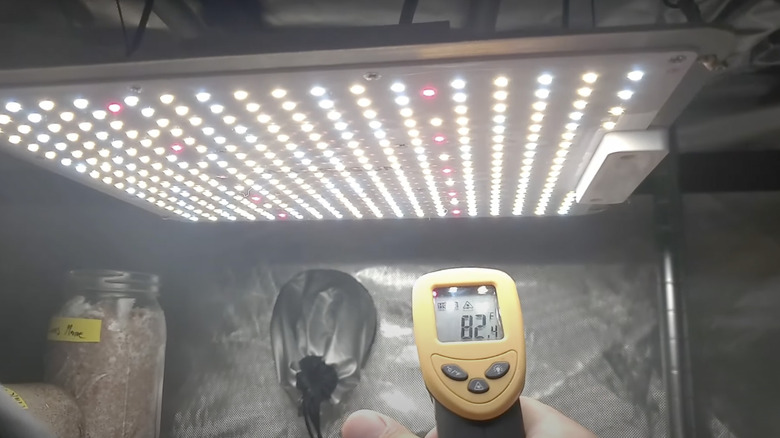
If you plan on using artificial lights to nourish your mushrooms' shape, use bulbs that lie within the blue spectrum, around 380 to 480 nanometers, and that reach temperatures around 5,000 to 7,000 Kelvin. Use compact fluorescent lamp (CFL) bulbs over incandescent ones since the latter produces additional red lighting. Leave these lights on for up to 12 hours a day for the best results.
Overwatering or underwatering throughout the growing cycle
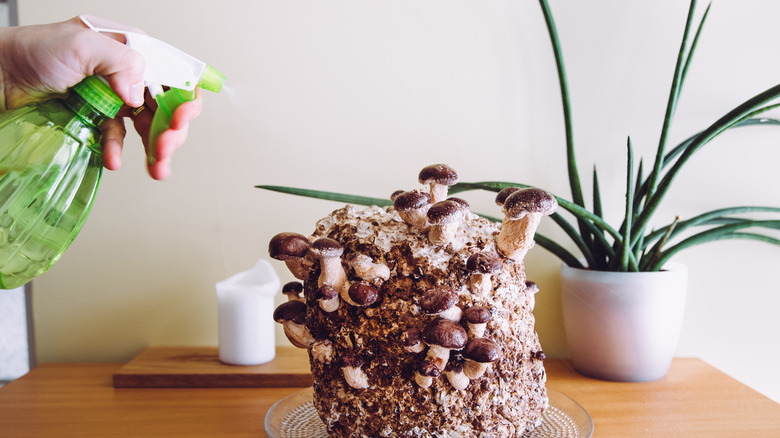
Light may not be as imperative to fungi growth as it is for plants, but using proper watering techniques makes the difference between life and death for mushrooms. These growths need to be consistently hydrated to keep from drying out, which is why they require the high 80 to 90% humidity levels at all times. Despite the importance of staying moist, keep in mind that you also don't want to overdo the watering. Too much hydration makes them slimy and encourages contamination over time.
Follow endorsed watering practices by misting the mushrooms twice daily with purified water. Do not use water from the tap, as it contains chlorine and other chemicals that inhibit fungal growth. You should also avoid distilled water, which is absent of many nutrients. (Purified water leaves some minerals behind.) You'll know if you need to spray water more heavily or often if the mushroom caps appear dried out or shriveled.
Accidentally contaminating mushrooms with mold and bacteria
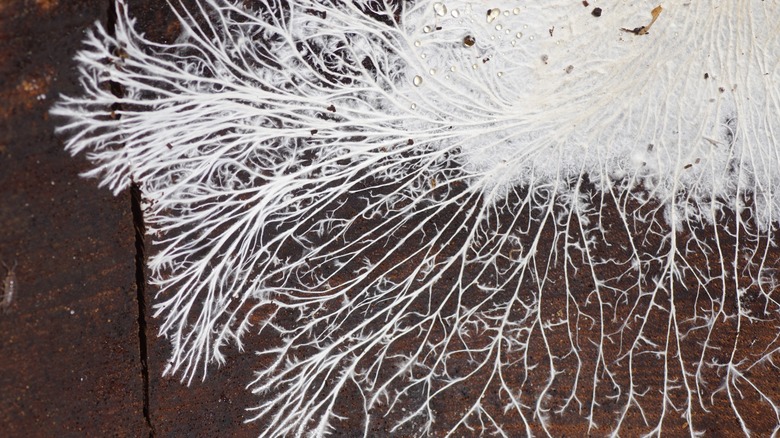
When a mushroom starts to grow, you'll notice white string-like roots interlacing across the substrate. These roots are mycelium and are perfectly normal. You should only be concerned when the mycelium turns another color and develops slimy patches. This is a sign of bacteria or mold growth, which slowly kills your mushrooms and potentially poisons you if it ends up in your food.
Once contamination begins, it's hard to fight off without trashing your mushroom and starting over. The best approach is to prevent it from happening in the first place. To start, ensure you sterilize the substrate correctly (as discussed previously) and obtain good-quality spawn from a reputable source. Keep your mushrooms in their ideal conditions and ensure they get proper ventilation. Some more serious growers even use a laminar flow glove box during inoculation to ensure no contaminants get mixed with the spawn and substrate prematurely.
Trying to grow too many mushrooms at once
Don't spread yourself too thin right off the bat. The more mushrooms you grow, the more you have to care for and the harder it is to catch early signs of contamination. Start off with a single grow kit or substrate and scale up from there. Most kits produce between 1 to 4 pounds of mushrooms, and they're usually good up to a week after being harvested as long as you keep them whole and in a plastic bag.
Once you get the hang of mushroom growing, you can scale up your produce as needed. Most grocery stores sell mushrooms in 4 to 8-ounce containers, as this is a practical quantity for standard-sized households. Unless you plan to turn mushroom growing into a business or share with friends, there's no reason to raise copious amounts.
Harvesting prematurely, excessively, or too late
Harvesting mushrooms is a balancing act; you don't want to harvest them too early or too late. The more mushrooms you grow, the better you'll get at determining when a batch is ready for harvest. Like fruits and vegetables, the best time to pick the fruiting bodies is at peak maturity before they get too old and decay. Fortunately, there are signs that certain species are at the right age to pluck.
Keep an eye on your mushrooms and use your grow kit or Field & Forest's time chart so you know when to expect them. The size of the mushrooms does not determine how mature they are. Rather, you should pay attention to their shape. You'll see the mushroom caps start to flatten or convex and that the gills (the underside of the cap) will become more prominent. If you're growing the easiest mushroom species, one of the Oyster variety, look for curling at the cap's edges.
You'll know you've waited too long when the mushrooms are no longer getting bigger, and they're releasing a noticeable amount of white spores on surrounding surfaces. Don't forget to keep a personal record of how long it took mushrooms to grow in your home climate and under your care. This can give you better insight for when you start your next batch.
Not watching for signs of thermogenesis
Thermogenesis is an uncommon term but a known issue among fungi cultivators. The scientific definition of the term refers to when organisms produce heat, which is a natural but potentially fatal process in mushrooms. Fungi-populated substrates produce heat like all other living things, and when paired with warm room temperatures, the base that houses your mushrooms can become too hot. This can cause mycelium to overheat and cook themselves, causing your mushrooms to die without any chance of revival.
To avoid thermogenesis, you should follow the previous advice for providing a stable climate for your mushrooms. Regulate the humidity, temperature, and ventilation with fans, air conditioners, heaters, and humidifiers as needed throughout different seasons. In fact, you also need to take other previous points into account, such as providing the correct substrate, keeping different species separate, and generally keeping a close eye on your mushroom growth. Track their temperatures, and if they're hotter than your guide charts or grow kit instructions recommend, you should make changes to your setup as soon as possible. Remember, the sooner you realize your mushrooms aren't thriving, the higher your chances are of saving them.