Can You Really Install Tile Over Vinyl? What To Know
When it's time to update your home's design, installing a new type of flooring is a popular choice. When you select tiles as your new option, it provides several benefits. It lasts a long time and can give your home's resale value a boost, all while being easier to maintain than older materials. However, such upgrades are not cheap. You can expect the average cost to tile a floor to be about $17 per square foot. One way you may be able to save some time and money on the project is by attempting to install the new tile flooring directly over an existing vinyl layout. This saves money because you don't have to remove the current vinyl, which can cost anywhere from $2 to $3 per square foot. But can you go directly over a vinyl installation with a new set of tiles? More importantly, should you do this? You certainly can go directly over vinyl with tile, as long as you take a few steps to ensure the process goes smoothly and to avoid mistakes people make when going over an existing floor.
One of the biggest mistakes you can make when performing this type of install is leaving the vinyl in place when it has a poor quality. Additionally, if the subfloor is in bad shape, it may not be able to withstand the extra weight from the tiles, leading to a problem down the road. You may need to remove the vinyl to fix these problems.
Preparing to install ceramic tile directly over a vinyl layout

Before starting the process, you need to make sure that the additional height from the thickness of the new ceramic tiles will not affect doors opening or the look of your trim and baseboards. If so, you may need to take out the vinyl and adjust the subfloor.
If you still want to go over the vinyl, start by preparing the surface to accept the installation of the ceramic tiles. Clean the floors to remove any grime or waxy material remaining on the vinyl. Such materials do not allow proper adhesion of new tiles. To thoroughly remove the grime and waxy buildup, create a mixture of hot water, ammonia, and dish soap. Use two parts of water and two parts of ammonia to one part of the soap. Apply it with a mop and scrub it in. Mop up any excess water before allowing it to air dry.
It's all right to scrub hard when doing the cleaning because you need to sand the vinyl next. You can rent an orbital sander to make the process go faster, or you can use a hand sander and work on your hands and knees. Use 80-grit sandpaper for the job. Don't spend a lot of time on this work, as you only need to rough up the surface to make adhesion easier. Sweep up any debris from the sanding process. You may need to mop again.
How to install the tile over the prepared vinyl subfloor

You're now ready to apply an underlayment, called a thin skin, over the vinyl that helps the tile to adhere properly. A primary advantage is that it's thin enough to avoid adding height to the subfloor before installing the tile. Glue the thin skin in place. Once the adhesive on the skin is dry, which usually takes about 30 minutes, you are ready to begin installing the tiles.
You now can work just like you would with any other installation of ceramic floors. You no longer have to take any special steps just because you're going over the top of vinyl.
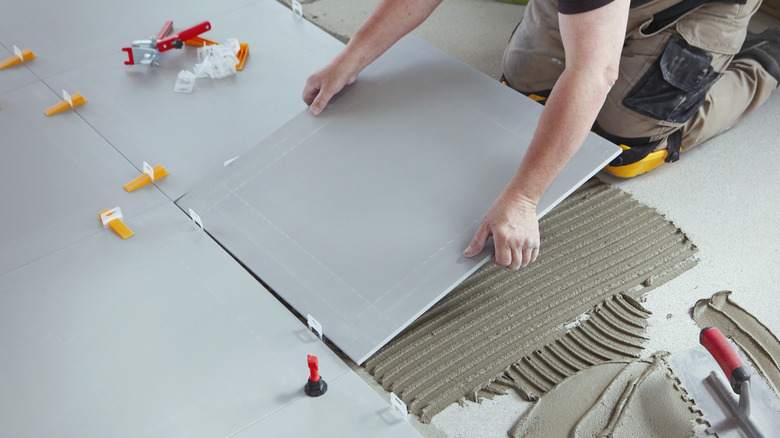
If you have two sides of the room that are out of sight or are away from the main traffic areas, start on the opposite sides with full pieces. You can then place any cut pieces along these hidden walls. If the entire floor is visible, start in the middle of the room with full tiles and try to end up with similarly sized cut pieces along all four walls. Apply your mortar over the top of the thin skin material. Then set the individual pieces in place, using spacers as required to keep the entire layout's lines as straight as possible. Press down slightly on each tile to ensure a tight adhesion. After the tiles dry in the mortar, which takes roughly 24 to 48 hours, you can begin pulling the spacers out and applying the grout.