The DIY Project That Will Turn Any Mirror Into A Work Of Art
We may receive a commission on purchases made from links.
While mirrors make a fantastic addition to any space, few may provide that "oomph" factor you might be looking for. If finding your dream mirror feels like an impossible task, then you may want to consider creating your own DIY mirror. TikTok user @dillpickle0723 utilizes spray foam to create a unique and funky-looking mirror that will suit any space in your home (not to mention that you can customize the design too). This level of creative freedom will allow you to customize your mirror for a relatively low price compared to store-bought options of a similar design, not to mention that you can go pretty wild in terms of which crafting items you use. Sounds pretty enticing, right?
This hack works well on mirrors of any shape or size, making it the perfect choice if you're looking to upcycle an old one or if you have a specific design in mind and want to start from scratch — there are essentially no limitations here. All you'll need is to load yourself up with a mirror of your choice, a bottle of spray foam tallying up to a mere $4.38 from Home Depot, a knife, some Floracraft foam coating from Amazon for $9.33, spray paint, sanding paper, and adhesive.
Decide the design of your mirror
When it comes to designing your mirror, you have two options: start from scratch or upcycle an old one. If you want to start from scratch, then you could opt for anything that tickles your fancy. But if you want a classic look, a good place to start would be with something simple, such as this square mirror from IKEA for $39.99 or this arched mirror for $70 at Target. For a "funkier" style, you could experiment with shapes such as triangles, hexagons, or other exciting designs such as this cloud-shaped mirror from Walmart — it all depends on the look you want.
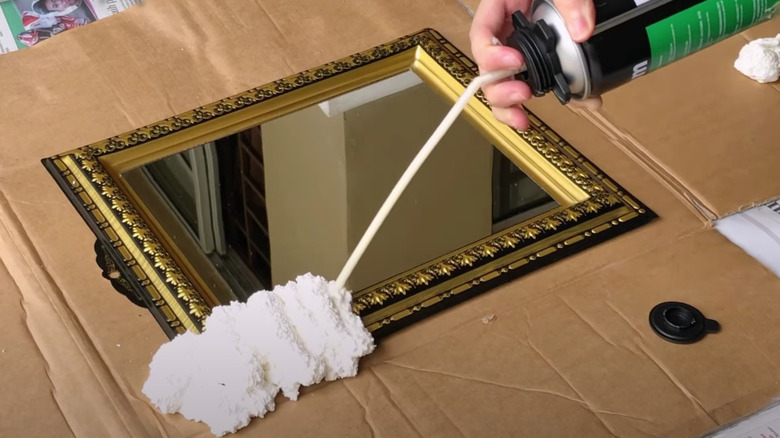
Once you have your mirror in hand, prepare the floor area with some paper or protective layer under the mirror before grabbing your spray foam and applying a generous amount around the border in the shape that you want, whether that be zig-zags or in swirls, slowly building it up to your desired amount. After this, you can leave it to cure for at least eight hours, so you may want to leave it overnight and check it the next day. When it feels dry, you can finish your prep, shaving off any excess to smooth it out if you want to apply something on top, before adding some of your foam coating. However, you can always leave it to create your own unique "cloudy" look with a light coat of paint over the top.
Customize it to suit your vision
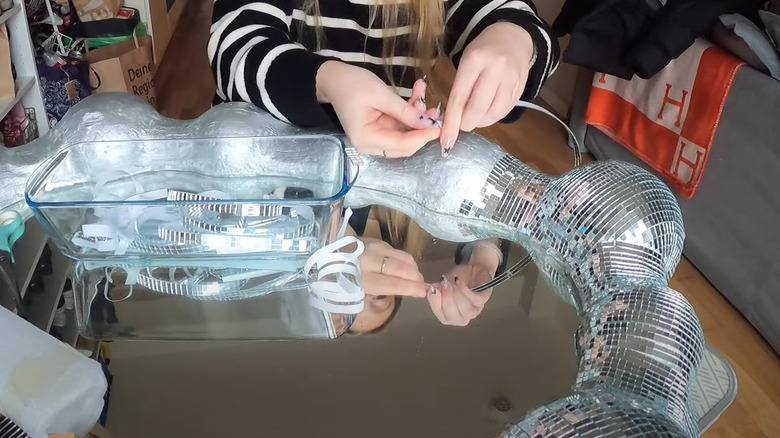
If you want to add more "oomph" to your design, there are multiple ways that you can customize it. For example, you could glue some craft feathers, such as these colored feathers for $5.20 on Amazon, around the border, or utilize some small self-adhesive mosaic pieces. You might also consider wrapping fluffy material, buttons, crafting leaves or wood, fairy lights, or random craft materials around it, or even use it to make a photo collage. Whatever you choose should help to really emphasize the design of your mirror in any room in your home. All that's left is to decide where the best spot to hang your mirror is, whether that be your bedroom, hallway, lounge, or bathroom — the choice is all yours.
The reason why this hack works so well is because the spray foam helps to show off the shape of the border and draws your attention, no matter how you decorate it. This would make it a great statement piece to display around your living quarters. Just make sure that you wait for your spray foam to dry fully before going in with your other materials, as this could affect your end results and botch the overall look, which will be challenging to reverse. At the end of all your hard work, you should be left with a jaw-dropping mirror that you can be proud of.