The Best Ways To Keep Your Hummingbird Feeder From Freezing As Temperatures Drop
We may receive a commission on purchases made from links.
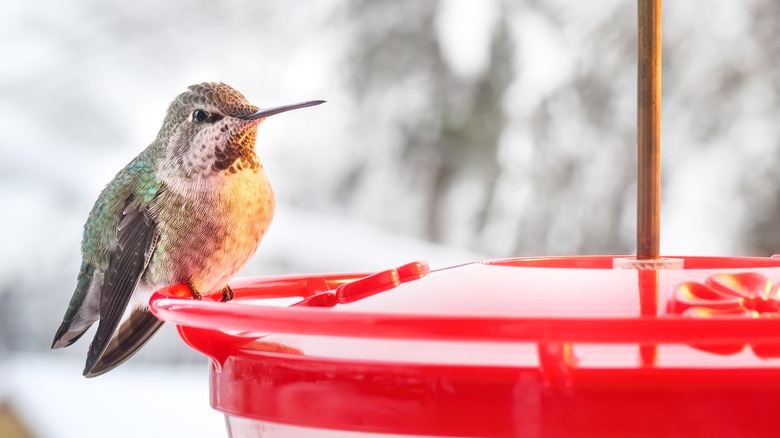
The sight and sound of hummingbirds in your yard is a clear sign that summer has arrived. Their merry chirp and eye-catching plumage are synonymous with long, lazy days and sultry evenings. When the first frosts arrive — and the skies darken and the temperature drops — many of these colorful little creatures migrate to the warmer climes of Central America or Mexico. Their tendency to move on to warmer pastures is the reason why many people stop putting out their hummer feeders during winter. However, some species, such as Anna's hummingbird, which is commonly found in the Pacific Northwest, tend to stick around and can be frequently spotted in northern backyards during the winter months. This is why it's crucial to not only keep your feeder stocked up, but also prevent it from freezing as the frost and ice creep in.
Since the turn of the century, birds like Anna's hummingbirds have made it their business to adapt to colder climates. They make their homes in dense shrubbery, and when night falls, their heart rate drops significantly as they enter a state of temporary hibernation. When dawn arrives, they're full of beans once more and eager to eat. Although they have learned to live off a diet of insects and the sap found in woodpecker holes, they still rely heavily upon the nectar found in backyard feeders. If your feeder freezes over, their food source dries up significantly. Here are some handy measures you can put in place to stop this happening and keep your hummers happy and healthy until the summer.
Keep the feeder protected from the elements with an old sock
Just as we wrap ourselves from head to toe in hats, scarves, jackets, gloves, socks, and boots to keep ourselves warm, the same principle can be applied to hummingbird feeders. Placing an old sock over the tube part of the feeder is a simple but effective hack to protect the nectar from the elements and prevent it from freezing. People have found anecdotal success with this, but there are some caveats involved. First, this hack is best used during the day since it helps insulate the nectar, but it doesn't actually heat it. Because of this, it likely won't be enough to keep the nectar from freezing at night (unless you live somewhere where the nights don't dip below 30 degrees).
If you want to try this method, snip a hole in the toe and the sock should cover the feeder tube perfectly. Just be sure not to accidentally cover the access ports our feathered friends use for feeding! Wool is a good choice for regions that don't get snow because it is a natural fiber that retains heat and is breathable. However, once wet, it takes a while to dry. Nylon and polyester socks may be synthetic, but they absorb less moisture and dry quicker than wool.
For an added layer of insulation, you can always place a hand warmer pouch between the fabric and the feeder. Standard hand heat pouches have a shelf life of about 6 to 7 hours, which is plenty of time to keep the nectar at dining temperature during the day for the visiting hummers. You can get a 10-pack for $7 at places like Target. Always follow the manufacturer's instructions when disposing of hand warmers.
Add a little sugar to keep things sweet
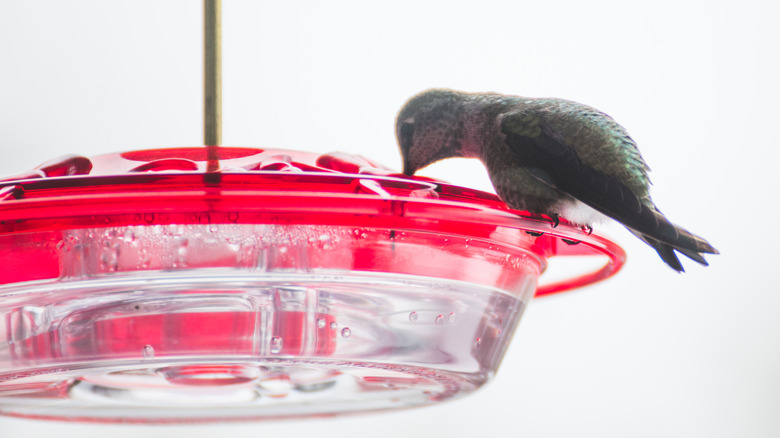
Sugar often gets a bad rap, but it still has its uses, and one of them is to stop your hummingbird nectar from freezing. Hummingbirds have a very pronounced sweet tooth. They crave the sugars found in floral nectars because they have very fast metabolisms and need a lot of the sweet stuff to keep them well-fueled and flying fit. They'll have no objections to you making their nectar a little sweeter by adding some extra sugar to their nectar to stop it freezing. Because of its sugar content, hummingbird nectar is less likely to freeze than plain water, which reaches a freezing point at about 27 degrees. That's because the sugar molecules replace some of the water ones, making the process take longer. However, please note that this hack should only be used by people who live in regions where temperatures at night are just slightly below freezing. The increased sugar content alone won't stop the water from freezing into a block of ice if it dips into single digits.
When making your own hummingbird nectar, the standard ratio is 4 parts water with 1 part sugar. However, during the winter, you can reduce the ratio to 3 parts water and 1 part sugar to give them more energy during a difficult season and keep the water from freezing. Only do this during the winter since consuming more than the recommended amount of sugar during spring and summer can hurt the birds. Also, please remember only to use white sugar when making homemade nectar for the hummers. Brown sugar, honey, caster sugar, and all other sweeteners are unsafe.
Use a little light to warm the feeder
When you've got a problem, casting a little light on it always works a treat, and this applies in a very literal sense when it comes to stopping your hummingbird feeders from freezing. You can get in the festive spirit and help the hummers at the same time by wrapping your feeder in some outdoor holiday lights. Although this hack is not recommended in single-digit conditions, it can work if the weather dips just below freezing. It's wise to use as many pink, red, yellow, and orange lights as possible because the hummers are attracted to these shades.
You'll need incandescent lights because although LEDs are economical, they don't radiate enough heat to make a difference. Although incandescent lights don't exactly give off a fierce blaze, they still offer enough warmth to stop the nectar from freezing. Always ensure both your lights and extension cord are for outdoor use, and if your nectar mix turns cloudy, it's a sign that the lights are wrapped too close, or their wattage is too high. Be careful if you're using them with plastic feeders because the heat of the lights could cause them to melt or warp. It's also recommended to use a timing device with the lights so you can decide when the feeder is and isn't heated. If your region goes down to the single digits, a solid alternative to Christmas lights is to position a 125-watt lightbulb at a distance of about two feet from your feeder. This will generate more heat, helping the nectar stay liquid.
Rotate three feeders to stop the nectar from freezing
Sometimes the simplest hacks are the most effective, and if your hummingbird nectar is in danger of freezing, then simply replace one feeder with another. It's the classic trick that bird lovers have been using for generations. It's reliable, and it works! You simply put a feeder out first thing in the morning and exchange it with a fresh one midday before swapping it with another mid-afternoon and bringing it in at night. It's then simply a case of rinse and repeat until Jack Frost and his legions make way for the arrival of spring.
Be warned, though — although this method works, it requires a big commitment on your behalf. Firstly, you have to be an early riser who's up with the birds to ensure that there is nectar available for the hummers first thing. Remember, if they come to rely on the food you supply, you cannot let them down. Without easy-to-find sustenance during the bitter cold, they can easily die from starvation and malnutrition, and they awake from their nightly hibernation just before the sun comes out. Secondly, you or someone else needs to be there midday and late afternoon for the changeover. It's time-consuming but rewarding if you have an abiding love for our feathered friends and their welfare. Whether you decide to rotate your feeders or not, bringing them in overnight is always a sensible idea. If your house is adequately heated, any nectar will melt and thaw overnight, ready for hanging back in the garden the following day.
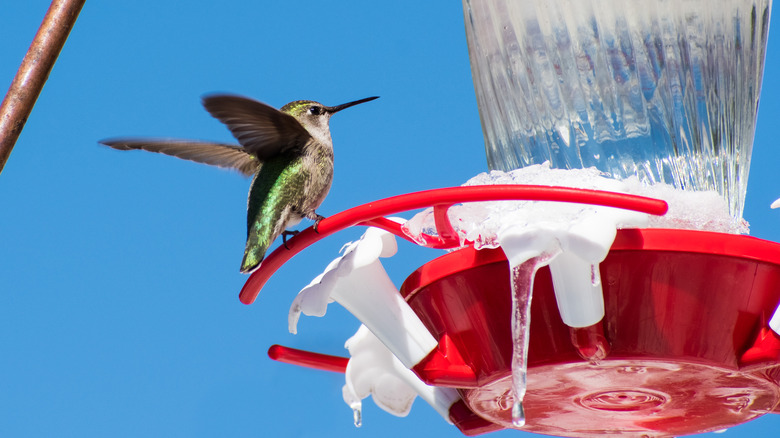
Use a baffle to block the ice and snow

Placing a baffle on your bird feeder is a time-honored tradition to stop squirrels and other critters from getting their greedy paws on the food in your bird feeder. Just as the width of a large dome-shaped baffle prevents rodents from leaping onto the feeder, it can also help block the ice, snow, and cold rain from settling upon your feeder. However, this only works if your issue isn't with the nectar itself freezing, but the feeding ports closing. An accumulation of sleet, snow, and rain on your feeder can soon freeze and form a layer of ice on the feeding ports.
You'll need a wide baffle to ensure the hummers have plenty of shelter while they are feeding and collecting their thoughts. Although there's not much sun in the bleak midwinter, a baffle made from a dark-colored shade is better than a light-colored one because it will attract and store what little heat the winter sun generates.
Use foam pipe insulation
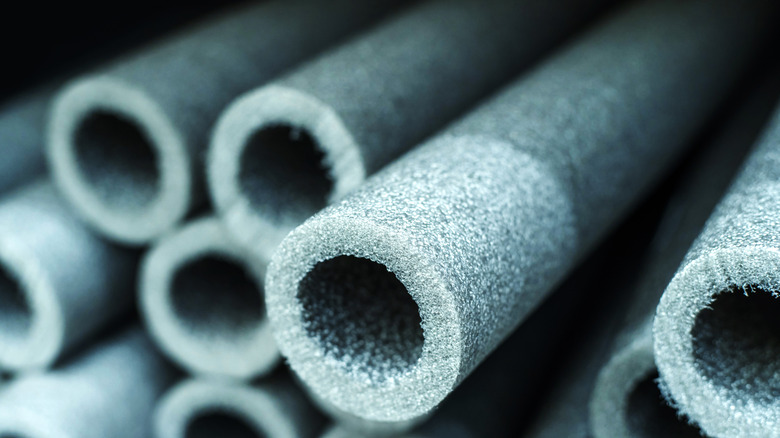
Although, as we have seen, an old sock is handy for protecting your hummingbird feeder from the elements, there are other, even more innovative and creative ways to protect the nectar inside from freezing. The foam pipe insulation you can find at most hardware stores is flexible enough to attach to most feeders. Since it's used to insulate pipes in areas of the home that get little heat and are in danger of bursting — like basements — it can help keep the nectar from reaching its freezing point during the day. Simply measure how much you need to cover the feeder, cut it to size, wrap it around the tube, and secure it in place with zip ties or rubber bands. Tape is not recommended because it doesn't allow for easy access when it's time to clean and restock the feeders.
However, just like with the sock hack, this is best used for feeders in regions where the temperatures don't dip below freezing at night. Insulation alone likely won't be able to keep the water from freezing. Instead, you will need a constant heat source — like a warm lamp — to keep the nectar thawed throughout the night when temps are in single digits.
Use heat tape
An unusual and less common method to prevent your hummingbird feeders from freezing is to use the sort of heating tape favored by plumbers. For those not familiar with the non-adhesive tape, it can be found in most home or hardware stores and is primarily used to wrap around water pipes to stop them freezing and bursting. Although called tape, it is more like a wire as it is thermostatically controlled or comes with a pre-set temperature. When purchasing, ensure you buy the shortest length of the tape because you won't need much to cover your feeder. For example, you can find a three-foot option at Home Depot for $30.
For best results, use electrical tape to seal both ends of the heat tape that you have wrapped around the nectar reservoir of the feeder. Take care never to overlap the heating tape as it poses a fire risk. If you are using a thermostat to control the temperature of the tape, that will also need to be attached to the feeder. (However, keep in mind the thermostat version is much more expensive. They typically run for $125 on Amazon.) Connect the tape directly to a power source and not an extension cord. The power outlet needs to be GFCI (Ground Fault Circuit Interrupter) approved, so it will cut the electrical charge automatically if there's any potential risk of electrocution. Using heat tape may sound a bit more complicated than other methods, but it will definitely stop the nectar from freezing. However, it might make cleaning and refining your feeder a bit annoying, since you will have to remove the entire setup each time you do so.
Attach the feeder to a window for extra heat
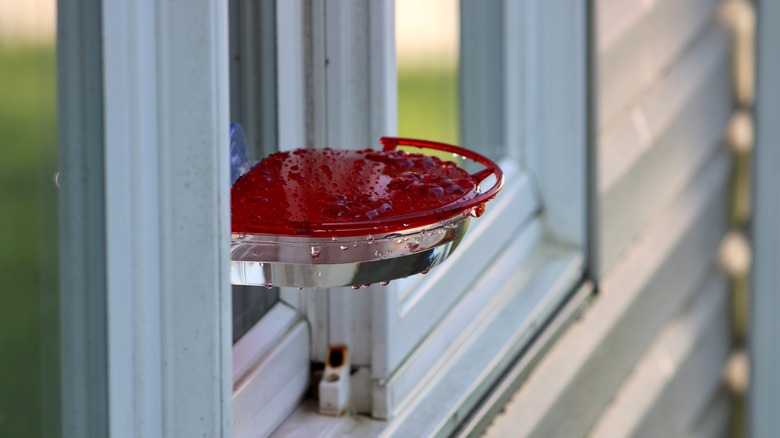
Using a window feeder for hummers during the winter is a double whammy. Their color and charm will help brighten up your view during the bleak and barren months and the heat from your home will help keep the nectar liquidated. Sweet Feeders' geometric window hummingbird feeder is a great example of one — the nectar is held in viles and is easy to apply to any window by simply attaching it via the built-in suction cups. Attaching the feeder to a window works a lot better if it's a single pane. Yet even if it's double glazing, it should help conduct enough of the heat generated from your central heating, fireplace, or cooker to prevent the nectar from freezing.
However, the usefulness of this hack depends on how cold it is outside. The residual heat from the house will keep the nectar warmer by a few degrees, but it won't be enough to keep the water from freezing once the weather hits single digits. Also, remember that there is a risk of an enthusiastic hummer flying straight into your window, so ensure you put up plenty of decals to warn them it's a dead end.
Consider purchasing a heated hummingbird feeder
If you haven't the time or inclination to try any of the DIY measures that we've recommended, or are not a fan of window hummingbird feeders, then perhaps it's wise to consider purchasing a hummingbird feeder heater. There's a wide selection on the market, such as the Hummer Hearth hummingbird feeder heater that simply attaches to the bottom of your existing saucer-type feeder. They are simple to use, are UL-compliant, have a built-in fuse and outdoor-rated cord, and come with a 7-watt and 15-watt bulb. It also glows red to reassure you that it is working hard to keep the nectar flowing.
Heated hummingbird feeders are easy to attach, but if you prefer, you can buy a pre-existing hummingbird feeder with the heater built in. The Hummers Heated Delight is a fine example of this. It comes with a handy six-foot-long cord that you can simply plug in and you're good to go. If you decide to incorporate a purpose-made heater with your hummingbird feeder, always ensure that all products and cords have been professionally certified for use outdoors. By using one or a combination of these methods, your hummers should stay happy and healthy all winter long.