Genius Ways To Reuse Leftover Soup Cans Around The House
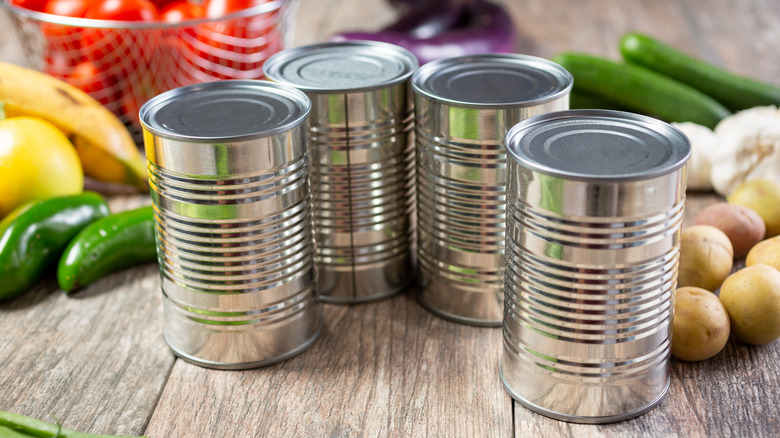
Have you ever held an empty soup can and thought, "I could do something with this"? Empty food cans are full of potential, but without inspiration, they just take up space. If you're looking for ways to reuse leftover soup cans, you're in luck, because we're sharing some of our favorite can DIY projects. These ideas range from beginner-friendly to more complex, so regardless of your crafting ability, we've got a DIY for you.
Repurposing old or unwanted items keeps them from going to a landfill. Though it is a highly recyclable material, Staista noted that tin (which coats the steel food cans) had a rate of recycling of only 30% in 2021. Crafting with food cans is good for the environment, your wallet, and your home. Some DIYs may be purely decorative, while others can provide solutions for organizing and gardening. Necessary supplies may include paint, a drill with drill bits, glue, and a can opener. A strong utility knife or scissors can also be used, but always wear safety gloves when cutting food cans.
Candle holder
Making a candle holder can be as easy as you want. Many crafters use a drill bit or hammer and a nail to punch out holes in the side of a can. These holes could be arranged in a pattern or spread out like polka dots. For a luxe touch, paint the outside with matte paint and the inside with a metallic shade, then add a candle that has a diameter of 3 inches or less. Votives will make the most light, so they're the ideal choice.
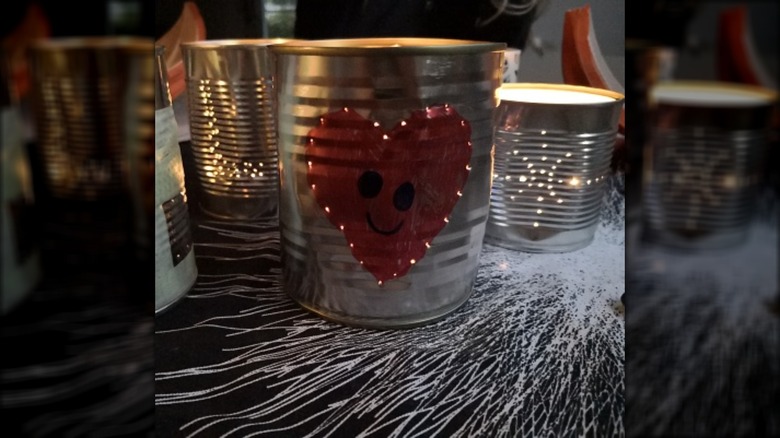
Hanging lantern
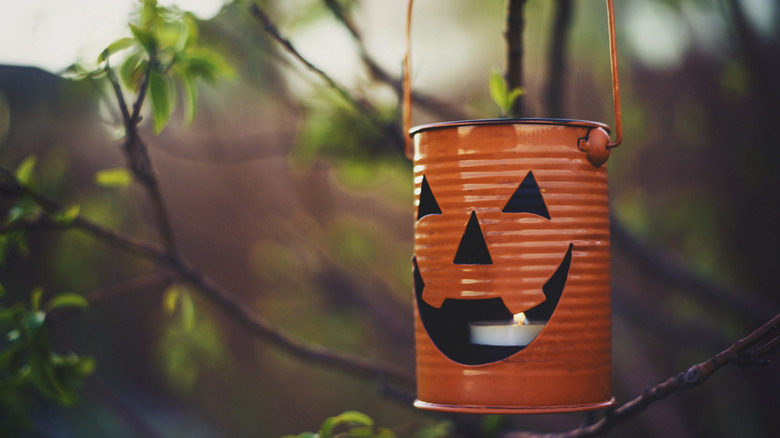
A hanging lantern can be made with a drill or hammer and a nail, craft wire, and a wire cutter. Start by drilling or hammering holes into the can. Forming a pattern like a flower or star with the holes is a creative way to decorate the lantern. Drill two holes about ¼ inch below the rim on opposite sides. Cut a length of wire that's at least the length of the can and thread it through both the holes. Twist the ends of the wire inside the can so that they stay secure. Pop a tea light inside, and you're ready to hang.
Herb pot
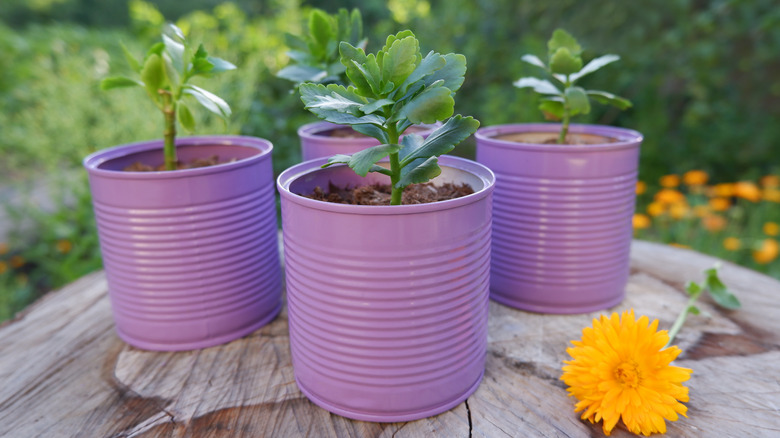
Creating adorable planters requires a hammer and nail, small rocks, potting mix, and an herb starter or seeds. You may also want to use paint and labels for identifying herbs. First, after painting the exterior and allowing it to dry, puncture eight evenly-spaced drainage holes on the bottom of each can. Then, turn them over and place rocks inside. Layer potting mix over the rocks, put your herb or seeds in the mix, and layer more of the mix on top. You can then add your labels for easy identification of all your growing plants.
Utensil organizer
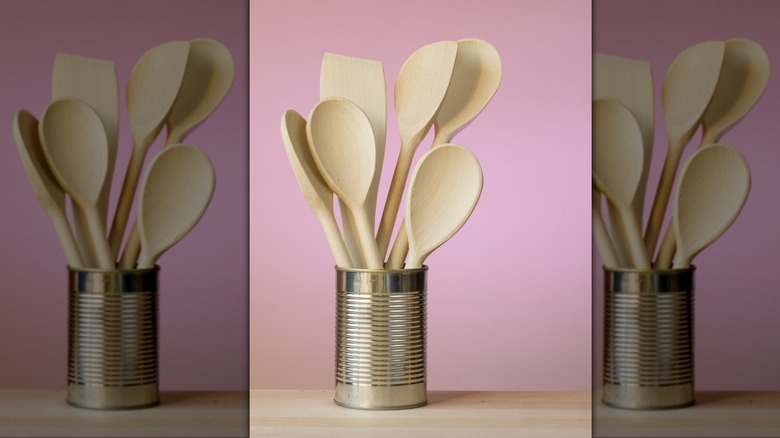
Leave your cooking utensils out on the counter, but keep them organized. An empty can is a suitable size for storing upright spatulas, spoons, and ladles. Keep it unaltered for a more rustic appearance, or paint it to match the rest of your kitchen. Matte paint is more modern and easy to blend, whereas metallic and brightly-colored paints make for statement pieces.
Garden critter decor
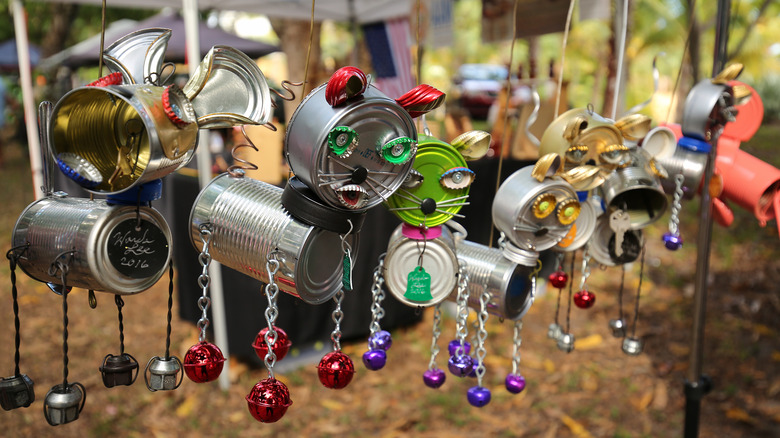
If you have paint and a vision in mind, you can make an adorable soup can critter for the garden. There are many ways to make a tin can garden sculpture. Simpler designs may only call for paint. However, other items like bottle caps, bells, buttons, and smaller cans make excellent additions. Critters could be hung from trees or affixed to a stake in the ground. If you attach something like bells to your decorative piece, it could also function as a wind chime that sings when the wind blows.
Coloring and crafting storage
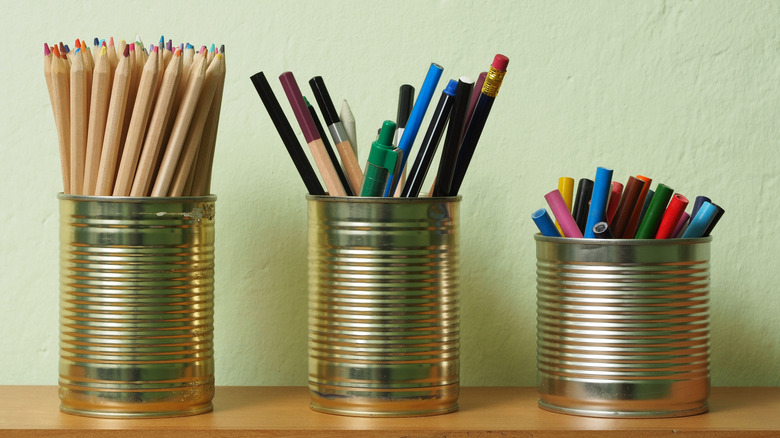
Markers, crayons, and colored pencils are notorious for getting lost or rolling away at the worst time. Store them upright in a soup can for easy storage. Use acrylic paint on the outside to blend the cans in with your decor. Alternatively, you can help little ones stay organized by covering them with chalkboard paint and labeling the cans according to what supplies go in each one. This could also be helpful in your home office for corralling all your supplies.
Centerpiece
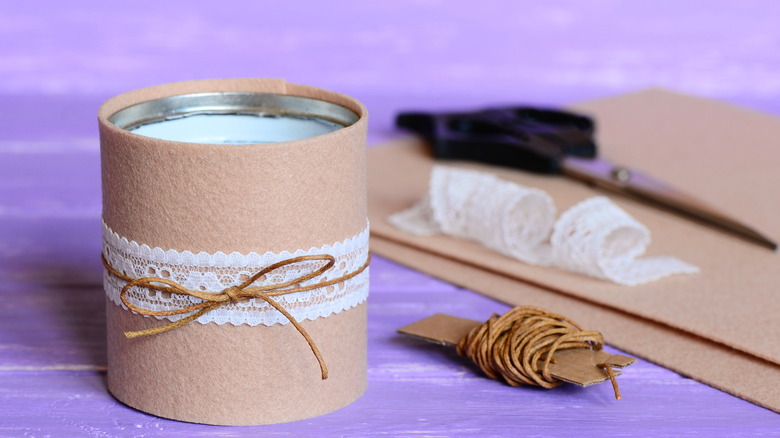
A beautiful and unique centerpiece is a coat of paint away. Solid colors are safe and blend nicely with other decor, while adding a metallic ring around the bottom gives it an elegant touch. Paint a pattern or mural, or wrap the can in fabric to really create a one-of-a-kind statement piece. Accouterments like ribbons or twine can also be attached with hot glue after the paint has dried. You could even add faux flowers or a candle inside the can to really make your centerpiece look gorgeous.
Festive decor
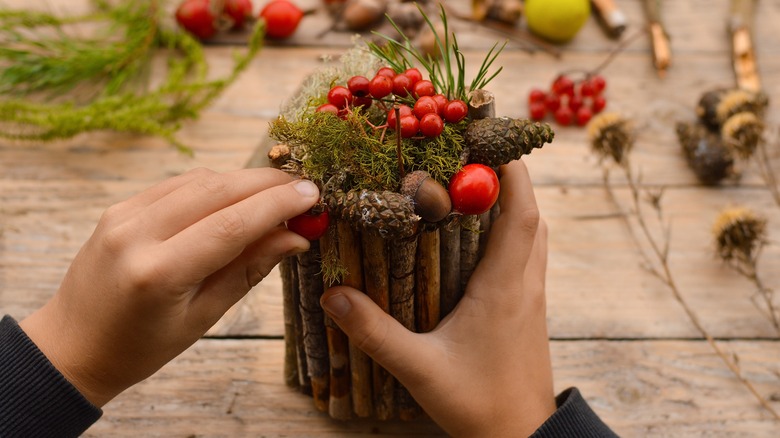
A hollow cylinder is a versatile crafting material. With the addition of seasonal elements like cinnamon sticks, acorns, cranberries, and pine sprigs, you can make a festive decoration. Hot glue cinnamon sticks along the outside of the can. Fill the inside with styrofoam or craft foam and glue moss to the top. Insert fake cranberries, small pinecones, and other natural materials that won't rot.
Tool carrier
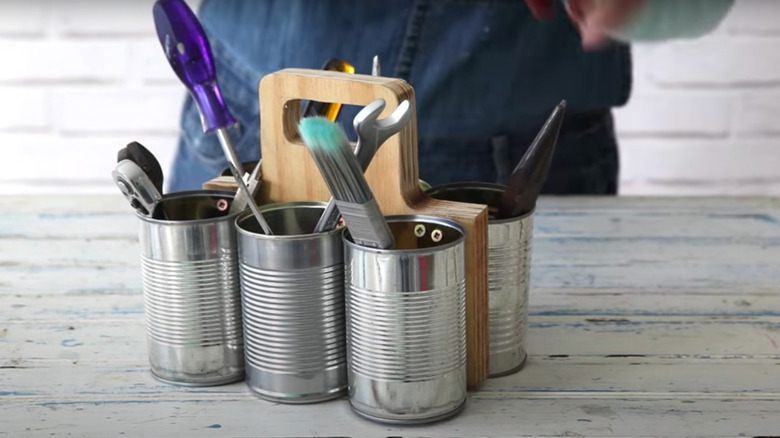
Carry all of your small tools at once with a DIY carrier. There are multiple ways to construct this caddy, and the design you choose determines what you'll need. If you want to create a piece that's more durable, you'll need screws, a drill, a wood panel, a saw, and sandpaper. To create this, carve a handle out of the wood with the saw, then sand down the edges and attach the cans to the wood with a drill and screws. Less intensive designs consist of hot gluing the cans together and attaching a thick strap to serve as a handle.
Wine bottle holder
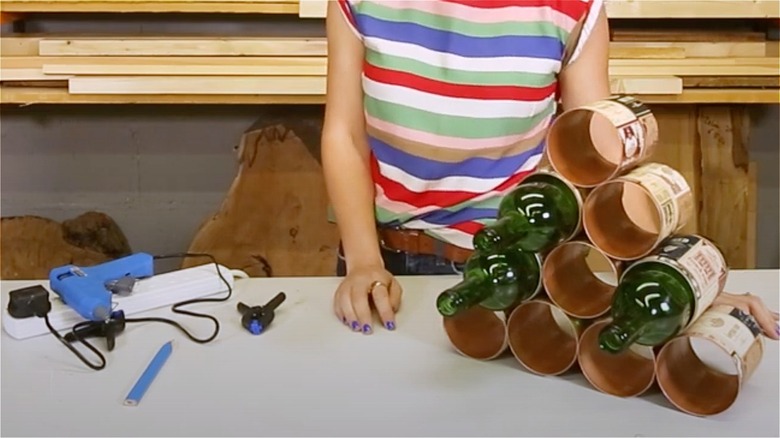
Store your wine in a chic yet cheap bottle rack. You'll need ten cans, hot glue, and a can opener for this project. Paint is optional but great for elevating the piece. If you do use paint, it's better to do so before gluing. To begin, remove the bottom of the cans, then assemble the bottom row by gluing four cans together. Glue another three cans on top of that row, then add another row of two cans. Lastly, glue one can to the top, then insert your wine bottles.
Bee hotel
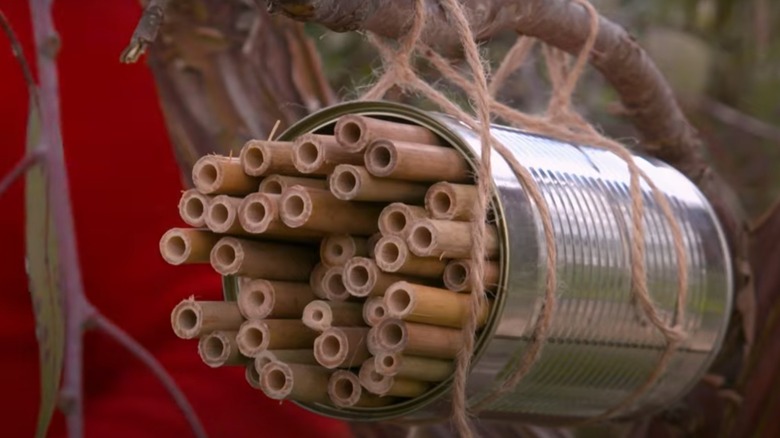
Be a friend to the bees and give them a vacation home. You'll need a pencil, scraps of paper, a toilet paper roll, tape, twigs, glue, string, and decorative supplies. First, decorate the hotel as you see fit. Next, roll the scraps of paper around the pencil so they form small tubes. Insert the paper tubes into the toilet roll to keep them together. Place the roll into the can and fill in the remaining space with more paper and twigs for support and structure. Use the string to hang the can from a tree.