The Woodworking Safety Precautions You Should Be Taking For Your Next Home Project
We may receive a commission on purchases made from links.
Sawing through wood to bring your ideas into life may be a dream for you, but what about safety? From rotating wheels and movable blades to nip points, several woodworking elements can cause mishaps — like mutilation, amputation, blindness, and even death. 2017's Table Saw Blade-Contact Injuries Report found that hospitals have treated over 26,500 blade-related injuries in their emergency departments, with over 89% attributable to the disuse of protective blade guards, as some woodworkers felt they reduced their saws' utility. This doesn't account for home-treated wounds or injuries caused by other power tools. Nor does it factor in respiratory issues, an unwelcome consequence of the clouds of dust and fumes. Long story short: Safety is essential for craftsmanship to thrive.
Mindset, too, plays a crucial role in woodworking. Simply put, you must visualize the process before cutting the lumber for your woodworking projects, as it helps you envision the safest approach. Understandably, this can be a tall task, especially for beginners looking for woodworking projects to practice their art. It's smart practice to review machine manuals and carpentry videos along with undertaking routine maintenance of operating tools to minimize risk. You must also anchor your craft to other safety measures, such as wearing personal protective equipment (PPE), using sharp blades, having the right setup, avoiding distractions, and more. Don't forget to keep a first aid kit handy at all times, as even the most careful precautions can't always prevent unpleasant surprises.
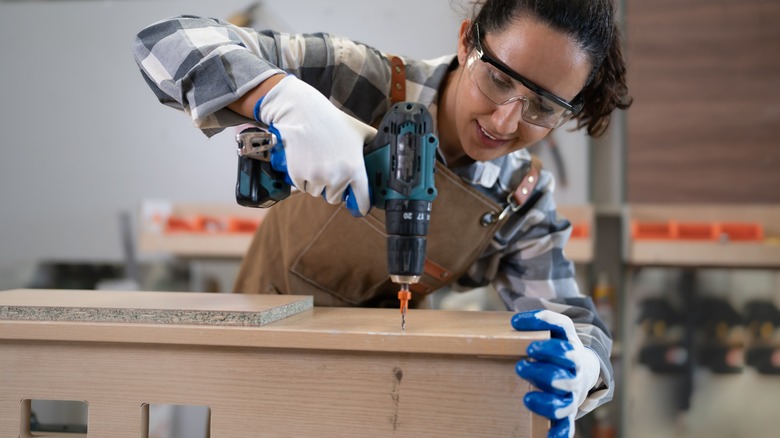
Wear appropriate attire

Before you begin daydreaming about your home project's final look, it's important that you dress the part. Unfortunately, baggy jeans aren't going to cut it — in fact, none of your loose clothing will. You'd think those super casual outfits would make sense, as woodworking is intensive, and it seems fair to wear comfortable clothing. But dangling fabric can get caught up in machinery like cutter heads or saw blades, and making a fashion statement isn't worth the potential harm. So, either secure your garments or swap them out for snugger, sweat-absorbent fabric. If you're wearing a long-sleeved shirt, either roll up the sleeves over your elbows, or choose a shirt with close-fitting sleeves. If you choose to wear an apron — which you should while working with a lathe – tie it so that its fastenings are behind you.
Favor long pants and closed-toe shoes (preferably steel-toe work boots) to avoid injury from any flying wood splinters and chips. Boots also keep sawdust particles from making your legs their new home — a truly uncomfortable feeling, as many experienced woodworkers attest. Follow the same principle for jewelry, such as chains and rings that could get entangled with the tools. Also, tie up long hair or cover it appropriately. While it's good practice to wear gloves to escape woody fragments, remove them when dealing with rotating blades because they slow you down and, like other clothing, could get wedged in machinery.
Always put on safety gear

The buck doesn't stop at nailing down your clothing. Wearing personal protective equipment is just as crucial. From sanding, sawing, and routing to bagging cutoffs, there are multiple ways your DIY project could expose you to dust, and breathing it in can be a source of trouble (which is one reason you should wear a mask while sanding wood). In the worst cases, it can even lead to asthma and lung cancer, so a respirator is a smart option. They're priced economically — although not as cheap as a dust mask – and perform way better in keeping the finer dust out that even local exhaust ventilation systems have difficulty controlling. Plus, they're better at keeping paint or varnish chemicals off you. But if you have a beard, look for air shields instead. They fit better, filter in clean air, and don't fog up glasses. However, they can be pricey.
Safety goggles are a must, too, as flying dust can easily irritate your eyes. Ensure they've got side screens and impact-resistant lenses. Also, invest in earplugs or earmuffs to protect your hearing. Working with table saws and the like exposes you to loud sounds that can impair auditory perception. If you can't make out what a person standing 3 feet away from you is saying, get hearing protection immediately. Although, you can generally skip ear protection if your arsenal only includes hand tools.
Ensure you've got the right setup
Woodworkers sometimes only dwell on their workflows and project types to plan their workspace, overlooking safety concerns. This can be risky, as a poorly planned layout exposes you to numerous dangers. Common examples include getting grazed or pierced by unguarded machinery parts or being hit by wooden chunks thrown back by the rotating heads because of insufficient maneuvering room on the side. So, factor in safety to create a secure woodworking paradise.
To do so, ensure you leave sufficient margins around each tool so that they aren't knocking against each other, and neither are you. They must also be properly grounded and should be set up in your order of use to avoid confusion. Favor installing electric cords overhead, but if it isn't possible, arrange them so that they aren't laying haphazardly on the floor. In addition, make sure the ground is fairly level and isn't slippery. As for the tools, protect their start buttons with a 3- to 6-millimeter-wide collar to prevent any accidental power-ups. Finally, ensure all tools have well-functioning guards to reduce any danger.
Only use sharp tools

While a sharp blade won't necessarily make a George Nakashima out of you, it can stop you from becoming a wood butcher while lending you much-needed protection. To understand why, simply think about a time you used a dull knife to slice meat. Now reimagine the scenario with a dull chisel and wood. Not only is it inconvenient, entailing immense exertion, but it also causes undue splintering. In case you lose control of the tool in hand, it could lead to injury. Keeping your bits and knives sharp and without defects will reduce the likelihood of such outcomes. In addition, they promise a much cleaner cut.
Common dulling signs to keep an eye out for include the chisel having difficulty pushing through, cut lumber showing jagged edges, and the generation of relatively larger sawdust particles accompanied by high-pitched noise. Sharpen the blade when this happens. But if your blade is chipped or missing teeth, replace it instead. Another way to check for sharpness before working involves shearing off a piece of paper from its edge. If it isn't smooth, it's time to get your diamond stone or scary sharp out to grind and polish the blade. Also, follow routine maintenance practices while focusing on rust management in steel tools, especially in humid climates.
Examine the wood for defects and objects

Given the cost advantages, it's tempting to buy recycled wood from a lumberyard or a bulk store rather than going for new timber. Sometimes, you may even choose to reclaim a beautiful wooden piece from an abandoned building or field simply because it fits your aesthetic and has character. However, unlike the hardware store-purchased stock, these wood pile-ups are often not checked for major defects, such as loose knots (the section where a branch breaks off from the tree, leaving behind dark rings), twisted fibers (bad news for saws), and raised grain. Nails, metals, bullets, staples, screws, and parts of barbed wires are the worst offenders, making for the perfect "shiver me timbers" moment when mixed with woodworking tools, especially during cutting, sawing, planing, or routing. The Canadian Centre for Occupational Health and Safety recommends that you avoid sanding wood embedded with foreign objects, knots, or other serious defects.
The reasons are all too clear. While it's possible for the blade to cut right through a nail, the chances of it flying out or chipping saw blades are way higher. In the worst cases, the offending nail can even lead to kickback, causing injury to your eyes or limbs. Moreover, it can graze the workbench, too. So, examine the wood carefully for nails or run a metal detector like the Lumber Wizard 5 (available for $150 on Amazon) to find deeply driven nails before you begin.
Have adequate light
Working in a poorly illuminated room can be incredibly dangerous. This is because you're more likely to trip over a cable you didn't see or mess up a blade change if you're only working by feel. The more clearly you can see your space and tools, the better (and more safely) you work, and the lower the possibility of accidents. Understandably, not every woodworker enjoys the privilege of natural sunlight or shop lights in their workroom, but that doesn't mean you should work with inadequate lighting. You can install fluorescent or LED lighting in your space; just make sure you have the proper foot-candle measurement. A foot-candle highlights the area's light intensity and can be measured easily through mobile apps like Megaman Luxmeter (iOS) and Light Companion (Android).
The road to adequate lighting also has to consider shadows. Arrange the light fixtures so that there are neither glares that inhibit your work nor any dark zones, as is often the case when you lean over a table under an overhead light. In such scenarios, keep two fixtures at 45-degree angles out and above the bench. So, if your workbench is 4 feet away from the ceiling, place two lights diagonally 4 feet away at the top, facing outward. Alternatively, supplement with a magnifying light.
Get a push stick
To save time, amateur and seasoned woodworkers often work without push sticks while operating saws and planers. But this is a grave mistake because these sticks provide excellent hand protection while ensuring the stock doesn't drift away from the woodworking machine. So, if you're making door rails, face frames, table aprons, or any other narrow cuts that are barely 3 inches away from the cutting head, use push sticks to avoid inadvertently losing a finger. Switch over to push pads, however, if you're making cuts for rabbet or dado joints, which require far more control of the lumber.
While some advocate for skipping the sticks when making longer cuts, they must at least be used for the last 1 foot-long segment. They're also necessary for handling shorter pieces under 1 foot in length. The rationale? The push stick hooks on the wood and pushes it smoothly through the blade. This will prevent it from turning into a projectile and spoiling the cut or injuring your face (if you make the mistake of standing in its line of sight). Another good practice is using the sticks to push off sawdust or jammed offcuts from the blades instead of leaning over. Don't forget to unplug the machine before doing so. Moreover, choose a sufficiently long stick that maintains a safe distance from the tool and dip it in a product like Plasti Dip to minimize slippage.
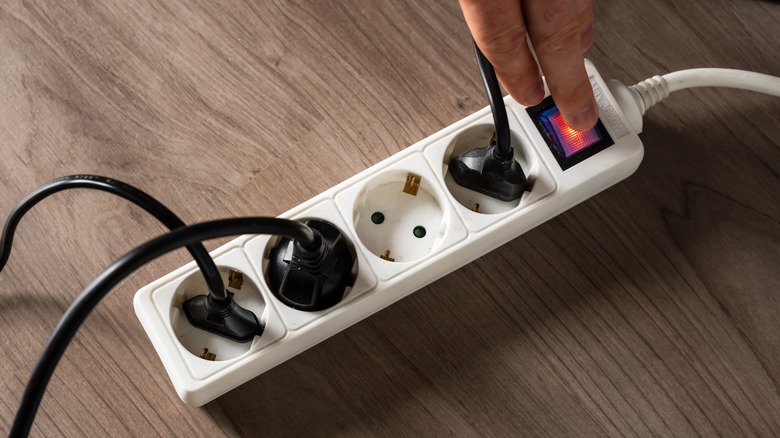
Stick to one extension cord
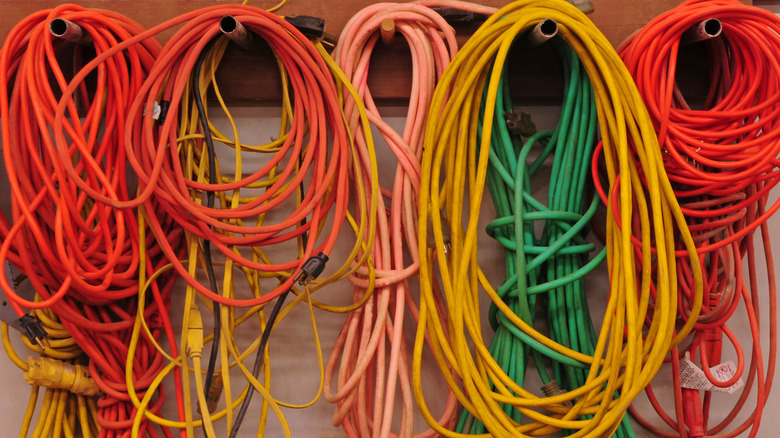
Resist using separate extension cords for your power tools to extend their reach to your worktable. Instead, build up a practice of using a single heavy-duty or contractor-grade extension. Generally, a tool's manual will direct you to the cord that best fits its use. However, it may prove insufficient over long distances (over 50 feet), as cords can become overheated, ultimately leading to a voltage drop and poor performance. In such cases, move to a cord that's made to support heavier loads.
There are plenty of reasons multiple extensions are a no-go. Single cords force you to switch between your various power tools, affording the highest safety. You can rest assured that another tool isn't simultaneously plugged in and accidentally turn it on. Second, it addresses the issue of current drops when multiple cords are plugged in together, impairing performance and work quality. Finally, if not an invitation to overheating and potential fire, they most definitely pose a trip hazard, as it isn't unusual to get entangled between multiple wires snaking over the floor while walking through the room. While you're at it, childproof your extension by attaching a twist-lock cover to it as well as your electric tool.
Know your tools

Knowledge is power. Still, sometimes we choose to forgo it, as reading through pages of manuals can feel cumbersome and boring. But, not reading instructions can cause unforeseen trouble down the road. For one, you remain unaware of the most efficient ways to complete a specific task. It might surprise you that there's no one-size-fits-all approach to making a certain cut. For instance, to cut down a thick lumber piece into two thinner equivalents, you can use both a band saw and a table saw — but which one should you use to safely make the final cut? Having complete information about your tools assists in such decision-making. Reading manuals, viewing woodworking videos, and seeking out experienced professionals for walk-throughs surely help, as does following the instructions to the T.
Moreover, such information empowers you to confidently face emergencies because you're well-versed in the riskiest parts of the machine and the ways to handle them. To illustrate, if you're used to controlling a router with your right hand, you can use your left hand to turn it off safely. Plus, if, despite your best efforts, a cut still goes wrong, knowing your tools' emergency shutoff mechanisms is critical, allowing you to take the safest measures.
Don't stand behind the machines

It may seem natural to stand right behind the machine, smack dab in the center, but doing so is not advised. Assume you're making a cut with a table saw, and somehow, the blade grabs the timber. What are the possibilities? It could either hurl back at you at a swift speed (saw blades can run between 3,000 and 4,000 rounds per minute), hitting you anywhere on your body, from the belly button up. Alternatively, the wooden chunk just might slide right back. Either way, you're standing directly in the line of fire and are at risk of kickback. Similarly, imagine scenarios with other operating tools like circular saws, jointers, routers, and planers. For instance, in miter saws, their gauge slot lines are the danger zone and should be sidestepped.
Thus, you should be standing to the side. This way, even if the worst happens, you aren't seriously endangered. Be confident about your stance and weight distribution, too, as you don't want to fall toward the machine. Also, keep your hands away from the blades — that's where push sticks come into the picture. Such positioning has another added benefit: It makes it easier to complete a long cut, which wouldn't be possible if you were standing behind, as more likely than not, your arms aren't long enough for you to fully bend over.
Cut the wood in the right direction

This may be self-evident to the experienced woodworkers, but unfortunately, it may feel like going against the grain to those just stepping into the art. Here, the focus is on feeding the wood through the machine in the opposite direction of the rotating head. So, essentially, you're working against the cutter. For example, if you're using a handheld router, you'd feed in stock from left to right. This is because the router's head rotates in the opposite direction; that is, it spins clockwise. But if you were using a stationary router that turns anti-clockwise, you must reverse the direction for lumber-feeding from right to left.
The main aim is for the machine's teeth to cut into the wood, rather than the stock pushing its way into the machine. It should feel like the blade is moving against your timber's movement. This will reduce the likelihood of wood tearing or splintering, as well as kickbacks, while rewarding you with smoother, cleaner cuts.
Steer clear of the machines when removing cutoffs
Another safety precaution to swear by is to avoid leaning over your machine to get rid of wooden waste and shavings, otherwise known as cutoffs. No matter how irksome their presence, it's ideal to leave the wooden chips and shreds alone until you're done for the day, or at least with the machine. Wait for the cutter to stop and for the blades to come to a standstill before sweeping down the stock scraps. While you're at it, consider collecting and using the workshop wood savings to help your garden thrive. Push sticks aren't an exception to this rule either. You must wait for the machinery to halt all movement before using the sticks to remove scrapings. But they're safe to use when tearing down the chunks of wood while operating the machines or to take out any pieces lying between the blade and the saw fence. It'll also prevent jagged particles or sharp edges from injuring your skin.
Maintain a hands-off approach when dealing with miter saws, table saws, and other similar woodworking equipment. This will lessen the risk of slicing your fingers over the blade. Remember: Don't throw caution to the wind just because the machines have shut down. Unhappy accidents involving operational malfunctions or sudden bumping of "on" switches can happen anytime.
Unplug the tools when not in use
Disconnecting your power tools when you aren't operating them should always be done. Yet, regardless of their experience, many choose to disregard this cardinal safety rule. Woodworking forums are full of crafters debating the need to power off their machines when servicing them. The logic? As power buttons are placed at a considerable distance –and can be out of reach for some — the likelihood of bumping them on inadvertently is zilch. Some even bank upon their machine's fail-safe mechanisms to make their case.
While it's undeniable that the chances of the machinery turning on its own are negligible, it doesn't account for random malfunctions. Although rare, woodworkers have had to grapple with magnetic switches engaging spontaneously, putting them in jeopardy — and you don't want to be a part of that statistic. So, unplug your tools anytime you're examining them for functionality and upkeep, switching out their cutters and bits, dealing with stalled blades, removing sawdust or cutoffs from them, or swapping in new sandpaper. Do so even if you're merely taking a break. Also, don't tug on the cord when unplugging. Instead, pull out the plug directly from the outlet or disconnect the work area's power source. And make sure your hands are dry before unplugging, to avoid getting shocked.
Don't be distracted or work under the influence

Woodworking demands attention to detail to be truly rewarding. So, don't ruin your final results in exchange for immediate serotonin boosts. Showing off your home project through reels can wait, as can the phone calls. If not, then turn off the machines before you engage in other activities. Similarly, avoid drinking alcohol (or taking drugs) while working. Carpentry may be your happy space, and using intoxicating substances might be part of your me-time, but the two don't mix. Such combinations can turn tragic. Slow responses and poor coordination when dealing with stalled cutters and wood tearing will worsen the situation.
Likewise, postpone working if you're feeling under the weather and are consuming medicines that leave you drowsy. Concentration is essential to avoid woodworking mishaps. It's easy to lose focus and lumber along when all you're doing is making the same cuts over and over – perhaps because you need duplicate parts. However, to avoid serious injury, make it a point not to work when you're distracted, under the influence, or feeling drowsy.
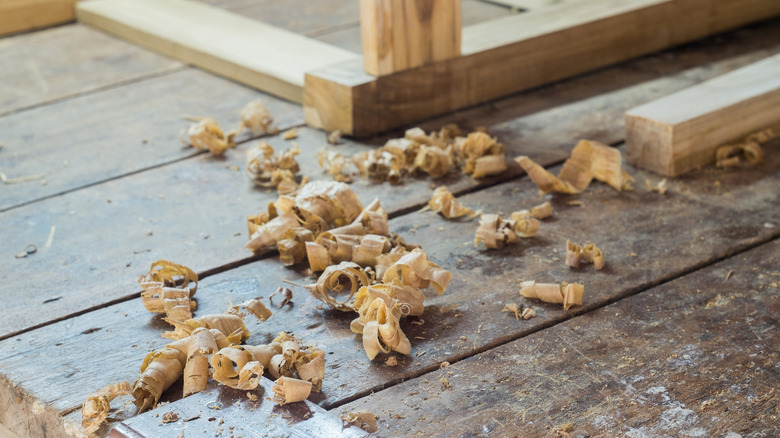
Clean your workspace
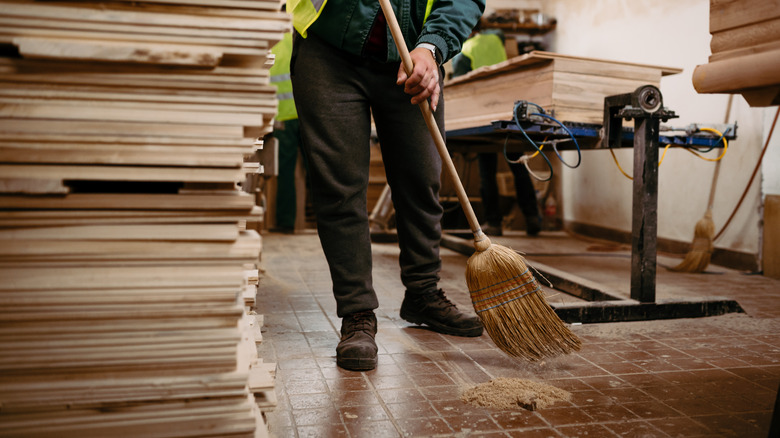
Working in a space that looks more like a cluttered attic rather than a woodworking area can pose a problem. Ideally, you should clear up all dust, debris, and wood scraps after shutting the shop. Also, take care of any glue, grease, or oil spills on the floor (dryer lint can help with the last problem). While many woodworking tools come with factory-installed exhaust ventilation systems to get rid of wooden chips and sawdust, it isn't enough. You must regularly wipe down the machinery to remove waste and splinters. Keep the saws covered when not in use, and pick up items like tool cords, hoses, nails, and hammers, lest you stumble upon them while moving around the room.
A disorganized carpentry workspace can be a disaster waiting to happen. Any movement can dislodge sawdust, causing eye and skin irritation. Another disadvantage is that wood dust can be flammable in higher concentrations. So, cleaning up the particles is important. Finally, dispose of old, unusable tools, as they only add clutter to your space and can be unsightly.
Ask for help

You might relish working with wood by yourself, but that doesn't mean there won't be instances where you could use a hand. An obvious instance is when you're lugging around heavy hardwoods like Ironbark, which weigh almost 1,120 kilograms per cubic meter. Resist the temptation to act like Superman, and seek assistance. Your back muscles will thank you, and you'll also keep serious injuries and strains at bay. Besides, it's a great opportunity to socialize. Incorporate healthy habits like stretching, bending, and exercising now and then while working.
However, help isn't limited to physical aspects of the craft. Learning about the safest ways to operate a woodworking tool is valuable, too. It's good practice to ask experienced woodworkers for solutions either on forums or notable websites whenever you feel stuck on your home project. You can also turn to a skilled neighbor, peer, or local woodworking expert for helpful tips and suggestions. At the same time, decide on an emergency contact person beforehand in case the need ever arises.
Attach a guard to your table saw
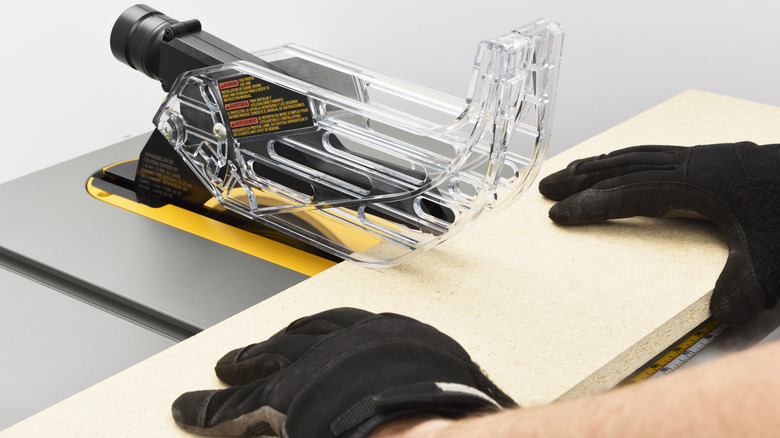
Finally, if you're only into assembling wooden cabinets, chances are that table saws are your go-to tools. But given the chance that they may fling wood right back at you, it's best to secure the machinery with a guard. Older table saws often had splitters — a pointed blade placed right behind the cutter — to grab the wood and prevent it from jerking back. Unfortunately, they don't go up or down in tandem with the blade's movement — something that riving knives, the safety instruments found on newer saw tables, do. These knives are usually thinner than the blade and stop the wood block from pinching or turning, avoiding kickbacks. They aren't a hindrance while cutting grooves and dadoes, doing away with the necessity to remove these protective mechanisms during certain crosscutting routines.
After-market guards are an option, too, if the pre-installed versions don't work for you. These perform similarly to a riving knife, keeping the wood in place, but they also support anti-kickback pawls on both sides, principally eliminating any chance of the wood hurtling back at you. Moreover, they have a dust collection compartment on the top that further thwarts the wood's movement upward.