The Germy Mistake Everyone Makes When Cleaning With Feather Dusters

If you're a "Downton Abbey" fan, you might remember the household staff cleaning chandeliers and other decorative objects with feather dusters. While they might be viewed as "old fashioned," they're great household tools for delicate dusting. They're also more economical than disposable dusters since you can use them for years before needing to replace them. In fact, when cared for properly, you probably won't need to replace your feather duster until it starts losing its plumes. Proper care equates to regularly cleaning your duster; however, neglecting to do that is a mistake many people make when using them.
Feather dusters pick up all kinds of particles, including germy ones that can harbor viruses or bacteria. It makes sense to clean your duster to eliminate that grime. Additionally, when you dust, you can pick up oils, residue from cleaning products, waxes, and other substances that can adhere to the feathers so the dust you're trying to pick up doesn't cling as well anymore. So, in addition to taking your feather duster outside to shake it out after each use, give it a more thorough scrub with soap and water a time or two each year to make sure it's not one of the dirtiest things in your home.
How to clean a feather duster with soap and water
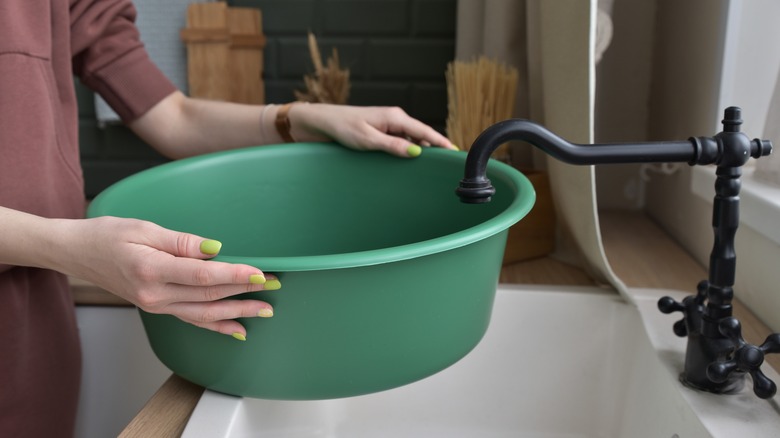
Cleaning pros wash their feather dusters with soap and water as needed, so there's no reason that you shouldn't keep yours tidy, too. First, fill your sink or an appropriately sized bucket with warm water and add a little liquid dish soap. Then, dunk your duster in the soapy water and swish it around gently. Ensure all the feathers open as you move it around in the water. When you feel it's clean enough, rinse the duster with running water until it runs clear. Work the feathers gently with your hands as you're rinsing to remove all the soapy residue.
After your feather duster is washed, thoroughly dry it. Do this by gently squeezing out as much water as you can with your hands. Then, fold a clean towel around the duster and let it absorb most of the moisture, leaving it to sit for about 10 minutes or so. Remove the duster and twirl it over the sink to rid lingering water from the feathers. Then you can hang the duster with the feathers down in an area with good airflow to let it dry completely.
Once it's dry, run your fingers gently through the feathers to get them back to their original shape, if needed. Now that you know how to clean your duster, you won't make the mistake of not keeping this potentially germy tool spick and span.