The Tip You Need For A Consistent Caulk Job Every Time
Although the pros make it seem pretty easy to use a caulking gun, the job can become messy in a hurry. The caulking gun builds up pressure in the tube, causing the caulk to move through the hole you cut in the tip. Without careful work on your part, excess oozing of the caulk can create a sticky mess. One way to reduce the mess is to carefully control the application of the bead. A smart caulking gun trick to use to make the job easier is to cut the tip at an angle, while using the embossed markings on the end of the tube to match the diameter of the bead you want.
To ensure a steady bead, you then want to hold the gun at the same angle and orientation every time you use it. This can be a difficult process, though, as you are likely focusing on the bead and on moving at a steady speed and pace, rather than trying to watch the tip to orient it properly.
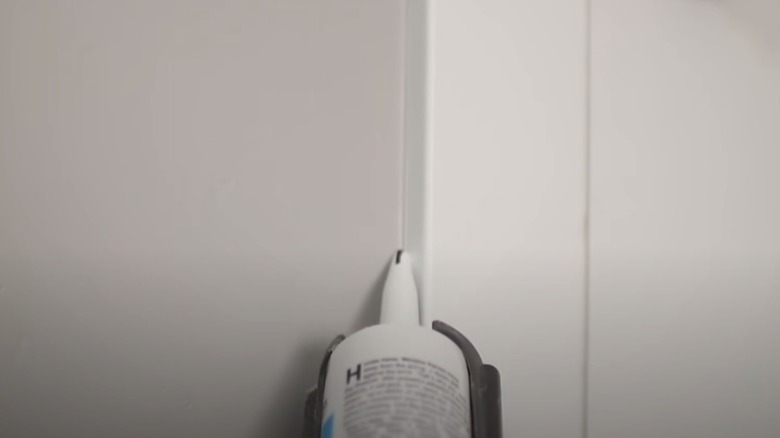
The best way to do this is to use a Sharpie and mark a vertical line on the tip. Then you can watch this black line to keep the tip of the caulk tube properly oriented as you move the gun and create a bead. Because most tubes consist of light-colored plastic, the black line is easily visible, even when you may be focused on another area while you are working.
How to determine where to place the black mark on the tip of the caulk tube
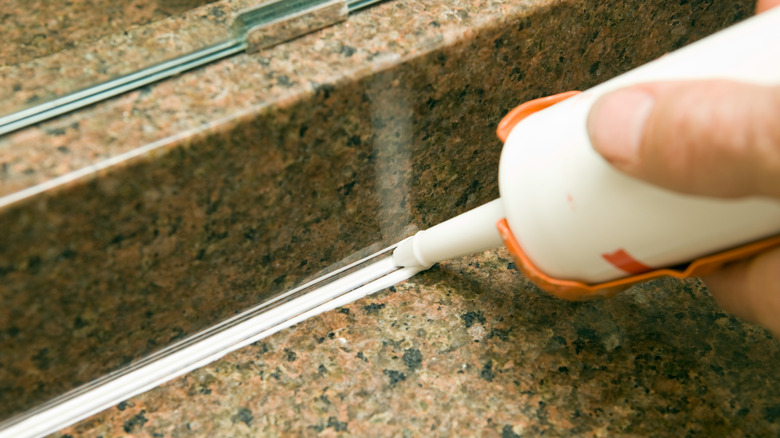
The tube of caulk has a long nozzle at one end. This is where the caulk exits the tube. To begin using it, you must cut the tip off and poke and break the seal through the new opening. The plastic of the tube is thick enough that you probably will need a utility knife or high-quality scissors. Look at the tip carefully. It has embossed marks in the plastic that indicate the diameter of the bead when you cut in that spot. Most projects use a diameter of 1/4 of an inch.
For the best results, cut at a 45-degree angle, rather than straight across. By using this angle and by holding the tube with the pointed lip at the back or top of the bead you're applying, the pointed lip helps to direct the caulk into the seam or crack, while also smoothing it as you apply it, which should lead to less mess.
Now take your Sharpie and draw the black line from the pointed lip back down the tip toward the main portion of the tube. A line of an inch or a little shorter is enough. You just want it to be long enough so you can easily see it. When you load the tube into the caulking gun, place the line parallel to the top of the gun to keep the tube properly aligned as you work.