Common Reasons Why Your Toilet Won't Stop Leaking
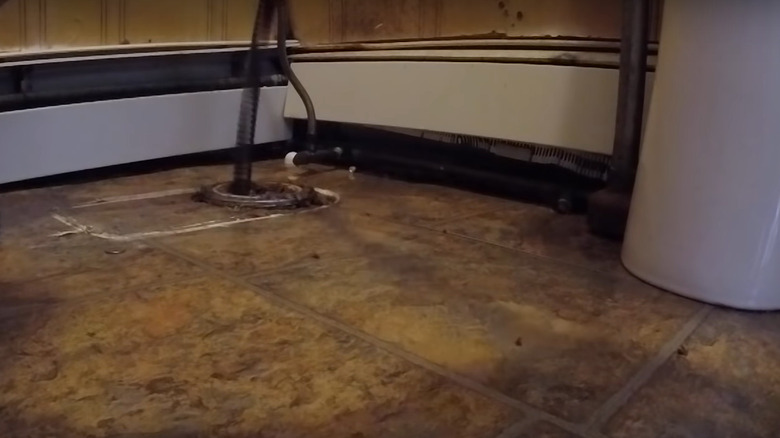
Stepping into a pool of water on a hot day feels splendid, but it's a different story when that water is located on your restroom tiles. A quick inspection might trace the leak to the otherwise unassuming bathroom fixture: the toilet. If lucky, it might just be the classic case of a sweaty privy — a phenomenon where high humidity causes water to condense and trickle down from the cistern, forming an unsightly mess at the toilet's base. Take that as a sign to cut back on hot showers, run a dehumidifier (or exhaust), or insulate the cistern. But if you're on top of the humidity game, don the hat of an amateur plumber and get ready to shell out a few dollars unless your homeowner's insurance covers the costs.
Fill and flush valve systems are problematic, too, but if they're performing satisfactorily, chances are connectors, wax seals, bolts, the toilet bowl, or the tank may be acting up. Depending on the problem at hand, expect to spend $262 on average on toilet repairs (via Angi). This doesn't, however, account for the huge sums you'll have to additionally fork out on inflated water bills, floor repairs, and mold and mildew issues. So, before the water leak becomes especially bad, read on to figure out what's ailing your toilet and whether you can DIY the remedy, or are better off calling a plumber.
Your toilet's flapper has seen better days
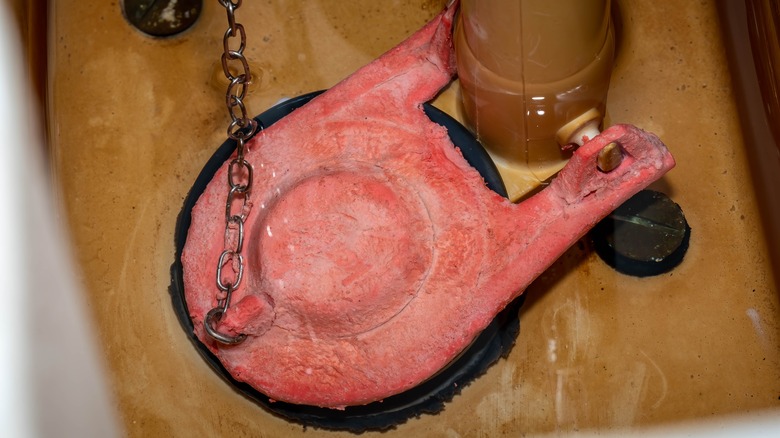
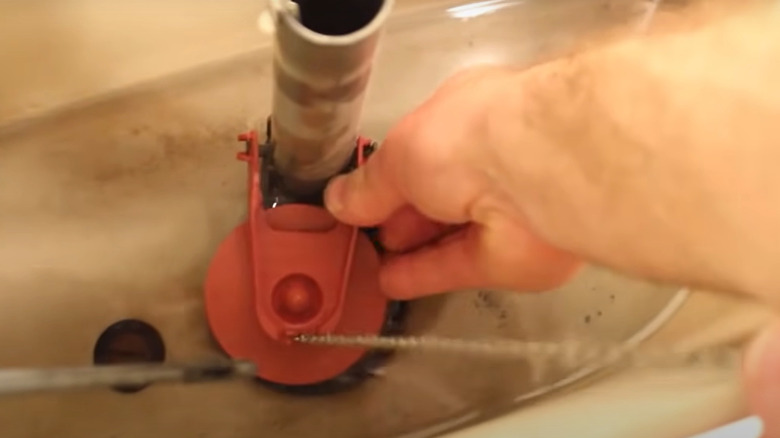
When you flush something down the toilet, the flapper, a plastic or rubber-based regulator at the cistern's bottom center, dislodges from its spot to allow water's downward flow. Responsible for regulating the water movement between the flush valve and the bowl, as well as keeping the tank filled, the flapper begins losing efficacy if exposed to hard water (rich in mineral deposits) or algae deposits. Cleaning it with a diluted vinegar solution may restore some of its health. Time also does a number on it, ultimately resulting in "silent leaks." In such cases, water constantly drips into the bowl, sometimes wasting over 5 gallons every minute. You may also encounter phantom flushes, where the toilet tank starts refilling on its own despite being untouched.
An easy way to check for such toilet leaks is to pour a food coloring agent in the tank. If, after 30 minutes, you notice colored water in the toilet, your flapper needs a replacement. To do so, shut off the supply valve and empty the tank by holding down the flush lever. Undo the flapper chain, slide the rubber valve over the pegs or tubes (depending on your toilet's assembly), and install the new part by slipping it down the same path. Adjust the chain to the right length, or it'll prevent the flapper from sealing the space. This will cost you under $25 and will only take about half an hour to execute.
The float valve has lost its bearings

A float valve is truly a divine invention until it's misplaced. The valve is located inside the cistern, just 1 inch short of the overflow pipe, and the float beckons the water inlet to keep running until the tank is full. But if it's placed higher, the system fails to receive the signal, causing the water to enter the overflow tube and leak out. Newer toilets instead support float cups — small cylinders that move in tandem with water flow and are affixed to the fill valve. They can be adjusted by pressing their spring clips (located on the side) and sliding to the appropriate height.
To fix the issue, grab a screwdriver and rotate the bolt linking the float and the fill valve counterclockwise to reach the desired height. If you notice any wear and tear on the valve or find it waterlogged (causing it to sit in the water instead of over it), replace it to prevent aggravating the issue. While substituting it, turn off the water supply and drain the tank. Follow it up by unbolting the float arm and securing its replacement. Screw on the new float and fill up the cistern to check if the seeping persists.
Debris and rust have gotten to your toilet's fill valve
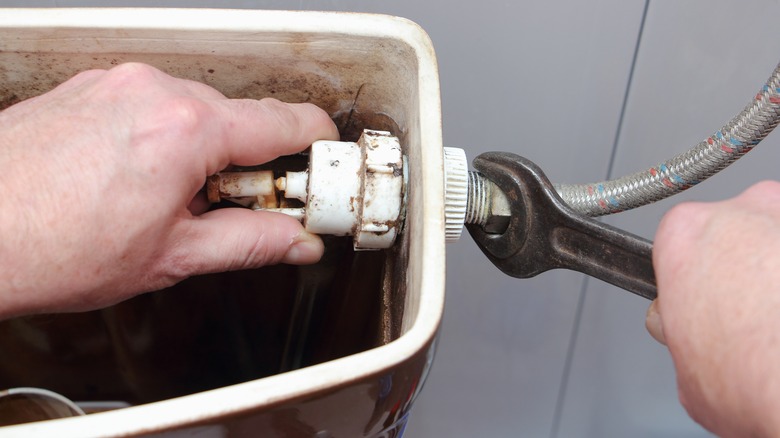
If cleaning or replacing the float doesn't stem the leakage, the fault likely lies in the fill valve assembly — the mechanism backing the water inflow into the tank. There could be several factors at play, including the tank has accumulated debris, grime, or mineral deposits over time, damaging and eroding the fill valve, especially the gasket connecting it to the cistern's bottom. To clear them out, switch off the water supply and raise the valve assembly's arm to rotate and glide out its cap. Replace the cap with a plastic cup and restart the supply lines. The ensuing water pressure will push out all muck and blockages. Once clean, restore the cap to its original place.
Alternatively, the main screw on the tank's exterior base, which locks the fill valve in place, may come loose, providing another pathway to the water stream. Regularly tightening all bolts should usually resolve this problem. However, overhaul the assembly if the fill valve rusts or develops cracks. To fix a leaking toilet fill valve, drain the tank and remove the connecting nuts to detach the supply line. Keep a bowl underneath to catch residual water in the pipe. Undo the bolts joining the fill valve assembly to the cistern and swap out the old assembly for its new counterpart. Adjust the fill tube's height if required, and tighten the nuts. Turn the supply on after reconnecting it to the tank to enjoy a puddle-free bathroom.
There's a disconnect between the connectors
Your porcelain throne requires plenty of connectors to keep it functional. Hence, it comes as no surprise that your midnight nature calls become a nightmare when the seals of these connectors lose their stickiness. For instance, your commode is fitted with a toilet pan connector that establishes the link between the waste pipe and the bowl. Similarly, you may notice plastic-covered screws or tee bolts on your toilet's base to hold it in place. Two-piece privies, too, contain myriad gaskets to keep the pan and cistern connected.
Spirited cleaning and mopping can run down these connectors, causing fissures and gaps in their plastic shells. Time also degrades the seals, prompting replacements. Of course, at times, the fault doesn't lie in the fixture's make and condition, and has more to do with a misaligned seal, requiring repositioning and an adjustment of its angle. An easy way out is to remove all the plastic covering and screw the nuts tight. But if the connectors are rusted, swap them outright for new ones. Remember to keep the supply valves shut when doing so. Also, wrap the wrenches in tape if you're dealing with metal coverings to protect their finish. In the future, develop a routine of checking and tightening the bolts now and then. Don't screw too hard, lest the loo get damaged.
Supply lines have had a breakdown
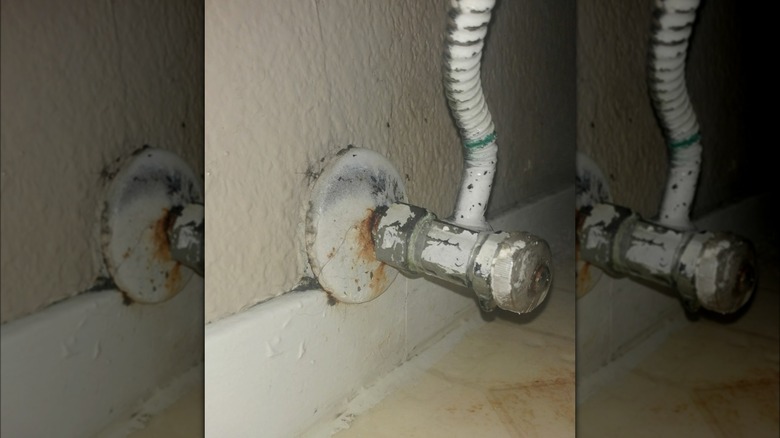
Catching on when supply lines are posing trouble is a breeze since you would immediately find the water oozing out and collecting on the floor. However, diagnosing the root cause can be troublesome since multiple things can go wrong. Perhaps the water pressure is higher than they can tolerate (installing a pressure washer helps), or the fill valve's functioning creates strong vibrations that weaken the hose. Maybe the source water contains a lot of dust and debris, cutting away at the hose or wearing down the nuts responsible for interconnecting supply lines (when there's more than one). They may also wear away with age. Improper installations and corrosion are other factors.
To find the source, rub a cloth along the supply hose and examine the point of the leak. If it's closer to the valves, twist them tight with a plier after turning off the water supply. If that doesn't plug the seepage, unfasten the bolts, remove the supply pipe, and check its washers for fractures or corrosion. Switch the degraded washers for new ones, but if they look fine, consider applying the plumber's tape to the piping system's threads, then reattach the supply line and open the water valve. If this fails, replace the supply hose and secure it with an epoxy putty. From now on, change the supply line every three to five years, or whenever you buy a new toilet.
The toilet bowl is cracked
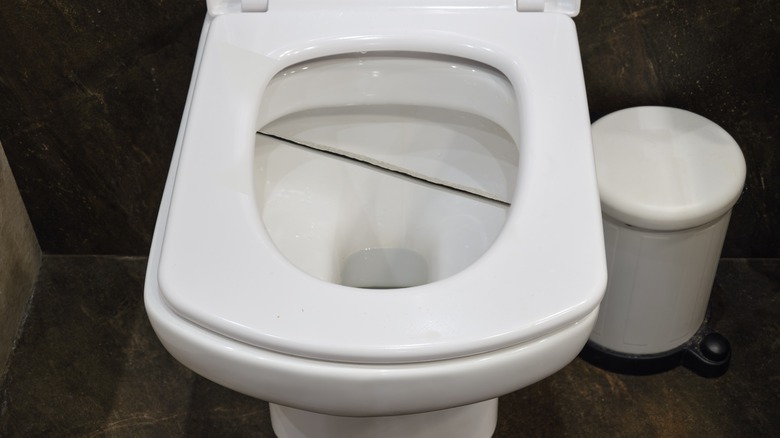
An accidental slip or drop of a blunt object on your toilet might cause it to develop cracks. A DIY project gone wrong when you overly-tighten the tank-bowl gasket can also cause damage. It wouldn't be overtly concerning if the crack in your toilet bowl is minuscule or way above the water level, as you can patch it up with epoxy. But any other outcome would leave you in dire straits, with the water pools becoming especially severe and unsightly.
Even if the initial fissure starts as a mere invisible line (due to a manufacturing defect or age), it can escalate into a veined pattern, as if making a decision tree. However, in such cases, you don't get to make any other choice except to call a plumber. You must necessarily replace a toilet bowl with fractures exceeding 1/16 inch on its inside before the leakage eats through your mats and flooring. It'll cost you between $70 and $100, excluding labor (per Angi), unless you're up for changing out the whole unit, involving an outlay ranging from $220 to $530. If you do, upgrade to high-efficiency toilets, which aren't as water-hungry, saving you buckets in utility bills.
The wax seal isn't sealing anymore
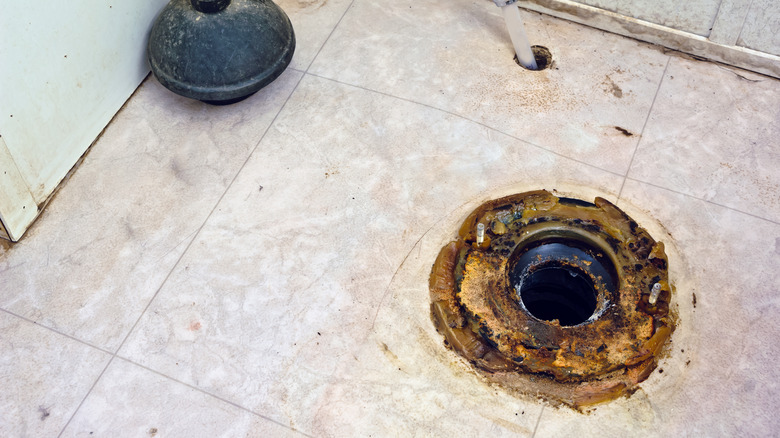
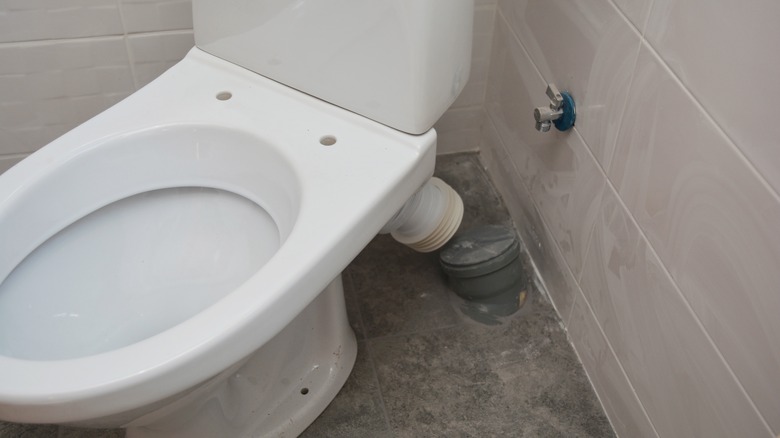
Most toilets come equipped with a wax ring to ensure the base completely covers the sewer pipe and prevents things from going south. Although they're touted to live just as long as the toilets they're a part of (20 to 30 years), wax rings can suffer damage when installed incorrectly. Rocking the toilet back and forth, as opposed to moving it sideways, during fitting can prevent the delicate Johni-Ring seal from compressing evenly, generating several permeable pathways. Besides, if the commode is wobbly, the ensuing friction can degrade the wax, ultimately turning it dry and flaky.
To know if a faulty wax seal is the root cause, wipe down the puddle and see if the next one accumulates underneath the privy. Also, check for any accompanying musty smell. If so, it's time for a replacement. As affixing a new ring necessitates moving the whole unit, which can weigh almost 100 pounds, consider hiring an expert. But if you've picked up decent plumbing skills over the years or are price-sensitive (pros can charge almost $200 in some cases), the DIY route is an option. Be ready to scrape off the old seal with a putty knife after you've cut off the water and removed the toilet. Install the new silicone ring, caulk the base, and reset the unit.
The toilet tank has called it a day
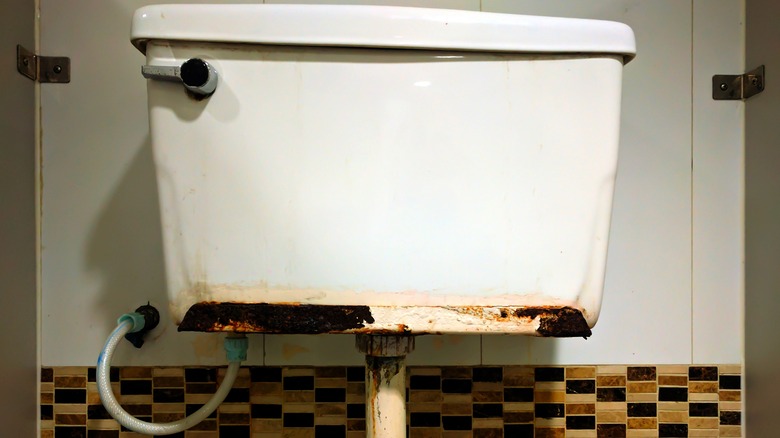
Like your toilet bowl, the water tank or cistern is prone to accidents. You can damage the delicate porcelain while repairing or tightening the nuts, or simply dropping things can also leave the top nicked, taking over the whole tank. Age can also pull tricks on the water-holding container. Regardless of the reason, all cracks in the toilet tank are a recipe for disaster, since you never know when the trickle-down will transform into a water blast, putting your powder room out of business.
Ensure your diagnosis is correct by first checking if the water is dripping from the tank's side down to the floor. Next, inspect the nuts to see if they're bolted shut. Afterward, examine the tank for cracks both inside and out. A small hairline crack (under 1/16 inch) can be corrected with waterproof epoxy or porcelain sealer. Per usual, shut off the water valve and drain the tank. Using a putty knife, spread the epoxy from 1 inch above the crack and smooth it out until it's covered completely. Let the epoxy cure for a day (or follow the manufacturer's instructions). Avoid using plumber's putty since it's hard to fathom when it has dried out completely. Restore the supply and flush the system to test if things are back in order. For more significant cracks causing a leaking toilet tank, consider installing a new cistern.
Flange bolts are on the loose

An interplay of a rickety toilet that trembles every time you sit on it, splashes water when you pull the flush lever, and gives off funky odors should have you concerned about flange bolts. These closet flanges perform double duty as fixtures that keep the loo glued to the ground, while minimizing any gaps between the wooden floors or tiles and the sewage pipes. Suffice it to say, they may come loose with time as the lavatory is put to use.
Don't turn a blind eye to this toilet issue, and start by removing the plastic caps on the toilet's base. Bring out an open-ended wrench or a pair of pliers and rotate the nuts clockwise till they're fully secure. This should also keep the wax rings in place. If they don't twist at all, retry after oiling them. And, if that fails, substitute in a new pair. Replacement is also due when the bolts become free of their track and spin around without tightening. New flange bolts can cost between $145 and $165 (via Angi). That being said, if this doesn't stop the discharge, you might've to replace the flanges, especially if you haven't changed them in over six years.
Drain lines are clogging up
Drain lines are a standard bathroom feature, given their pivotal role in sending... things into oblivion. But when they start jamming up, they force your toilet to become leaky. Usual signs to keep an eye out for include recurrent clogging or bowls that drain sluggishly. While there's a chance of the water backing up if you try to flush down an entire plate of scones (a la "Derry Girls" style), the point here is a tad different.
Choked drain pipes begin exerting pressure on the wax rings — the waterproof sealants embedded in the toilet's base to keep wastewater and foul smell out. As a result, the wax sealants suffer dilapidation and break down, causing the water to accumulate around the privy's base. In such cases, it's best to seek help from a plumbing company to ensure you are on the right track. Plus, they'll clear out the drain pipes and replace the seals if broken, enabling you to get back to business quickly.
The flapper is flailing about
Occasionally, the reason for your toilet is springing a leak may have nothing to do with poor installation, faulty equipment, or a run-down assembly. Instead, what's at play is that the flapper has moved out of its position and is now wreaking havoc. Ideally, this value should remain stuck to the toilet tank's bottom until the lever has been pulled. Failing to do so will result in an incessant water trickle, sure to force anyone to their wits' ends.
Push down the flush handle to check if it's limp. If so, you need to reposition the flapper. Remove the water tank's lid and scrutinize the assembly. Chances are the chain has skidded down, and the flapper is no longer connected to the flush lever. Restore the settings by putting up the chain, leaving some slack space for the flapper, and flushing. If it still leaks, it's your cue to get a new valve since, despite its good condition, the old flapper is failing to move in tandem with the water flow. But don't forget about the flapper after the issue gets resolved; it's a good practice to replace it every three years.