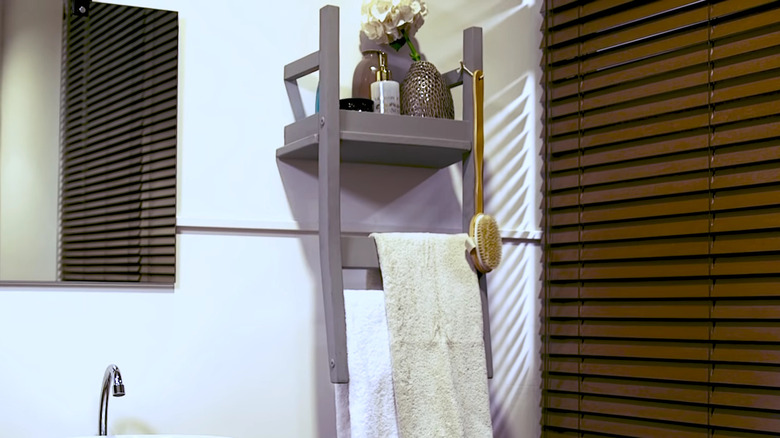
How To Use An Old Chair To Create Extra Much Needed Towel Storage
See that old wooden chair in the corner? It's time for the trash — or is it? If you're looking to add extra storage to your bathroom space, then this old piece of junk may actually come in pretty handy and can help you create a repurposed chair wall shelf — not to mention that it also looks pretty unique. Alongside boasting some pretty funky looks and adding an individualistic flair to your bathroom, it prevents you from splashing your cash on a store-bought shelf or a larger unit. This is perfect if you're looking to upgrade your home's interior on a budget, as you can keep costs down and use tools that you already have. You could even use this to transform your laundry room space.
Likewise, you have the bonus of choosing the design and customizing it how you like, so you can refine this DIY to suit your needs and work with any size wall space. All you'll need is your a wooden chair, clear sealant, level, drill and a drill bit, cloth, degreaser, screwdriver, water-based paint, such as this matte white acrylic paint from Walmart for $7.27, a water-filled tray, screws and wall plugs, painters tape, a jigsaw saw, gloves, earmuffs, a respirator, a plunge router attachment, and something to sand it with. While white paint is a solid option, pick whatever color you like to suit the interior of your bathroom.
Slice your chair to size
To replicate this DIY, start by slicing your chair with your saw down the middle of the seat horizontally, leaving the area of your seat where you'd normally lean your back. Chop off a portion of the legs, too. Once this is done, use your ruler and pen to plan where your holes will go in your chair so you can later secure it to the wall. Take your drill and insert these holes on one of the flat-facing legs, just underneath the seat. The holes should be in the shape of a screw. Now is a good time to take your painter's tape and use it to mark down where your screw holes are on the legs, so you can mark out where you want your shelf to sit on the wall. When you decide, simply drill and pre-insert some screws for it to hang off.
Next, you'll want to take your sanding gear and sand your piece before going in with your cloth and degreaser. Make sure to take your time with both of these steps to cover the whole seat. For your finishing touches, simply take your paint and paintbrush and apply a generous coating on the whole thing before leaving it to dry. When you're ready, and it's all dry, all you need to do is add some clear sealant, pick it up, and add it to the screws that you put in your wall with the seat facing down.
Add some extra functionality
Once you hang up your shelf in your bathroom, add your items, for example, mini plants, photos, decorative pieces, or baskets with toiletries. How you decorate it will be up to you. However, there are also some ways you can add some extra functionality. For example, you could add extra hooks on the side of the wood, allowing you to hang items such as towels and bathrobes, or insert some extra rails. Screw-in hooks are available from Walmart for $4.98 or some steel hooks for $1.98, but there are plenty of other options, so pick what works best for your unit. Likewise, rather than using one chair, double up and attach two together for double the storage, or even experiment with a stool instead.
While you could hang it upside down, there is also the option to have it facing up as if your chair is suspended on your wall or try utilizing where your back normally sits and use it to hang items. If it has a flat top, it may also work as a mini-shelf. If not, you can always add your own. So, what makes this hack so effective? Well, it all boils down to the design, with the seat acting as a nifty shelf while the other parts allow you to hang things. Now, all that's left to do is try out this upcycled shelving idea around your home and see how you can make it work for you.

