Smart Tips For Preventing Your Exterior Doors From Freezing Shut This Winter

We may receive a commission on purchases made from links.
When winter wraps its chilly fingers around your home, one of the most vexing issues you may encounter is discovering that your exterior doors have decided to play it cool — literally — by freezing shut. This situation is more than just a minor inconvenience; it can quickly become a safety hazard, especially in emergencies when every second counts. The issue often stems from the doors' construction and the conditions they face. Sliding patio doors, especially those with single-glazing, are highly prone to freezing shut. The science behind it is straightforward: Warm indoor air meets the cold, leading to condensation on the glass surfaces. This moisture, feeling quite at home on your door's glass, eventually makes its way down into the tracks and later welds to the door when the temperature takes a nosedive. The metal frame, too, can become an unwitting participant in this frosty embrace, freezing solidly to the tracks.
However, fear not, as there are proactive steps you can take to ward off this icy predicament, ensuring that your doors remain welcoming and functional, even when the temperatures drop to their lowest. A few savvy maintenance strategies can make a world of difference. Regularly removing snow, sealing any gaps with weather stripping, and ensuring your doors are properly insulated are just the tip of the iceberg. These simple acts of care can keep the cold at bay and your doors free from ice's frosty clutches.
Remove snow and use heated mats
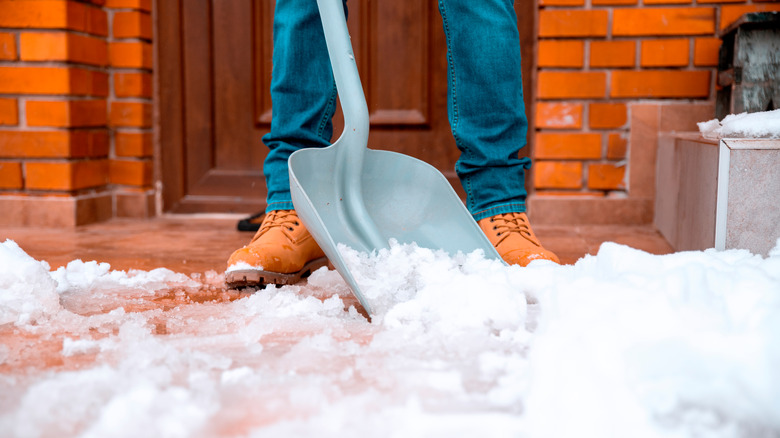
To prevent your patio door from freezing, you first need to eliminate the source of potential ice formation — snow. One direct and effective method is to use a shovel. Make sure you clear a wide enough path and move the snow far from the door to prevent it from drifting back. You can also try throwing salt on the snow around the door area. Salt lowers the freezing point of water, causing the snow and ice to melt. It's a simple yet powerful solution, but remember to use it sparingly to avoid damage to your patio surface and surrounding vegetation.
Another innovative solution is using a heated mat. These products are designed to melt snow and ice upon contact, ensuring the area around your patio door remains clear and safe. They're usually electrically powered and generate sufficient heat, preventing accumulation and the subsequent freezing that can jam your door. Furthermore, you can place them directly outside your patio door. Two reliable brands of heated mats you can find on Amazon are HeatTrak Heated Snow Melting Mat and Cozy Products Ice-Away Heated Mat. Both brands provide a range of eco-friendly, low-consumption heated floor mats that ensure safety and comfort outside your patio door.
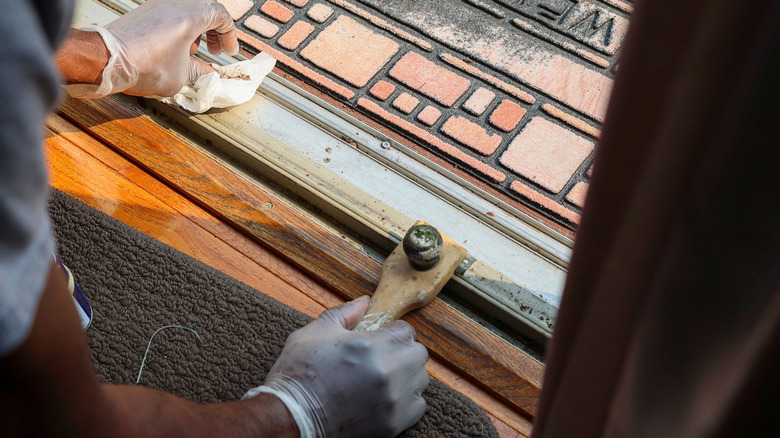
Doors should be well-sealed
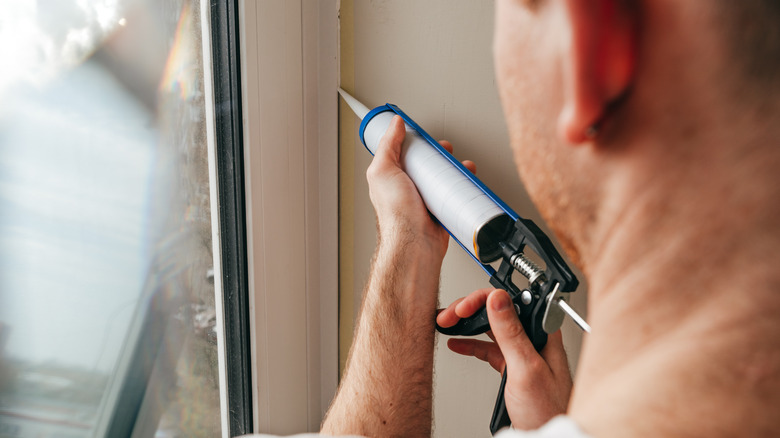
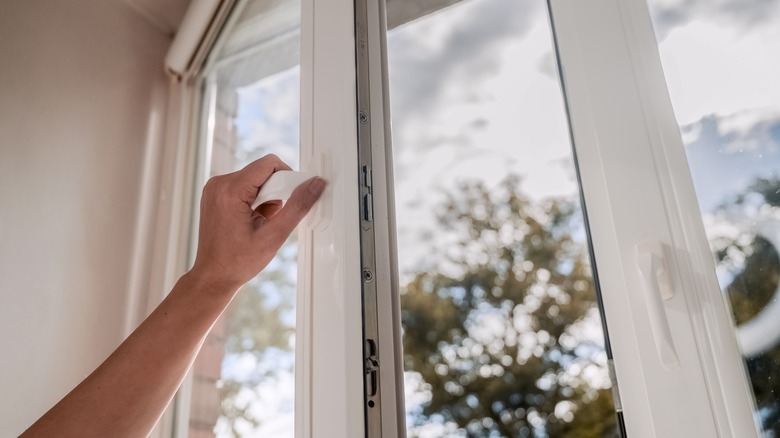
Unsealed doors are like open invitations for cold air and moisture to enter, setting the stage for water to collect and freeze, especially around the door's edges. Sealing the door also helps to boost your home's insulation. You keep warm air in and cold air out, effectively reducing heat loss, which can lead to lower energy bills and a cozier living environment. To start, take a close look at the perimeter of your door. You're checking for any visible gaps or cracks where drafts can sneak through and moisture can accumulate. You can use silicone caulk to seal these trouble spots. Silicone stands out for its durability and flexibility, and many products have waterproofing qualities, making it an ideal choice for combating moisture penetration. Its ability to adhere to various surfaces ensures a tight seal, blocking any entry points for cold air and moisture. Apply the caulk along any gaps or cracks, smoothing it out to ensure complete coverage.
In some cases, the best solution might be to replace the door entirely. A new, properly fitted door can dramatically improve insulation, eliminating gaps and ensuring a snug fit within the door frame. All in all, sealing your doors works wonders because it tackles the root cause of freezing — moisture penetration and cold drafts.
Install or replace weather stripping
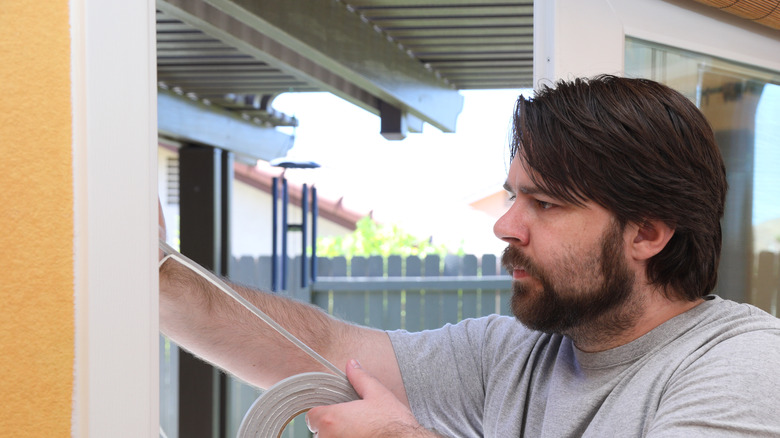
Installing or replacing weather stripping around your doors is a game-changer when it comes to winter-proofing your home. If you're not familiar with weather stripping, it's essentially a material used to seal openings around doors (and windows) to prevent cold air from entering and warm air from escaping. So, how do you go about this? First, assess the current state of the weather stripping around your doors. If you notice it's worn out, missing, or damaged, it's time for a replacement. Choosing the right type of weather stripping is crucial. You'll find various materials available, including foam, rubber, vinyl, and metal. Each has its pros and cons, but all aim to do the same thing: seal off air leaks.
To install new weather stripping, start by cleaning the area where it will be applied. Remove any old weather stripping and adhesive residue to ensure a clean surface. Measure the perimeter of your door to determine how much weather stripping you'll need, then cut the stripping to length. Most types come with a self-adhesive back, making them easy to stick into place around the top and sides of the door frame. For the bottom, you might use a door sweep, which attaches directly to the bottom edge of the door. But why does this work so effectively? Similarly to caulking, it's all about stopping air and moisture exchange. By sealing the gaps around your door, you minimize the cold air coming in and the warm air going out.
Regulate the humidity indoors
As mentioned earlier, too much moisture in your house means you'll see more condensation on your windows and doors. Here's what you can do: Think about using a dehumidifier, especially in damp areas like your basement, kitchen, or bathrooms. These gadgets are great at pulling excess water out of the air, helping to keep things dry and comfortable. During the winter, aim to keep your indoor humidity levels somewhere between 30% and 50%. This is the sweet spot that minimizes condensation without making the air feel too dry.
Ventilation is your next best friend. Use those exhaust fans in your bathroom and kitchen to shoot the moist air straight outside. And here's a little trick: Crack open a window for a few minutes each day, especially when the outside temperature is just above freezing. This helps to swap out humid indoor air for drier outdoor air without cooling down your house too much. Another tip? Keep an eye on your houseplants. While they're great for your home's vibe and air quality, some plants can add moisture to the air. If you've got a lot of green friends, consider moving them to a well-ventilated area or just keeping a closer watch on how much water you're giving them.
Install a door sweep to block cold air
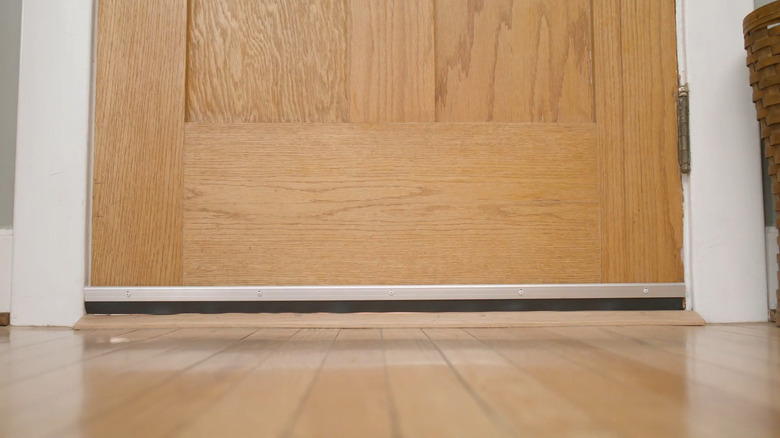
Door sweeps are an ingenious, yet often overlooked, solution for keeping your home snug and your doors free from the icy grip of winter. They are typically made from materials like rubber, vinyl, or even a row of dense bristles; they create a tight seal against the threshold of your door, which attaches to the bottom of your door, serving as a frontline defense against the cold drafts that try to sneak into your home. By keeping the area around your door dry and warmer, door sweeps reduce the risk of water collecting and freezing at the door's base.
Innovations in door sweep design have led to models that cater to specific needs, including adjustable heights for different gap sizes and detachable models for seasonal use. Among the standout models, the MD Building Products Triple Fin Door Sweep stands out for its unique triple-fin design that offers superior draft protection. This model is crafted from premium vinyl, providing an exceptional seal that keeps out cold air, dust, and insects, making it an excellent choice for energy efficiency. The triple fins increase the sweep's adaptability to uneven surfaces, ensuring a tight fit. Another impressive option is the Frost King Slide-On Door Sweep. This model is designed for easy installation, eliminating the need for screws or nails, making it a great choice for those seeking a hassle-free way to improve their home's insulation.
Use a draft stopper along the bottom of the door
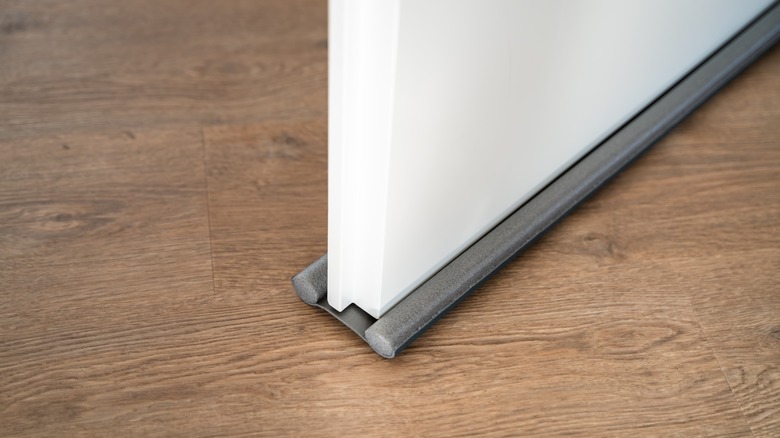
When winter rolls around, one smart move you can make to keep your home cozy and your doors functioning smoothly is to use a draft stopper. Unlike its cousin, the door sweep — which attaches directly to the door itself – a draft stopper sits snugly at the base of your door on the inside. These stoppers come in various materials like fabric filled with insulating substances such as sand or rice. Some are even made with specific thermal properties to further enhance their insulation capability. The design is simple but effective. Often resembling a long, thin pillow or tube, draft stoppers are placed directly in front of the door's bottom edge on the interior side, bridging the gap between the door and the floor.
The Twin Draft Guard offers double-sided insulation, ensuring that cold air is blocked not only from entering but also from escaping under the door. It's adjustable to fit any door size while providing an airtight seal. On the other hand, the MAGZO brand specializes in creating efficient insulation solutions, and their door draft stopper is no exception. Designed with durability and versatility in mind, the MAGZO Door Draft Stopper is typically made from heavy-duty materials such as silicone or fabric, filled with insulating materials to block drafts effectively.
Let in natural sunlight

Keeping your drapes, shutters or blinds open during the day may sound like a simple task, but there's some solid science behind why this works. Here's the deal: Sunlight is a powerful natural heat source. Even in the coldest months, when the sun makes an appearance, its rays can significantly warm up your home's interior. By keeping your drapes and blinds open, you're essentially inviting that free heat into your home. This warmth helps to raise the temperature of your doors and their immediate surroundings, reducing the likelihood of condensation forming. And as we know, where there's no condensation, there's no ice to freeze your doors shut.
But here's a bit more to consider: Sunlight doesn't just warm up your space; it also helps to regulate humidity levels indoors. Natural light can decrease the dampness in your home. This may help minimize the overall moisture available to condense and freeze at your doors. It's a double whammy against winter's icy grip. Moreover, leveraging sunlight for warmth is a smart move for your energy bills. By allowing the sun to contribute to your home's heating during the day, you might find yourself needing less from your heating system, leading to some savings on energy costs. Plus, there's the added bonus of a brighter, more cheerful space during those short winter days.
Remove dirt piling up in the tracks of the door
Over time, it's common for dirt, leaves, and various forms of debris to accumulate in these tracks. This accumulation doesn't just hinder the smooth operation of your door; it also traps moisture. When the temperature drops, this moisture freezes, effectively sealing your door shut and making it a challenge to open. So, how do you keep these tracks clean and your door sliding smoothly, no matter the weather? First off, start with a brush or a vacuum cleaner. This initial step helps remove the larger particles and loose dirt, making the following steps more effective.
Once you've cleared out the larger debris, it's time to get a bit more detailed in your cleaning approach. A mixture of warm water and a gentle cleaning solution can work wonders here. Dip a soft cloth or sponge into this mixture, ensuring it's not dripping wet but damp enough to pick up any remaining dirt. Gently scrub the tracks with this damp cloth, paying close attention to the corners and any nooks where dirt might be hiding. For those stubborn spots where grime seems to have made a permanent home, a soft-bristled brush or old toothbrush can be your best friend. Scrub these areas gently to loosen and remove the buildup. Once you've dislodged and wiped away the dirt, give the tracks one final pass with a dry cloth to remove any leftover moisture.
Warm the area by installing a baseboard heater near the door
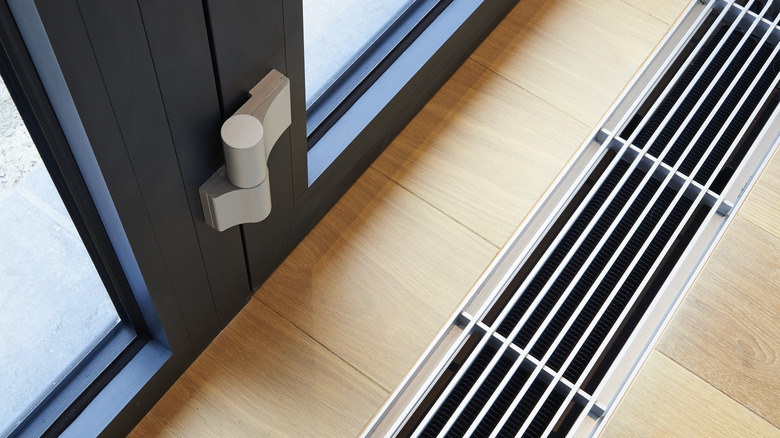
Baseboard heaters, those sleek, low-profile units you often see hugging the wall at floor level, are pretty efficient at zapping the cold. They work by heating the air right where it's most needed — at ground level, where cold air loves to loiter and cause trouble, like freezing your doors. Plus, they're an energy-efficient way to target heat where it's needed most, potentially saving you on heating bills by not having to crank up the thermostat to keep your entire house warm. Now, there are mainly two types of baseboard heaters: electric and hydronic. Electric models heat up quickly and are simpler to install, but they might cost more to operate than their hydronic cousins, which use heated water to warm up a space more evenly and efficiently. Depending on your needs and the setup of your home, one might suit you better than the other. Installing baseboard heaters can be a DIY project if you're handy and familiar with electrical systems, especially for electric heaters. However, for peace of mind and safety, you can get a professional to do the job.
Brands like Stelpro and Dimplex are known for their quality and offer a range of options to fit different spaces and budgets. Before making a purchase, consider the size of the area you need to heat and any specific features you might want, like a thermostat or energy-saving settings.