The Hidden Function Of A Handsaw Handle Will Save You Time On Your Next DIY

Most of the time you cut a board with a crosscut saw, you'll find yourself cutting at either a 90° or 45° angle to the edge of the board. Guides for marking 90° and 45° angles are built into common tools like speed squares and combination squares. But because these cuts are so ubiquitous, it's not surprising when you can't find your speed square when you need it. You have, after all, used it for every cut you've made, all day long. It's probably wherever you made that last cut, or perhaps sealed up in the wall you just built. But never fear! Many (maybe even most) crosscut handsaws and backsaws have the guides you need built in.
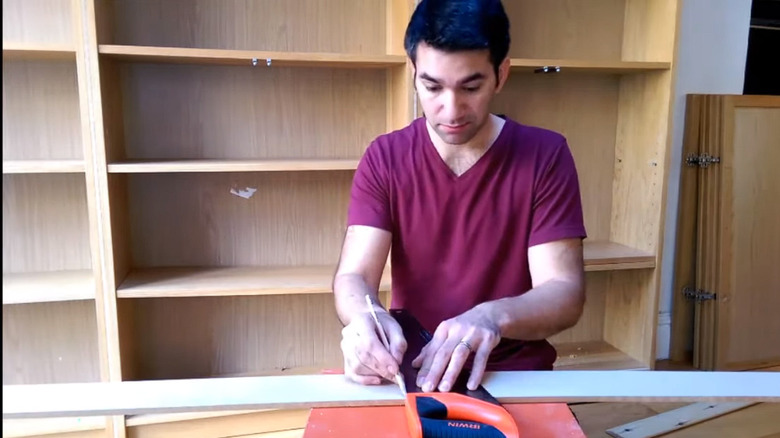
The way a speed square works couldn't be simpler. You simply hook the lip over a straight edge of the board you're cutting and use either the side that's at a right angle or a 45° angle to mark your cut. The handsaw handle works exactly the same way: The forward part of the handle has a section that's at a perfect right angle to the back of the saw blade and another portion that's at a 45° angle. The handle itself is wider than the blade so, like the lip on a speed square, you can hook it over the edge of your board and draw your pencil line next to the back of the blade.
Cutting at the right... err, correct... angle
That's very handy, of course, but your handsaw has a couple of other tricks up its sleeve thanks to these angle guides. The first makes use of the fact that you're probably using a crosscut saw with teeth designed specifically to cut across the grain of a wood board. Traditionally, crosscut saw teeth are sharpened and angled in a way that causes them to cut more aggressively. This is because cutting across the grain is considerably more difficult than cutting with the grain. For any saw more than a few years old, it's likely that the crosscut tooth pattern is designed to be used at an optimal angle of 45°. You can use the 45° bevel in your handsaw handle as a kind of visual guide to getting this angle right. Just remember that the angle is measured against the back of the saw, not against the toothy side of the blade.
More recent general purpose blades are designed to perform well at both rip cuts and crosscutting, but the general guidance is to maintain the 45° angle for cutting across grain. This makes your cuts more accurate, more efficient, and less likely to produce splintering and tear-out. Keep in mind that the 45° angle on the saw handle is a visual guide. You can use it as the starting point and adjust to a shallower angle for more precise cuts or a steeper angle (60° or so) for faster rip cuts.
Finding centers and getting clean cuts
There's a common trick in the building trades for finding the center of a circle using a speed square, combination square, or a try square that has a 45° angle guide. (Not all try squares feature a 45° guide; when they do it's where the two legs of the square meet.) You can replace the square in this trick with your handsaw as well. It works like this: place your circle inside a large construction square or any other suitable object with a true right angle. The circle should touch both of the edges that are 90° to each other. Then place your saw so that it runs through the corner of the square at a 45° angle. Mark a line along the edge from this corner across the middle of your circular object. Then rotate the circle and repeat the process. Your lines will cross at the center of the circle. It's often a good idea to scribe a third line as well to double-check the center point, since it's not unusual for a piece to slip out of place while you're marking.
There are other applications, of course. You can, for example, use a saw in place of a speed square for the viral TikTok vinyl cutting hack. These tricks are so handy that you might choose to replace the Japanese-style pull saw in our list of tools worth investing in to start woodworking at home with a standard crosscut handsaw.