These Common Mistakes Are Limiting Your Potato Harvest
All french fry lovers owe more than just the Declaration of Independence to Thomas Jefferson. If it weren't for him serving potatoes in the "French manner" in the White House, this starchy crop would still be languishing as animal food, depriving you of mashed potatoes, hash browns, tater tots, and more. Available in brown, red, purple, and white flesh colors and a slew of different textures, ample potato varieties support your desire to bake, scallop, or stew them. The diversity doesn't stop there; it's also reflected in the methods you can use to grow potatoes. Depending on space constraints, food preferences, time and labor commitments, and budget, you can plant taters in gardens, containers, bags, compost-filled old tires, or even laundry baskets. However, these choices will come to naught if you don't follow the "right plant, right place" maxim.
Potatoes may be a winter/early spring crop, but make no mistake, they love their sun, demanding over 6 hours of it every day. Although they tolerate light frosts, withstanding temperatures below 30 degrees Fahrenheit is not their forte. In contrast to most vegetables, they prefer growing in well-drained, acidic soils rich in organic content. So, if your yard has dense, compact soil, plant them in raised beds; otherwise, they'll rot from sitting on wet substrates. After finalizing your growing site, follow the list below to avoid making the common mistakes that will limit your potato harvest.
Neglecting crop rotation
Being genetically related, all Nightshade family members are susceptible to the same pests, weeds, and diseases. Unfortunately, if left untreated, these persist and accumulate in the soil, harming your new annuals. Besides, plants of the same family love a similar array of nutrients. So, avoid planting potatoes in the same place you've grown their brethren — such as tomatoes, peppers, eggplants, petunias, tomatillos, and even other potatoes — in the past 3 to 4 years. But if space is premium, at the very least rotate these vegetable crops. For instance, follow up tomatoes with potatoes, instead of planting potatoes over and over again.
Equally, avoid planting potatoes in areas previously covered in grass, as it plays host to insects like white grubs and wireworms that may eat your potatoes. Instead, grow short-duration cover crops, like winter rye, buckwheat, or clover, before establishing your potato patch. This will improve the soil's structure, quality, moisture retention, and organic matter levels.
Ignoring soil prep
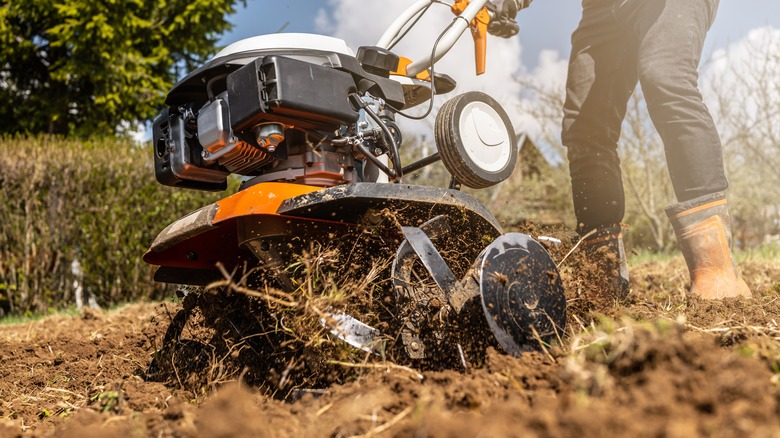
It's easy to lose sight of soil preparation in your zealousness to plant potatoes, but it's one mistake you can't afford to make. High water permeability, drainage, and aeration are necessary for a bountiful potato harvest. To ensure that, loosen up the soil down to around 12 inches. Use a spike-toothed harrow to break apart soil clumps in heavily compacted soils. If the patch is considerably large, use a disk harrow to till the area. This will ensure the taters have sufficient breathing space, leading to greater yields. Plus, it'll take care of any tomato hornworms roaming in the soil that may affect the potatoes.
Don't go overboard, as over-tilling can cause the soil to clod up right after it rains, causing suffocation and premature demise of newly planted seed potatoes. Also, don't forget to level the soil before planting, but, fortunately, there's no need to be unnecessarily nit-picky with it either. Establish potatoes in raised beds if your garden has clay soil, and avoid planting altogether in silt-heavy soils, as they result in poorly-shaped potatoes. If drainage issues persist, build ditches or switch to containers.
Using the wrong soil amendments
Soil tests may feel inconvenient, but they are necessary to maintain the right pH and nutrient levels. While potatoes can grow in diverse soils, they give their best shot in slightly acidic soils, with pH levels hovering between 5.3 and 6.0. Naturally, higher acidity is a problem, and most people choose to treat it with lime — a huge fallacy. Besides increasing alkalinity, lime raises the potatoes' susceptibility to scab disease, especially in red and white potato varieties. Although scabs don't lower the harvest's quality, they make it unsightly. Under such circumstances, it's better to mix wood ash into the soil to reduce acidity. But if you insist on using lime, spread it in the fall. Further, favor growing varieties like Russet Burbank, as they exhibit greater scab resistance.
Also, avoid amending the soil with fresh manure, except maybe in the fall, because it also makes the crops vulnerable to scab. To raise the organic content, plow a legume cover crop into the ground. It'll further diminish your fertilization requirements. Alternatively, you can use sludge, provided you know its NPK mix. Some experts even propose a 5:4:1 mix of soil, compost, and coconut coir for growing taters.
Growing store-bought or garden-saved potatoes
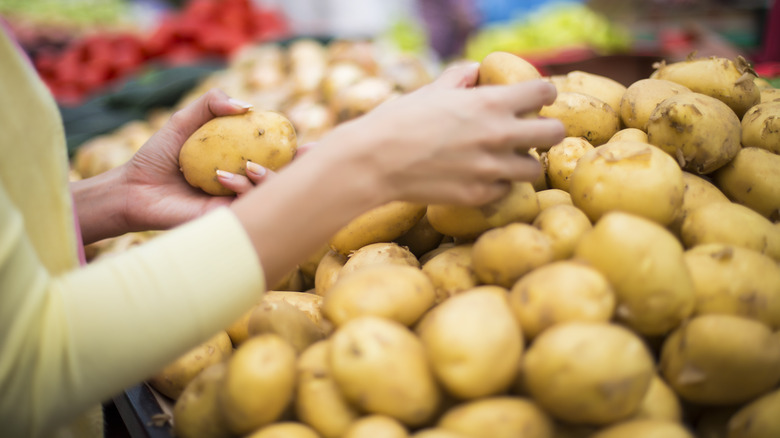
History is a remarkable teacher, and Ireland's Great Famine (1845-1852) has one powerful lesson that all potato growers must learn: Use disease-free, certified seeds. Unfortunately, many gardeners ignore it because commercial seed potatoes don't produce sufficient tubers. So, they buy potato spuds off the grocery shelf and plant them in their vegetable patch. But when it's time for harvesting, they're left wringing their hands fretfully. The reason? Most store-bought potatoes are treated with sprout inhibitors, which, as the name suggests, are chemicals that prevent them from growing new tubers. This aids in easy transportation and improves their shelf life. Besides, some varieties may be sprayed with pesticides like imidacloprid or chlorpropham — things you wouldn't want in your chemical-free garden.
Alternatively, some save their previous year's harvest to grow new potatoes. This isn't ideal because it encourages viruses and fungal spores to take home in your yard, severely damaging the crop. Thus, your best call is to buy certified seeds from reputed distributors or garden centers, as they assure better disease resistance and varietal purity, saving you a bucket load of money in pest management. However, you can make an exception for heirloom varieties, as certified versions are hard to come by.
Choosing the wrong seed potatoes
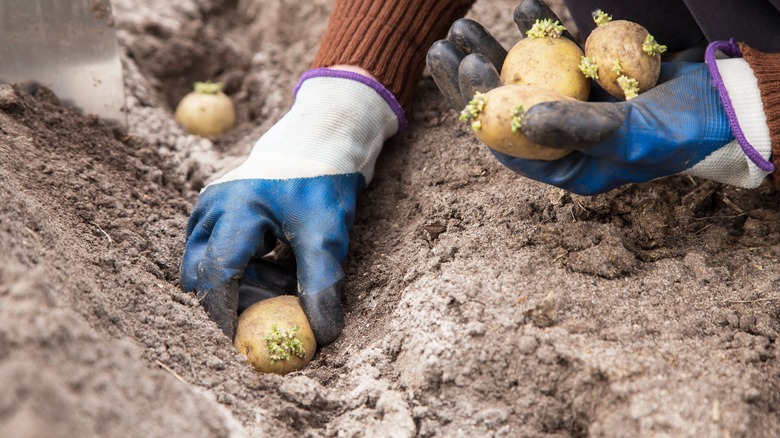
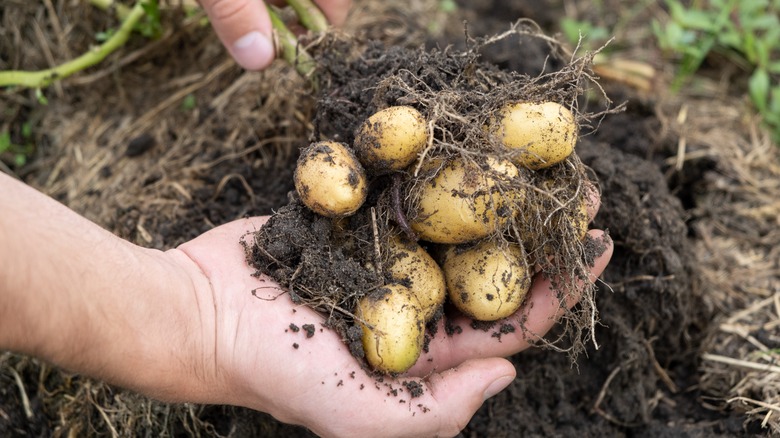
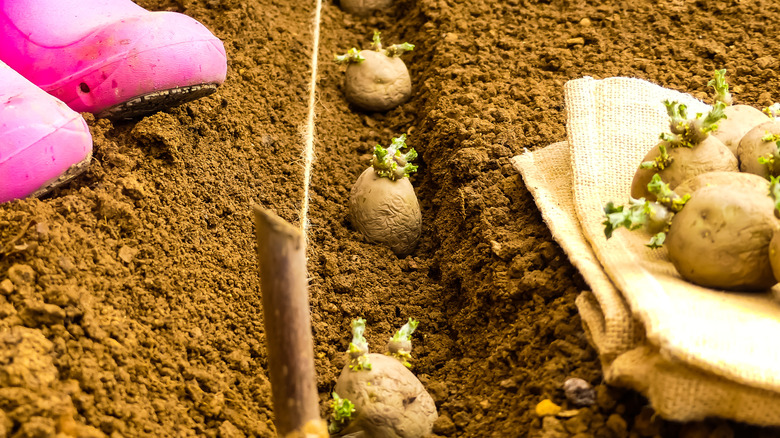
Potatoes are vegetatively reproduced, meaning they grow shoots from the "eyes" present on the tubers, not from their true seeds. The seeds usually stray from their varietal characteristics, producing a questionable harvest. Not to mention, they don't get sufficient time to grow in colder climates. However, the area where most potato enthusiasts falter is choosing the right seed potato. Ideally, you should be looking for small, blocky tubers about 1 to 1 ¼-inch wide and weighing around 2 ounces (like an egg). Moreover, they should have at least one eye, although two to three eyes work better if they don't look spindly. Remove all others, or you'll end up with smaller potatoes, albeit in larger sums.
Understandably, not all seed potatoes can be this small. In such scenarios, cut the bigger seed potatoes into 1 ¼-inch chunks with a sharp knife, ensuring all pieces have at least one to two eyes. But if it lacks eyes on one side, plant it whole. Allow the cut pieces to dry and scab over at room temperature (60 to 70 degrees Fahrenheit) in a dark, intensely humid (over 90%) space for three to four days. Keep the cuts to a minimum so that tubers don't redirect all their energy from growth to healing. If you lack storage space, plant them directly into the soil, but be aware that they're at a higher risk for rot.
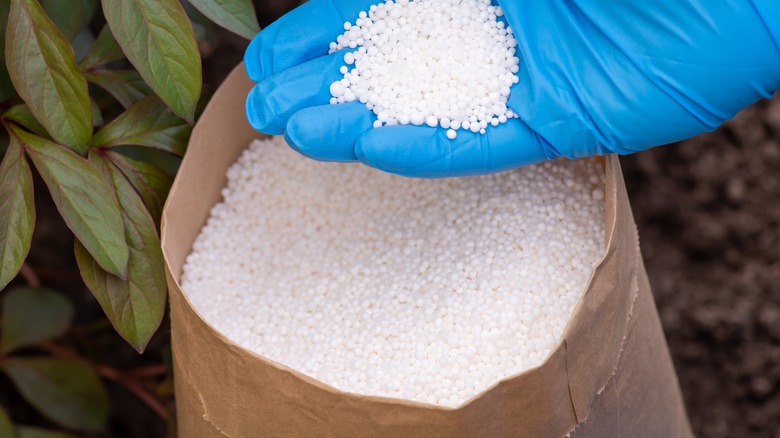
Not dusting seeds with sulfur
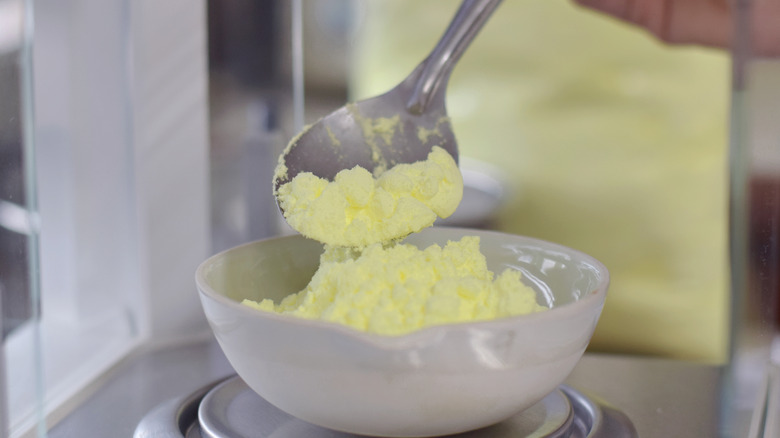
Usually, it's safe to plant cut pieces directly in the soil in late spring, since it'll be warm and moist, reducing the chances of a rot infection. But it may not hold for varieties that must be planted early into the growth season. This is because the soil is both wet and cool in early spring, which feels pleasant to insects and fungal spores. Eventually, they may walk into and feed on the still-healing cut potatoes, hurting the final produce. To prevent the cut pieces from becoming seeds of disappointment, treat them with elemental sulfur. You can buy it from most garden centers and drug stores. Plus, it's au naturale and available at an affordable price point.
Start by adding 1 pound of the chunks to a paper bag. Next, mix in 2 tablespoons of sulfur to the potatoes. Seal and shake the bag to ensure sulfur coats all the pieces thoroughly. Remember to use rubber gloves while handling and planting the sulfur-coated seed potatoes and dispose of them later. If any sulfur residue remains in the bag, add it to compost. While it's still unclear how sulfur works, the National Pesticide Information Center believes it kills insects and fungi on contact by penetrating their bodies and impairing their functioning.
Missing out on the right time for planting
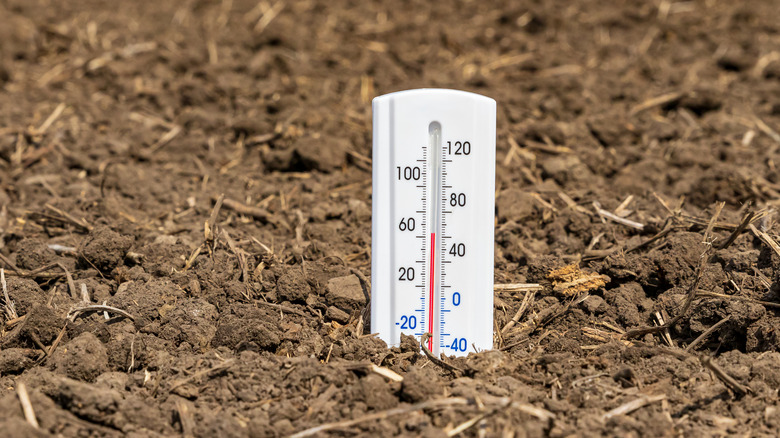
More than the date, the weather and soil temperature decide the right planting time. As mentioned, potatoes are only half cold-hardy, so surprise late spring frosts or cold drafts don't bode well for their health. Not to mention, the damp, cool soil may cause the tuber to decay.
As a general rule of (green) thumb, it's best to plant potatoes only after the soil temperatures exceed 45 degrees Fahrenheit (a soil thermometer can tell you that). However, cool climate dwellers may plant a little early when the soil temperature hits 40 degrees Fahrenheit. Conversely, in particularly warmer zones, waiting until the substrate is between 60 and 65 degrees Fahrenheit is best. If you're still unsure, look online for the most suitable time. No matter what you choose, plant no sooner than two weeks before the average last frost date.
Additionally, potatoes most thrive when daytime temperatures remain between 65 and 80 degrees Fahrenheit, while nighttime temperatures oscillate between 55 and 65 degrees Fahrenheit, so plan your schedule accordingly. Also, pay attention to the potato variety, as late-season cultivars are usually sown at the culmination of spring. Don't delay planting to after the summer solstice, at which time sun exposure reduces growth.
Not chitting the potatoes
Years ago, many old-timers kept track of the blooming of dandelions to mark their potato planting dates. But you can spare yourself some headache (especially if you're worried about a late frost playing spoilsport) by pipping, green sprouting, or chitting your potatoes. At its heart, chitting is simply letting the potatoes be until they begin sprouting, which lasts roughly 4 to 6 weeks.
Naturally, piping the tubers before transplanting them into your yard is the easiest way out of this predicament. To do so, spread the seed potatoes in a singular line on the windowsill or any other light-exposed area. You can also lay them outdoors if you're positive there are no chances of the temperature dipping below freeze levels. Although exposing the spuds to high humidity levels paired with 70 degrees Fahrenheit temperature is optimal, it may not always be possible.
Nevertheless, you must rotate the seed potatoes from time to time to inspire even sprouting. Once they sprout an inch-long, thick growth, know your seeds are safe for planting. Don't allow the sprouts to grow too long, as they might break during the moving and planting. Alternatively, choose maincrop varieties that can do without chitting, given their long growth period.
Crowding out the potato bed
More is less in potato patches — literally! Packing a bunch of potatoes together like sardines will not get you a generous harvest. Instead, it'll only result in smaller taters. When you make the mistake of planting the potatoes too close, you make them compete for essential nutrients. Since establishing a clear winner is nigh impossible, all the seed potatoes look stunted, deformed, and spindly.
To keep your poatoes happy, avoid overcrowding their living quarters. Although the optimal spacing requirements heavily rely on the potato variety, desired potato size, soil type, moisture availability, and soil fertility, there are some general rules that you can follow. For starters, most cultivars can be reliably spaced 8 to 12 inches apart. As for the rows, a 30- to 36-inch-wide distance is optimal. Since distance is key, plant closer (say 9 inches apart) if you wish to harvest new (smaller) potatoes. Raise the distance to around 20 inches to achieve majestic potatoes that can survive in storage. Similarly, go 15 inches wide for mid and late-season varieties. However, don't go overboard with the Yukon Gold variety, as it is vulnerable to suffering from hollow heart — a condition where the tuber develops a star-shaped gap in its center.
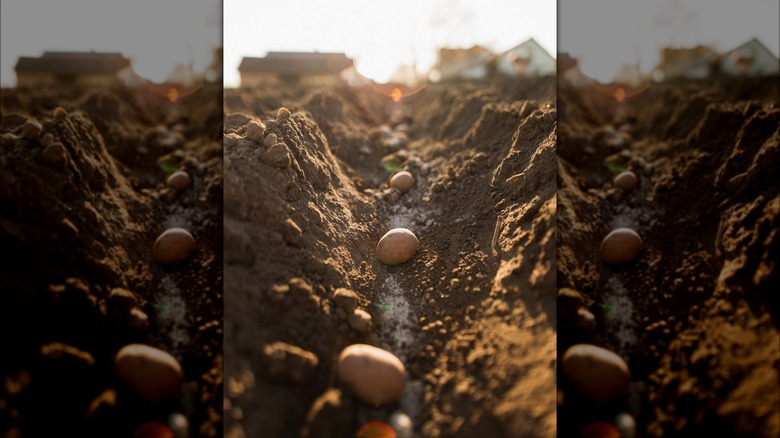
Planting at the wrong depth
Another cardinal sin that many gardeners commit is to plant their potatoes too shallow. This is a concern because, as they grow, they pop up on the surface sooner, despite not being fully mature. The resultant sun exposure prompts the tuber to produce chlorophyll, turning its skin green. However, the greening of potatoes signals the creation of solanine, a toxic substance that can cause death in extreme cases (via North Dakota State University). While this works well to keep insects at bay, it obviously is not good for humans.
Conversely, placing potatoes too deep shows poor results. Sitting in wet, cool soils for extended periods causes the seed tubers to rot and die prematurely. In benign cases, they may simply take too much time to begin sprouting. Regardless of the outcome, it's best to dig 6- to 8-inch-deep trenches, especially for late-season varieties; the rest can make do with 3- to 5-inch-deep furrows. Ensure the eyes face up, as they're the source of new shoots. Also, cover them back with 4 inches of soil. Water if the soil feels dry.
Under and overwatering
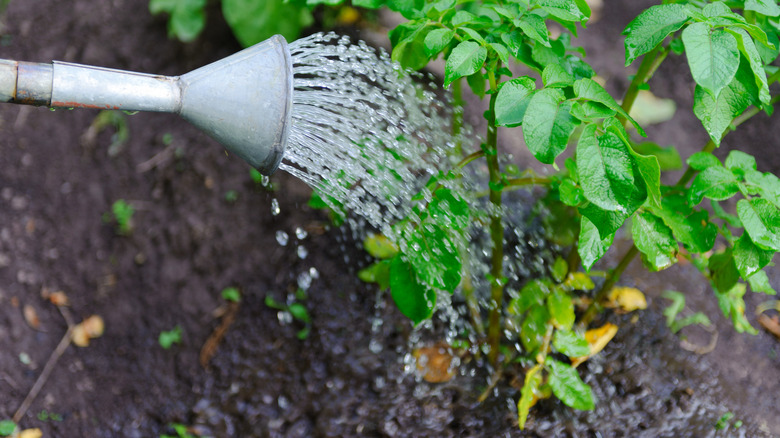
Thirsty soils create small potatoes, whereas waterlogged mediums rot them, so striking the right water balance is pivotal. This is tricky since these starchy delights keep changing their water demands depending on their growth stage, weather conditions, and soil texture. For starters, taters mostly rely on spring rains or pre-planting irrigation to set new tubers, which works spectacularly for disease management. But their water needs soar once the tubers begin bulking. Underwatering at this stage reduces the size of the potato, and correcting your irrigation practices after stressing the plants aggravates the situation, causing disorders like cracks and blackheart. But if your veggies power through their growth spurts, their water requirements will eventually reduce as the canopy dies to make way for harvest. Overwatering now leaches out nutrients, especially nitrogen, diminishing crop quality.
So, how should you go about watering your potatoes? Remember, spuds expect their soils to remain at least 60% to 80% moist (a combination of irrigation and rainfall) throughout their growth season (via Montana State University). Once the foliage emerges, water around .15 inch weekly. Raise the irrigation rates to 1.75 inches when the foliage overshadows the ground, and stop watering completely a week or two before harvest or when the vines die. If dry conditions prevail or your soils are sandy, increase the soaking frequency to two to three times a week.
Depriving potatoes of the right nutrients
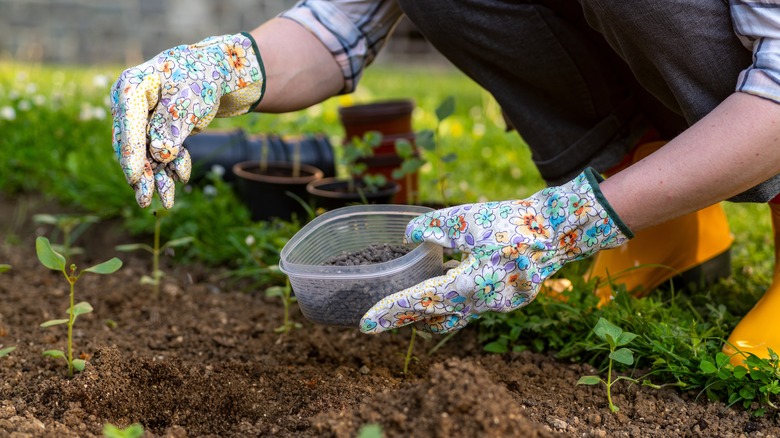
Potato plants are heavy feeders, requiring multiple trace elements, as well as the major three (NPK: nitrogen, phosphorus, and potassium), to produce quality crops. They lose a portion of their nutrients to the harvested tubers, necessitating replacement. Although gardeners can apply fertilizer, they're bound to make mistakes. Common examples include providing excessive nitrogen or potassium, hampering potato maturity, or softening them by indirectly hindering magnesium intake. This may push some into treating the soil with Epsom salt, thinking it's a magnesium deficiency. So, getting a soil test is imperative, especially in the first planting year.
Moreover, many prefer broadcasting the fertilizer by hand and then raking it into the topsoil. While this works, it isn't as effective as broadcasting and banding the fertilizer in a 1:1 ratio. In banding, fertilizers are thinly lined 3 inches from the seeds and 1 inch underneath. The reason this approach is better is because fertilizers desiccate and kill seed potatoes when placed on top. Additionally, avoid using fertilizer containing weed killer in your patch, as it'll destroy it.
Not hilling potatoes
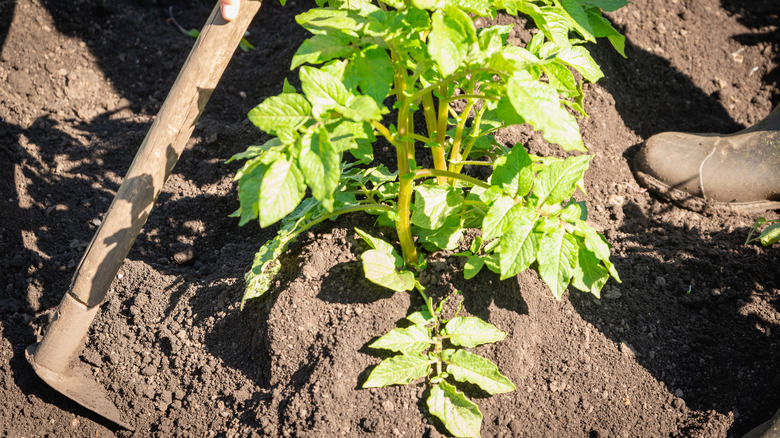
Covering your soil post-planting and letting it grow as is will not get you tasty potatoes. These "apples of love" must remain underground to cultivate their flavor, especially when sun exposure will likely stimulate solanine production, turning them green and bitterly toxic. To achieve this, hill your spuds — not once, but every time they start peeking through the soil. This also augurs well for stolons (responsible for producing tubers), which multiply rapidly the longer they stay below ground. Since hilling involves covering the top shoot growth (not leaves) with soil, it also lends the tubers winter and frost protection. As a bonus, it keeps blight at bay, as the leaf-colonizing fungal spores are prevented from dripping deep underground. Young weeds, too, get eliminated in the process.
Granted, hilling is easiest in trenches since you simply rake back the soil you dug out when planting. But it's equally doable in raised beds and containers, as long as you're comfortable mounding the soil, straw, or compost on top. For the best results, start earthing up when the shoots are about 9 inches tall. Leaving the top 4 inches, build a ridge with soil around the remaining growth. Repeat the process every few weeks until the potato plant blooms.
Snubbing weed control
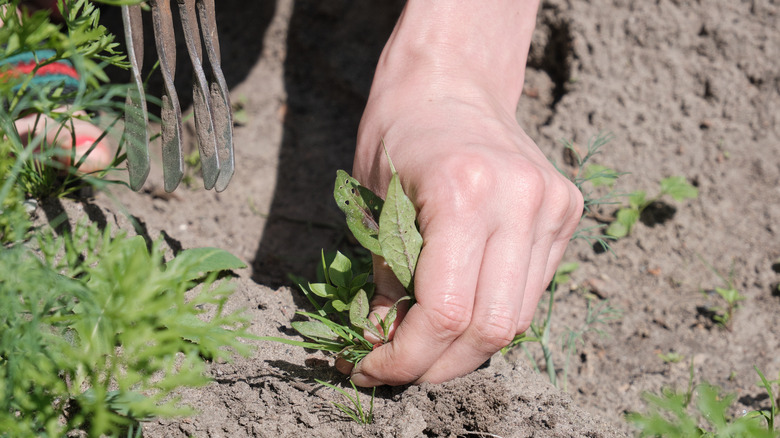
You already know that weeds are not something you want in your garden, but do you know why? They compete with potatoes for nutrients and resources, especially in the initial planting months when the tubers still find their footing, decreasing yields. While following the right crop rotation and hilling practices eliminates a few weeds, it is insufficient. So, you must cultivate the soil pre- and post-planting to ensure your potatoes remain on top of their game.
Usually, mechanical cultivators like hoes or rototillers are ideal for home gardens. These break apart the soil clumps and aerate the soil, improving the amount of oxygen available to the roots and weeding out the unwanted plants. However, you'll need to cultivate repeatedly if your potato patch experiences successive weed infestations. This is because you can only till shallowly post-planting, lest the blades damage the potatoes' roots. This applies even more so if you've been dilly-dallying on hilling the soil. You can hand-weed a few, though. Also, delay irrigation to about three to five days after cultivation. Avoid tilling when the planting medium is wet, and halt it completely when the potato plant begins flowering. Lastly, avoid using chemical herbicides.
Failing to mulch
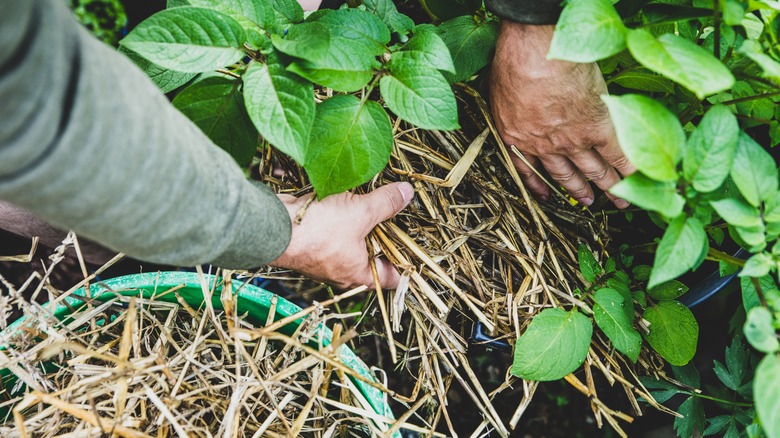
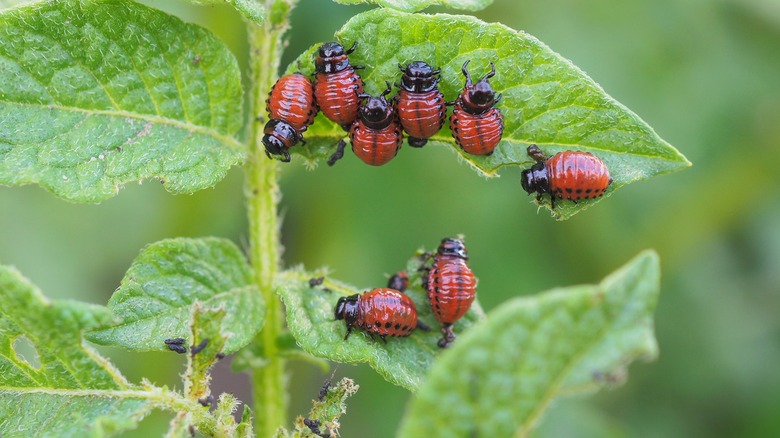
Another mistake that some potato growers make is not mulching their soil. This denies the planting medium several benefits, such as better moisture retention and weed control. Moreover, organic mulches are extremely useful in peak summer because they keep the ground relatively cool. The best part, though? They drive potatoes' arch-nemesis, Colorado potato beetles, out of your garden. These pests are voracious leaf eaters and actively line the undersides with orange egg sacs come spring. Although potato plants can tolerate losing around 15% of the foliage (via Connecticut Agricultural Experiment Station), an uncontrolled beetle infestation can wreak immense havoc, sending them to an early grave before summer's peak. Further, mulching heavily gets rid of tiny, black flea beetles that can puncture the leaves.
To reap its benefits, spread a 4-inch-thick layer of straw mulch after you're done earthing the soil. But if you've been hilling with mulch rather than soil, you might've to spread a thicker layer between the rows. Although most biodegradable mulches work, light straws or hay are preferred since they also deter other pesky invaders like thrips and aphids. That being said, plastic mulches have become popular since some homegrown veggie enthusiasts found roaring success in growing potatoes through plasticulture. However, they're best used before the plants emerge to warm up the soil and encourage potato growth.
Flouting pest and disease management
Regrettably, the soil-to-plate potato cycle passes through its fair share of pests and disease-causing microbes. Colorado potato beetles, leafhoppers, corn borers, wireworms, aphids, flea beetles, grubs, and thrips are some of the most common aggressors. While crop rotation, cultivation, and mulching thwart some attempts, you may still face intruders hell-bent on harboring in and nibbling through the spuds. This means you must constantly be on your toes and look for signs like yellowing, wilting foliage, chewed-up blades, punctured leaves, black mold, and stunted growth before the infestation gets out of control. Afterward, identify the pest and look for suitable treatment options, like insecticides labeled safe for home gardens. If you have a small potato patch, look for insecticidal soaps instead, as they're safer to use and easier to apply.
Your potato plants may also come under attack from seed- and soil-borne organisms, which cause major diseases like early and late blight, black scurf, scab, fusarium dry rot, and verticillium wilt. While some, like scabs, are merely cosmetic, others, like late blight or wilt, are more serious, as they destroy the foliage and plant. Root-knot nematodes are even known for leaving crooked bruises on tubers, impairing their growth. Planting certified seed potatoes is a start, but if your yard has a checkered history, consider switching to more resistant varieties. For instance, Red La Soda potatoes are moderately resistant to blight, whereas Superior potatoes can withstand scabs.
Failing to kill vines pre-harvesting
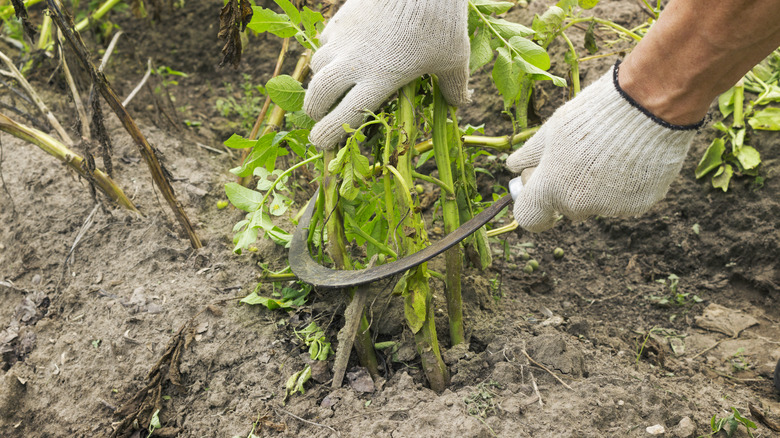
If you've got plans to store your potatoes, not killing the vines prematurely may cost you some harvest. Some potato types, like the ones hardy to Florida, suffer from poor skin set, meaning mere rubbing (while harvesting or storage) removes their skin. Additionally, sometimes the vines of these immature varieties don't age in line with tuber maturity, prolonging the growth season and delaying harvest. So, it's often recommended to kill the vines around seven to 21 days before you sit down to harvest. Don't cut it too close to harvest, or it might lower the starch content of your taters.
Vine killing induces potato maturity, while promoting uniform sizes and appearance. It also minimizes the likelihood of the tubers producing secondary growth. Moreover, because it improves skin set, fungal spores (like blight) have trouble penetrating and infecting the crop since there aren't many lesions or openings available. To kill the vines, mow them down. Another option is to spritz them with a desiccant, but be aware that it is expensive and can discolor the poatoes when not done right.
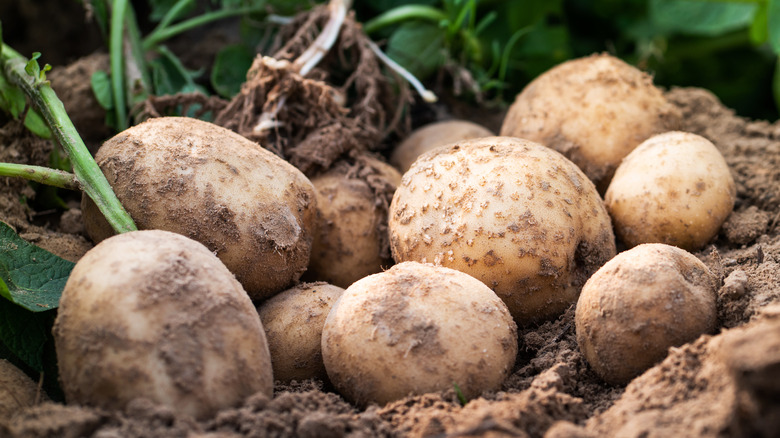
Harvesting at the wrong time
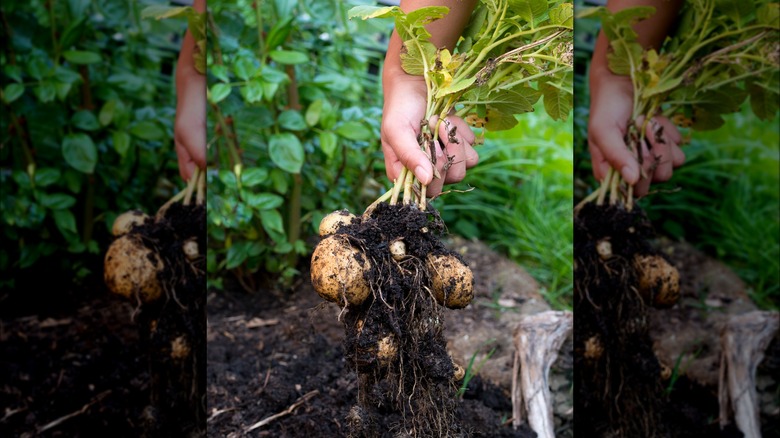
Unless you only care about edible potatoes, mental gymnastics are involved in nailing down the right harvest timing. Unearth too early, and you end up with tiny taters. If you delay digging out the potatoes, they might rot away or turn into cracked, misshapen spuds you want nothing to do with. Besides, Mother Nature can be a killjoy: One sudden hard frost and your harvest's gone before you could dream of mashed potatoes.
So, how do you maneuver the stakes? If you want baby (new) potatoes with tender skins, lift them out after seven to eight weeks of planting or two to three weeks after they bud out. But if you're harvesting a mature crop, wait until the vines die down completely or the tubers mature fully. Remember, you can stimulate tuber maturity by cutting the foliage back to the ground. Although you can harvest in installments, it can expose your tubers to hungry critters like slugs.
Using a shovel to dig potatoes out
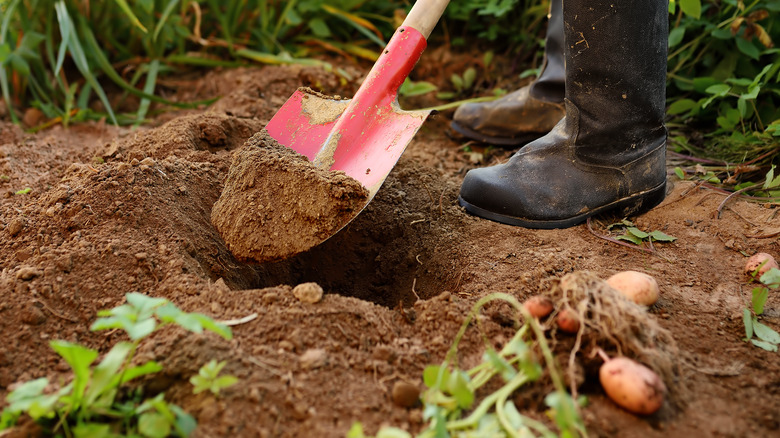
All potatoes, whether mature or new, are susceptible to bruising (in varied intensities) during harvesting. So, when you lift them out en masse with a shovel or a big digging fork to save time, there are high chances that the tines may puncture the crops or scrape off their skins, damaging them irreparably. Such stab markings serve as entry pathways for fungal spores, bacteria, or other soil-borne pathogens responsible for spud rot and decay.
Use a spading or digging fork to avoid damaging your taters while harvesting. Start digging around 6 to 8 inches away from the plant's base on a dry day. Doing so will minimize any chances of mistakenly piercing into tubers that have strayed away from their pals. Haul away the soil in a back-and-forth motion circularly around the plant's base until you get a hold of it. Lift the plant out gently and remove the ripe potatoes with a pair of shears. Don't forget to check for any strays lying underground. Wash the taters to clear the mud, but air dry them before storing.