How To Properly Propagate Your Topsy Turvy Succulents
Echeveria runyonii, better known as topsy turvy, is a succulent with long, pointed, blue-gray leaves that fold upward at the tips. Topsy turvy is a beautiful, low-maintenance plant, and echeveria varieties are one of the best types of succulents to grow indoors.
Topsy turvy is also ideal for propagation because, unlike some succulents, it will produce little offshoots on its stem during the active growing season. These offshoots, known as "pups," look like miniature versions of the main plant. Once they reach a reasonable size, you can easily remove them and put them in different containers to create brand-new houseplants.
There are a few things to consider when it comes to safely removing pups and caring for them until they grow into mature plants. Here's a step-by-step guide on how to propagate your topsy turvy succulent.
Step 1: Carefully remove larger offshoots
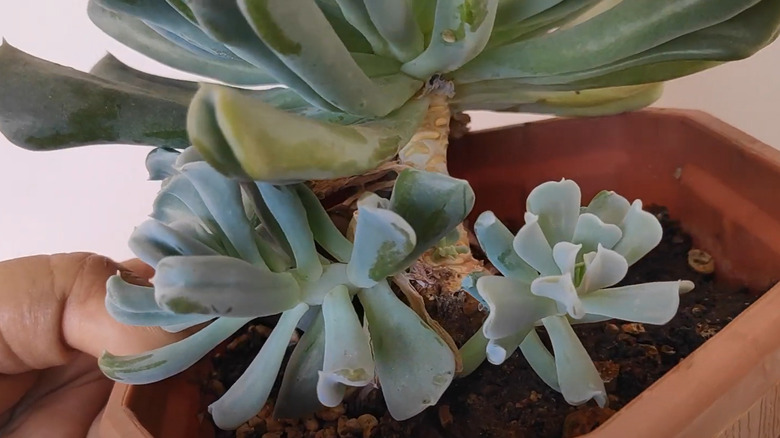
Keep an eye on your topsy turvy during its active growth season (usually spring and summer), and wait for offshoots to form on the base of the stem. "If it's making lots of babies, it's a sign that it's doing really well," says Small Things with Moumita in a YouTube video explaining the process of propagation.
When these pups are small, they may be hidden beneath the main plant's foliage. As they get larger, they may start to look like part of the main plant — or even become heavy enough to cause the plant to tip over. They don't need to be quite this big before you propagate them, but they should be at least the size of your fingertip. The bigger the pups, the easier it will be for them to develop roots and survive on their own.
Pruning shears may be too big for this delicate job. Find a small, sharp tool like sewing scissors, trimming scissors, or a box cutter, and clean it with rubbing alcohol to prevent transferring any germs to your plant. Then carefully cut the offshoots away from the main plant stem. There may be some dead, dry, shriveled leaves attached to the offshoots; gently pull these off. Now you have baby topsy turvy plants ready for propagating.
Step 2: Wait a few days to plant your topsy turvy pups
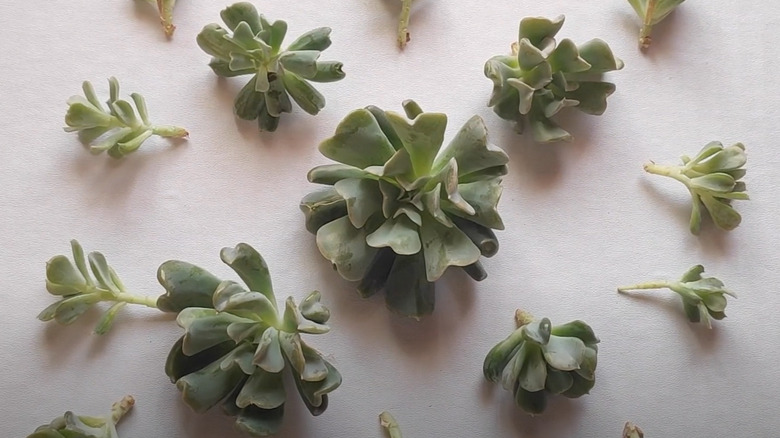
With most plants, it's critical to prevent cuttings from becoming dehydrated — but succulents are different. If you immediately place your topsy turvy cuttings on wet or even damp soil, they'll absorb too much water and rot. You need to allow time for their freshly cut ends to form a callus or protective layer of toughened skin. After removing your offshoots, store them in a warm, dry place out of direct sunlight and wait for the ends to callus over (usually three to five days is sufficient). This will prepare them to survive in slightly damp soil, start growing roots, and flourish just as much as their parent plant.
Step 3: Prepare your container(s)
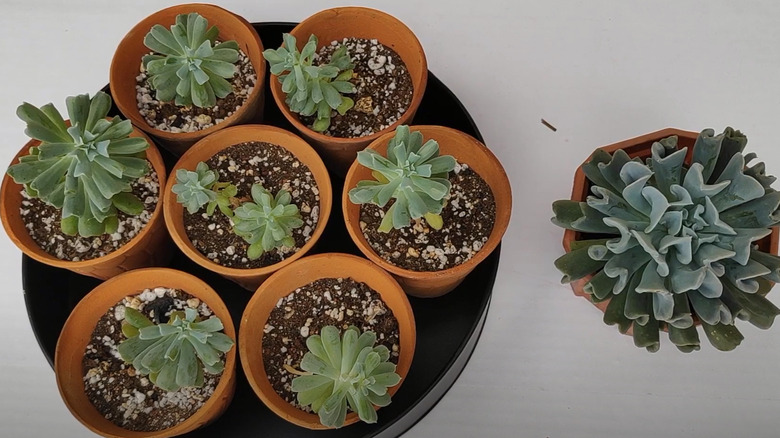
While you wait for the pups to dry, prepare a shallow container for planting your propagated topsy turvy plants. If your offshoots are large, you may want to give them each their own pot. If you have many smaller offshoots, it may be easier to put them together in a dish on top of an inch or two of soil. Either way, the best way to set them up for success is to provide ample drainage.
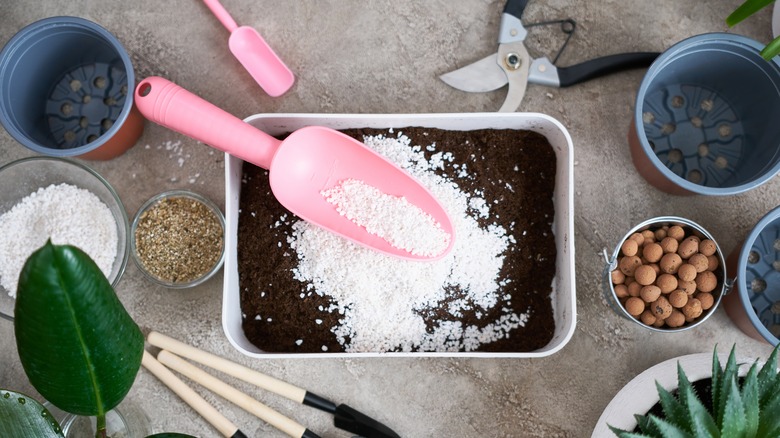
Succulents are prone to rotting in soggy soil, and young offshoots are even more susceptible. Make sure you use a well-draining potting mix designed for succulents — or make your own by mixing three parts of standard potting soil with two parts coarse sand and one part perlite (which resembles gravel). These materials allow water to drain quickly from the soil, reducing your offshoots' chances of getting "wet feet." To further mitigate this risk, choose a pot made of unglazed ceramic with a drainage hole at the bottom (the plain terra cotta pots you can find at craft and home improvement stores work well). The hole provides an escape route for water that can't be absorbed by the soil, while the unglazed ceramic interior will absorb a little more excess water.
Step 4: Plant your echeveria runyonii offshoots
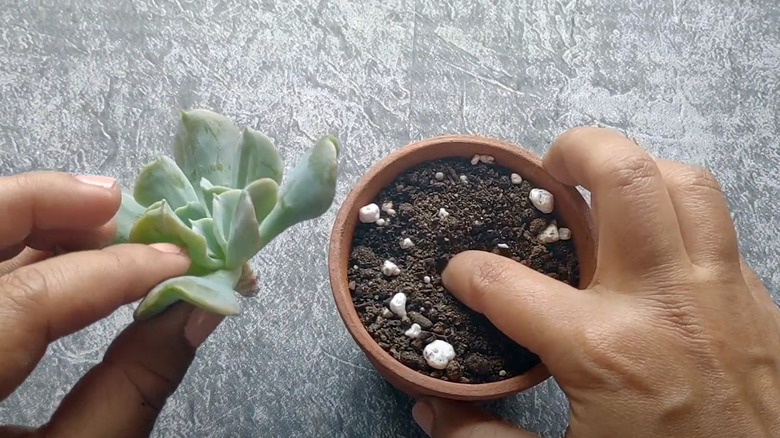
Fill your pot with your well-draining succulent mix, then use your finger to make a hole in the soil. This is where your offshoot will take root. Optionally, you can promote root growth by dipping the callused end of each offshoot in rooting hormone, sometimes known as root stimulator or root booster. Place the end of the offshoot into the hole, then tamp down the soil around it to hold it in place. You may need to dampen the soil with a little water to help with this. Now you have a mini topsy turvy plant!
Step 5: Care for your new plants
Now your propagated topsy turvy plants are ready for the big leagues. They're still essentially babies, so you'll need to treat them with extra care and follow many of the same rules as if you were caring for succulent cuttings. Keep them in a warm, dry place away from disturbances like pets and children. If it's winter, avoid placing them on windowsills where they could get cold — this will slow their root growth, and it could even cause them to freeze and die.
Your topsy turvy plants need plenty of light to grow, but they're sensitive to sunburn. Place them in bright but indirect light near a window. If your home doesn't get enough light, you can supplement with a grow light — just be sure the bulb is at least a foot away from your tender new plants. Once the plants develop their root systems, you can move them into direct sunlight.
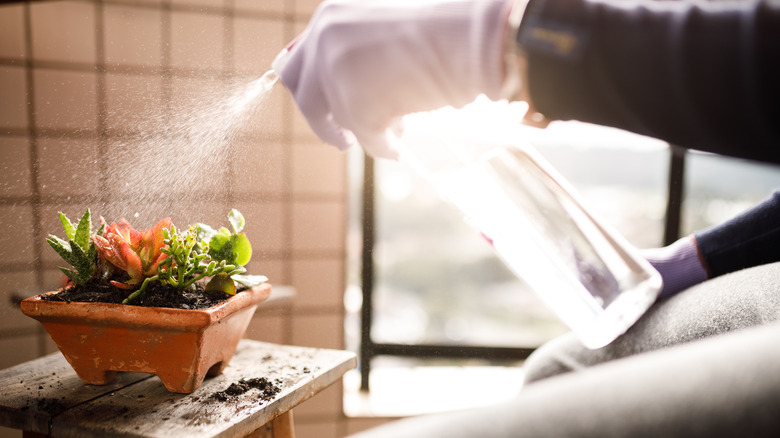
Your topsy turvy plants also need water to grow, but they're extra susceptible to overwatering at this stage. Aim to keep the soil moist but never soggy. Wait until the top of the soil is dry before watering again, and when you water, do it lightly. You can even use a spray bottle to give the soil a thorough misting. Once your adolescent plants have established roots and started creating new growth of their own, you can treat them like mature topsy turvy succulents.