12 Simple Garage Cleaning Tips You Don't Want To Skip This Spring
As winter fades to spring, it's the perfect time to do a little deep cleaning around your home, starting with your garage. Commonly saved for last or skipped entirely, the garage becomes your storage space for seasonal clutter, forgotten projects, and tools, making cleaning it out daunting. However, jumping into this challenge with the right outlook will help transform your garage from a cluttered mess to a functional, well-organized area that is safe and has plenty of room for your vehicles, or whatever else you use your garage for.
Instead of focusing on superficial cleaning projects, spring is the time for deep cleaning and organization to bring your garage to its full potential. From decluttering strategies to innovative storage solutions to maximize your space, this project's goal is to bring about a massive change in the cleanliness of your garage. This spring, embrace getting rid of the old and focus on revitalizing your space in a way that supports your lifestyle and hobbies.
As a bonus, understanding why these projects are essential allows you to avoid common pitfalls, like not using your vertical space or ignoring your stockpile of hazardous materials. Addressing these things boosts your garage's appearance and removes potential safety hazards or damage to your belongings. By focusing on these critical steps that can be easy to forget, you transform your garage into an inviting extension of your home that is ready to support your storage needs and activities all year round.
Declutter your garage

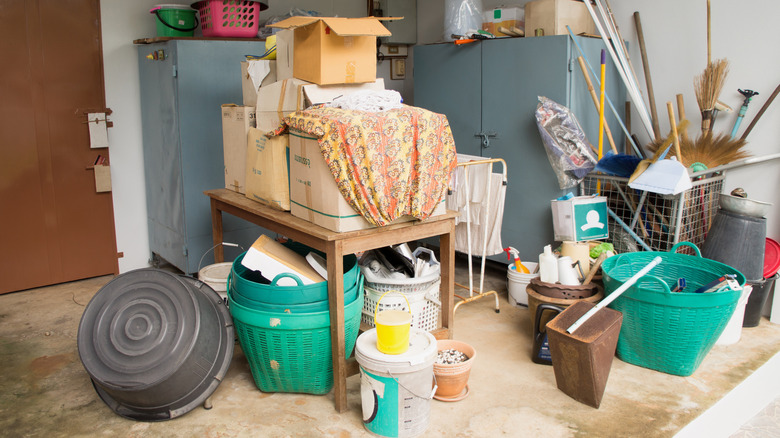
Throughout the year, it's common to set odd bits and items you don't have a set space for somewhere in the garage. This accumulation reduces how much space you have and slowly creates a chaotic environment that makes finding your equipment and tools a time-consuming process. Clutter also attracts pests and dust. Decluttering your garage as you clean helps you reclaim your space, making it more accessible, and helping you maintain a safer environment.
The first step in decluttering and organizing the garage is to carefully pull everything out to get a clear picture of what you have. Set up "keep," "donate," "sell," and "throw away" piles and sort everything into them. Be decisive during this process. If you haven't needed a specific item in a year and aren't attached to it, consider getting rid of it. For items in the "keep" pile, get clear storage bins to see what's inside. Labeling the bins makes it easier to find what you need, too.
Install pegboards and shelving units to use your garage walls for storage. Shelving is a great way to get bins and boxes off the floor, and pegboards can hold sports equipment, tools, and gardening supplies. Additionally, creating zones keeps your garage floor clear and helps you categorize your items into a manageable system.
Wash the garage walls and ceiling
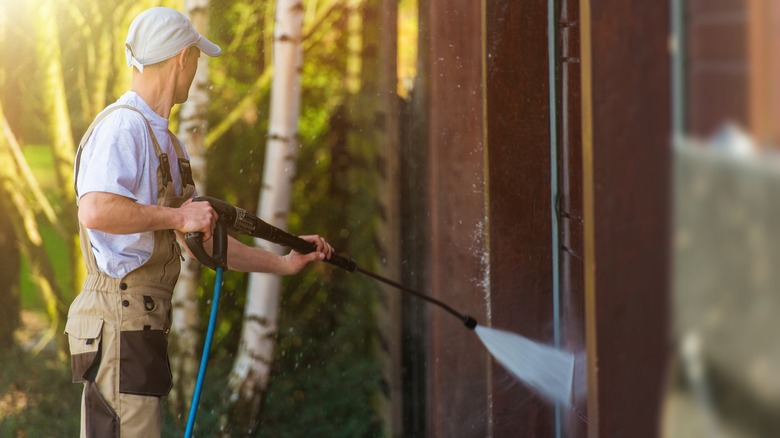
It's common to skip your garage walls or ceiling when you clean, allowing spider webs, dust, and stains to build up. These elements can make your garage look dingy and unkempt, and spider webs and dust can negatively impact people with allergies and make the garage less inviting. Therefore, cleaning your garage's ceiling and walls enhances the space's appearance and makes it healthier. It also helps you spot issues and maintain your garage's structural integrity.
Start the project by removing dust and cobwebs. It's best to wear gloves, since it's a dirty project. Grab a vacuum cleaner with a brush attachment or a long-handled broom to reach the corners or ceiling. Next, make a cleaning solution by mixing a mild detergent and water. It's gentle enough to use on most ceiling and wall surfaces without causing damage. Dip a sponge or a mop on an extension handle into the solution and wipe down larger areas. Gently scrub the surfaces to get rid of stains and dirt. For stubborn spots, push harder or use something like hydrogen peroxide or a specialized cleaning product designed for whatever material your ceiling and walls are. Rinse frequently with clean water to avoid spreading dirt.
Deep clean the garage windows

Garage windows accumulate a film of grime and dirt, stopping natural light from streaming in and reducing inside and outside visibility. This impacts your garage's aesthetic appeal and takes away the functionality of having windows. Over time, this buildup can etch the frames and glass, causing damage that could lead you to replace them. Keeping your windows clean and streak-free enhances your garage's environment, making it more inviting and brighter. Also, regular cleaning allows you to inspect them to ensure they work correctly without jamming or sticking due to grime buildup on the tracks and sills.
Start by dusting the sills, window frames, and tracks using a dry cloth or soft-bristled brush to remove cobwebs and loose dirt. This step ensures the loose dirt doesn't turn into mud when you get the spot wet. For the glass, whip up a cleaning solution of a 1:1 ratio of isopropyl alcohol and water, which cuts through grime without leaving streaks. Spray or wipe on the solution, covering the entire window. Get a squeegee to remove the mixture from the glass, starting at the top and working downward using smooth, consistent strokes to get a streak-free finish. Take a clean, dry microfiber cloth and wipe any drips.
Clean and lubricate your garage door
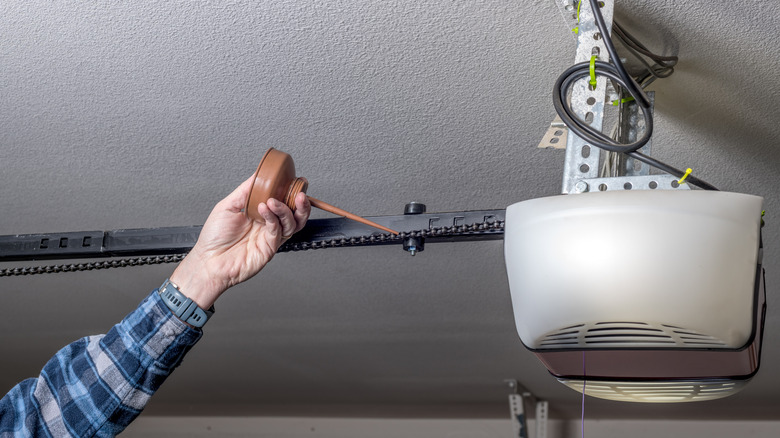
Your garage door is a vital part of your home's security setup. Over time, debris, dirt, and grime build up, which can eventually make the garage door stick when it opens or closes. Cobwebs, dust, and residue buildup on the door's surface and tracks increases the wear and tear on any moving parts, which can cause uneven movement, a noisy operation, or the door sticking. A deep clean ensures your door lasts, moves smoothly, is responsive, and keeps looking good. Also, maintaining your garage door helps it seal properly, which in turn improves your home's energy efficiency and reduces the risk of costly repairs.
Mix water with a mild detergent and get a soft cloth to gently scrub the garage door's surface, paying close attention to areas with visible grease marks or dirt. Rinse it with a clean, damp cloth or the hose and dry it to prevent water spots. Lubricate the door's moving parts on the hinges, springs, tracks, and rollers using a silicone-based lubricant. Silicone is best because it doesn't attract dirt and debris like other lubricant types. At the same time, look for wear and tear, like worn-out weather stripping around the door. If it's brittle or cracked, replace it to help prevent pests and water from slipping in.
Clean your interior and exterior garage lighting and change the bulbs
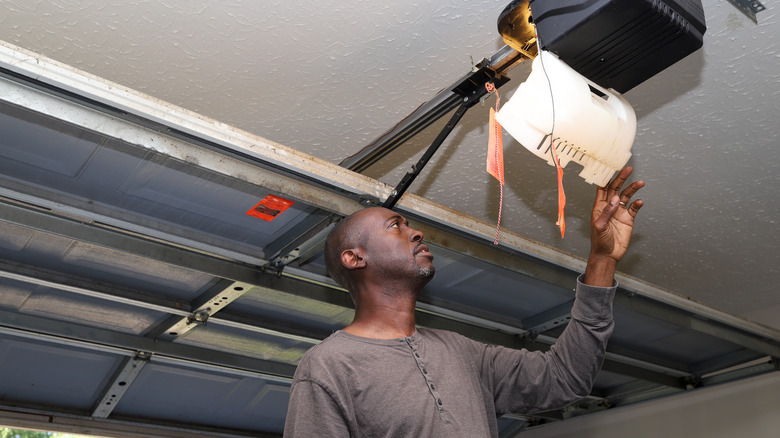
Lighting helps keep your garage safe and functional by improving visibility and minimizing accident risks. Over time, the interior and exterior garage lights get covered in debris and dust, reducing how well they work. This can create dark shadows or spots, making finding items, working on projects, or safely walking around the space challenging. Also, inefficient or outdated bulbs cause higher electricity costs and poor light output. Ensuring your garage lighting is clean and has the proper bulbs enhances your garage's usability, helps conserve energy, and lowers utility bills. Maintaining your garage lighting system is essential for optimizing its performance and longevity.
Start by safely getting to your lights; you might need a ladder for higher ones. Switch the electricity to the light fixtures off to reduce the risks of getting a shock. Gently dust the outside of the light fixtures using a damp cloth or duster with an extendable handle to reach every part. For bugs or stubborn grime, carefully remove the coverings, clean them with water and mild detergent, and then dry them. After you clean, check all the bulbs for any that are dying or burnt out, and replace them with energy-efficient options. According to Energy.gov, LEDs use 90% less energy than traditional bulbs, and they also can last up to 25x longer.
Purge old paints and chemicals
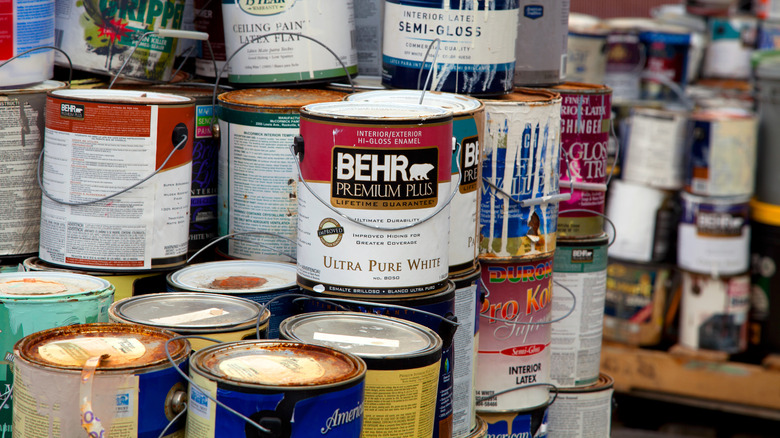
Storing solvents, old paints, or chemicals in your garage can be a health and safety risk. These substances degrade as they age, potentially leading to nasty fumes or leaks that contaminate your garage's air and seep into your home. Certain chemicals get more volatile as they age, increasing the risk of chemical interactions or fires. Cluttered chemicals also make your garage disorganized, making them hard to find when needed and increasing the chances of spilling them. It's critical to regularly go through these old paints and chemicals and get rid of what you need to. Disposing of them correctly reduces pollution risks, protecting local waterways and wildlife from getting contaminated.
Carefully go through your solvent, paint, and chemical collection, reading the labels to figure out if they're expired or if you have a use for them. To get rid of them, follow the local guidelines on hazardous waste, knowing this might involve delivering them to a specific drop-off location. Don't pour them into the trash or down the drain because this may be illegal. For chemicals and product you plan to keep, organize them by usage and type. Store them in locked cabinets or on high shelves to keep them secure and out of reach of kids or pets. The lids should be tight so they don't leak. Also, ensure your storage area has ventilation so fumes don't build up.
Sort, clean, and store seasonal items

Seasonal items, like winter coats, holiday decorations, and summer sports equipment, can take up a large part of your garage, especially in the off-season. They take up valuable floor space and can be exposed to potential damage from moisture, dust, and pests. Storing them properly after you clean and sort helps keep them in good condition, ready to use when the seasons change. It maximizes your belongings' lifespan, reduces clutter, and keeps your garage organized and functional.
Start by sorting your seasonal items into categories based on when you use them each year. This helps show you what you need to store away and what you should have access to. Thoroughly clean the sorted items to remove any dirt or dust build up. Cleaning before organizing your items helps prevent long-term deterioration and damage. Next, carefully pack these items into labeled, durable containers. Labeling enables you to find them at a glance and access them when the time comes. Pick clear containers or devise a consistent organization system by grouping like-items. Store these containers in an out-of-the-way space, like a designated storage area or on high shelves, to keep your garage organized and ensure the out-of-season items don't get in the way during the off-season.
Deep clean and seal concrete floors

Concrete floors are typical in basements and garages. They absorb moisture and stains and sustain wear and tear because they're porous. Over time, unsealed concrete can be a breeding ground for mildew and mold, especially in damp garages and can crack or chip. Chemical and oil stains sink deep into the concrete, making them challenging to remove and impacting your floor's appearance. Sealing the concrete boosts its resistance to stains, moisture, or damage while making it last longer. A sealed and well-maintained concrete floor makes it easier to clean and the space more inviting.
Thoroughly sweep the floor to remove any loose debris or dirt. For a deeper clean, use a degreaser or concrete cleaner to remove built-up grime or stubborn stains. Following the instructions, apply the cleaner and scrub it with a stiff-bristled brush so it really penetrates the concrete. Rinse with clean water to remove any residue, and let the floor dry. Moisture interferes with the sealing process, so ensure it's totally dry. Pick a concrete sealant that matches your floor type and finish, and apply it evenly across the floor with a paint roller or sprayer, following the directions. Work in sections so you don't overlap or get marks, and keep a wet edge. Leave the sealer to dry, and apply a second coat if recommended.
Tackle rust on metal surfaces
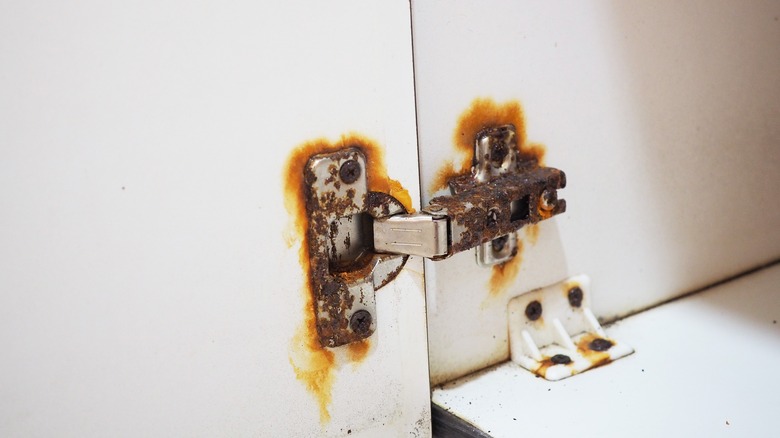
Rust comes from an oxidation process on metal surfaces when exposed to oxygen and moisture. This flaky, reddish-brown coating takes away from how your metal tools, fixtures, and surfaces look, and it also weakens them. Left unchecked, rust causes a lot of damage, compromising how well the items work. It can also lead to failure with the metal fixtures you use for safety reasons, like tools, outdoor equipment, or door hinges. Quickly addressing the rust prevents more corrosion, extending how long your items last while keeping them strong and reliable. It also reduces the need to go out and buy replacements, which is cost-effective.
Scrub the affected area with sandpaper or a wire brush first to remove the surface rust and any flaking paint surrounding the rusted spot. For delicate surfaces or fine details, steel wool is a slightly more gentle alternative. Once you get as much rust off as possible, wipe the metal with a damp cloth to remove any debris or dust. Apply a rust inhibitor to the clean metal surface to stop it from returning, forming a protective barrier that seals the metal from moisture and air. After the rust inhibitor dries, repaint or seal the metal to add another protective barrier. If painting it, use a paint specially designed for use on metal, and ensure it has rust-inhibiting properties.
Clean and organize electrical panels and wiring

Electrical panels and wiring are two things commonly overlooked when you clean. Over time, cobwebs, dust, and debris form a fine film that brings risks. Dust will act like an insulator that causes your electrical panel components to retain heat, and debris or cobwebs can be flammable. Additionally, disorganized and cluttered wiring obstructs airflow, making it difficult to do routine maintenance, leading to potential electrical fires or hazards. Regularly cleaning these things helps keep them safe and efficient and prevents emergencies, ensuring you can successfully get to a wire to perform upgrades and repairs.
Turn off the main breaker to stay safe if you plan on cleaning any exposed wiring or the electrical panel itself. It's a smart idea to get a can of compressed air or a vacuum with a brush attachment to gently pull out dust and cobwebs from around the electrical panels, outlets, and exposed wiring. Avoid direct contact with the electrical components and use non-conductive tools to prevent electric shocks. After dusting, look for loose, tangled, or incorrectly routed wires. Use wire organizers or zip ties to neatly bundle and secure the cables, ensuring you route them away from heat sources, moving parts, and water. Label all of the wires to make future emergency work or maintenance easier.
Revitalize your garage cabinets and storage units

Garage cabinets and storage units help keep supplies, tools, and seasonal items organized and out of sight. However, grime, dust, and spills can all contribute to a dirty film building up that degrades their functionality and appearance. This buildup can make the surfaces sticky, discolored, and unpleasant to touch. Also, garages usually have temperature and humidity fluctuations, and wooden storage units or shelves can end up with moisture damage, leading to mold or warping. Regularly cleaning and maintaining them helps preserve their condition, ensuring they store your items effectively.
Empty each cabinet and storage unit, removing all items to access every nook and cranny. You can use a vacuum with a brush attachment to thoroughly remove dust, spider webs, and any loose debris from the interior corners, shelves, and bases. After vacuuming, mix a mild detergent with warm water to wash down the surfaces. A soft cloth or sponge is ideal to avoid scratching or damaging the finish. Wipe down the exterior surfaces, paying particular attention to handles and doors where fingerprints and grime accumulate. Allow the cabinets and storage units to air dry thoroughly to prevent moisture from getting trapped. For wooden cabinets, consider applying a fresh coat of paint or a sealant after cleaning to refresh their appearance and add a protective layer against moisture and wear.
Clean and inspect the garage roof and gutters
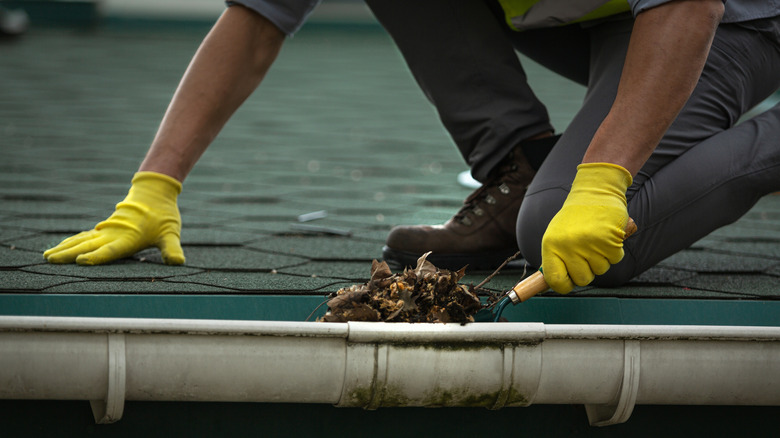
The garage roof and gutters are critical components that protect your garage and home. Over time, these areas can accumulate leaves, twigs, debris, and grime, obstructing water flow and potentially leading to leaks, water damage, and structural issues. Clogged gutters can cause water to overflow, affecting the foundation and siding of your garage. Additionally, standing water in gutters can attract pests and lead to mold and mildew growth. The roof itself can suffer from the buildup of moss and mildew, which can eat away at roofing materials, forcing you to replace the roof.
Ensure you have a stable, extendable ladder to reach your garage's gutters and roof safely. Wear gloves to protect your hands and use a gutter scoop or a garden trowel to remove leaves, twigs, and debris from the gutters. Check and clear the downspouts to ensure water can flow freely — a plumber's snake can help remove blockages. After removing the debris, use a garden hose to flush the gutters and downspouts, checking for proper drainage and any leaks. Look for signs of damage to the roof, such as missing shingles, wear, or leaks. Use a roof cleaner suitable for your roofing material to strip away moss or mildew buildup. Apply the cleaner according to the manufacturer's instructions, and you'll typically need a brush to apply it and a hose to rinse it off. Addressing moss or mildew promptly prevents it from causing further damage.