Reuse An Old Bookshelf As This Genius Closet Storage Solution
We may receive a commission on purchases made from links.
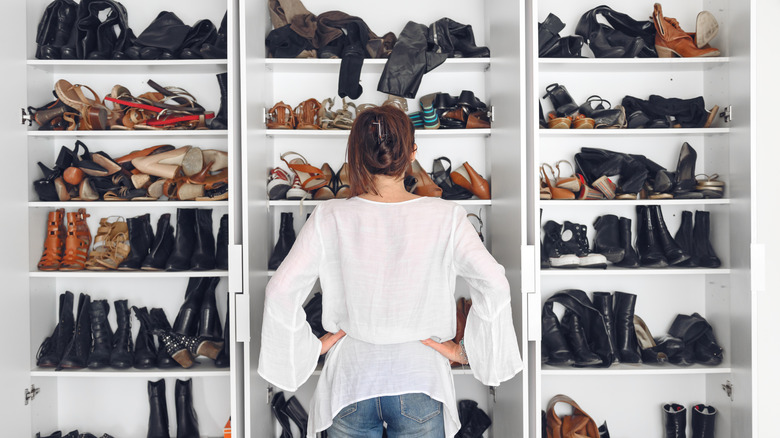
A well-organized closet is a necessity, especially if you possess a fervent love of shoes and accessories. Even small collections can often leave you fumbling for more space to both store and display them properly, lest you find yourself endlessly hunting for the mate to your pair on a messy closet floor. TikTok user @les_perezzz recently showed off an ingenious hack for turning an inexpensive bookshelf into the perfect shoe storage unit using only pre-cut shelves, a mallet, and plastic push-pins. The hack allows you to create custom height shelves to fit all varieties of footwear, from the tallest boots and most harrowing heels to low-profile flats and sneakers.
This DIY modification is a great alternative to buying other closet organizers designed for shoe storage, like pre-made plastic risers that fit on existing shelves. Even better, it can be created inexpensively using any fiberboard bookshelf. These shelving units can often be found on sale, like Ikea's $40 Billy Bookcase and this $30 Room Essentials 3 Shelf Bookcase from Target, as well as at thrift stores or second-hand venues, or possibly already in your own home. While their construction is often less than ideal for heavy loads like books, where they can bow and break down over time, they are perfect for lighter storage needs like shoes. In addition, storing your shoes properly not only makes things easier to find when you're looking for them but is better for the shoes themselves, which can become smashed or misshapen if not stored properly.
Modifying a shelf for optimal shoe storage
The best way to determine the ideal height of needed shelves is to measure your collection's width, depth, and — most importantly — height. Take into account all varieties of footwear, including your tallest boots and flattest flats. Using the existing shelves as a starting point, mark off with a pencil or tape the interior of the unit where your additional shelves will be placed. Add push-pins to the inside framework to support the added shelves or planks, then pound them in securely using a mallet. Simply slide in the new shelf to rest on the push-pins. Add your shoes to the shelves and make any other adjustments necessary. You can easily double the available storage space by adding a few extra shallow shelves without taking up any additional floor or wall space.
You can also add additional elements to your shoe storage rack that will help with closet organization, including small adhesive hooks along the sides for hanging purses, belts, or scarves, as well as wooden dowels or tension rods between shelves for things like bangle bracelets and headbands. This DIY is also great if you lack the space inside a closet and want to create a high-volume wardrobe wall in a bedroom or spare room, where the shoes can become a stylish part of the decor. Add LED bar lights ($27) or stick-on puck lights ($16) from Amazon to keep your shoes visible and easy to grab.