Safely Replace Your Lawn Mower Spark Plug With These Helpful Tips

Let's see if this sounds familiar: You wheel your lawn mower out of the garage after a winter-long respite from mowing. Long enough, in fact, that you almost miss the meditative patterns of mowing and the satisfying sense of bending the natural world to your will. So you pull the cord and ... nothing. You pull harder, and harder still, and maybe it finally catches and starts. Or maybe not. Either way, don't panic when this happens to you; there's a good chance all you need is a new spark plug. And, even if you don't need one, you should change it anyway.
Spark plugs are an important part of any gas-powered internal combustion engine. They ignite the fuel-air mixture to provide the combustion part, after all. A fouled or worn spark plug can cause your mower to idle rough and run poorly, use more fuel than necessary, and even refuse to start altogether. Or, perhaps worse, the engine might require more power to start, and if you have a pull start mower this means pulling harder. Plugs that are in bad shape can also cause engine damage. It's time to deal with it by getting a new plug in there.
Get what you'll need for changing a spark plug

Replacing a spark plug is one of the easiest maintenance tasks you'll do for your mower and one of the simplest fixes for when your mower won't start. It only takes a few minutes (notwithstanding the trip to Lowe's to buy a plug), and only requires a few tools. Here's what you'll need:
-
A new spark plug matching the old one
-
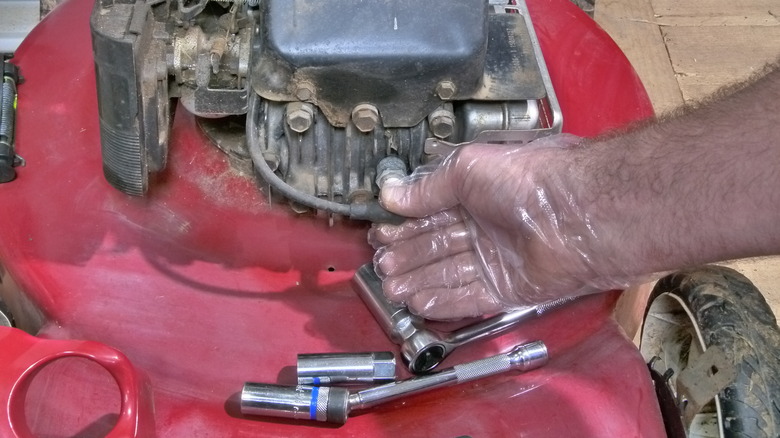
A spark plug wrench, or socket ratchet
-
A spark plug gap gauge or gap tool
Your mower might have come with a spark plug wrench, usually a galvanized steel tube that's hex-shaped at one end and is used to turn spark plugs. You can also use a ratchet and correctly sized spark plug socket, and these often have built-in magnets (or sometimes a foam disc that grips the spark plug) to help with extracting a loosened plug and installing a new one. This is usually more necessary for dealing with plugs in cars, but it's handy for mowers as well. A magnet means not dropping the plug quite as often.
There are also a couple of optional items that you might want to bring along if you have them:
-
A wire brush
-
A torque wrench
-
A vacuum cleaner or ShopVac
We'll discuss these further in the steps below.
Locate the spark plug(s)
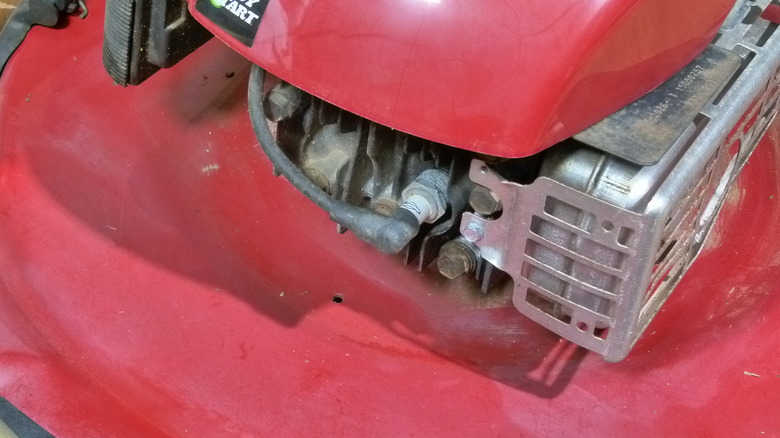
It won't be hard to find your spark plug (or plugs if you have a riding mower), no matter how dirty your mower is or how convoluted the engine design looks. Look at the front of the engine first on a pushmower, then check the sides. If it doesn't jump out at you, follow any wires you see until you find the telltale protective hood that covers (or partly covers) the spark plug.
Along the way, you might have noticed your engine needs a little cleaning. Even well-maintained mowers can become amazingly soiled with dirt and grass clippings, and it's important that none of that stuff ends up in your engine. So before you continue and start exposing things to dirt, take a moment to remove any visible dirt that looks like it might be knocked loose and through the spark plug hole. A vacuum and a wire brush are handy for cleaning up.
Disconnect the plug wire
The spark plug wire conducts voltage from the ignition system to the terminal on the outside end of the spark plug. Removing the plug wire is necessary to change a spark plug, of course, but it's also a good habit to develop for whenever you're repairing or doing maintenance on a mower, especially for models that start with a battery. This will prevent the mower from accidentally starting when you least expect it, which can be extraordinarily dangerous. It's easy enough to do: Grab the silicone boot that covers and protects the plug, rather than tugging on the plug wire, which could damage it. Give it a pull, wiggling it a bit if necessary to loosen the plug wire.
Now, inspect your plug wire. Corrosion, rust, and grime often accumulate on plug wires and can cause just as much trouble as old spark plugs themselves. If it's broken, cracked, misshapen, or otherwise damaged, now is a good time to buy a replacement. If not, give the terminal inside the silicone boot a cleaning with a small, fine wire brush.
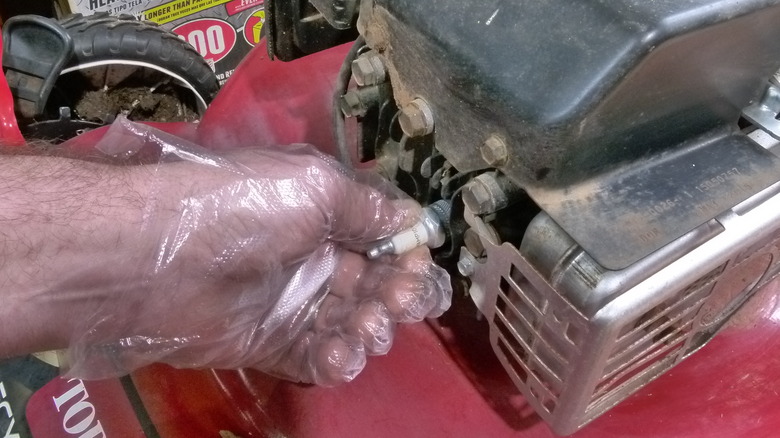
Remove the old plug
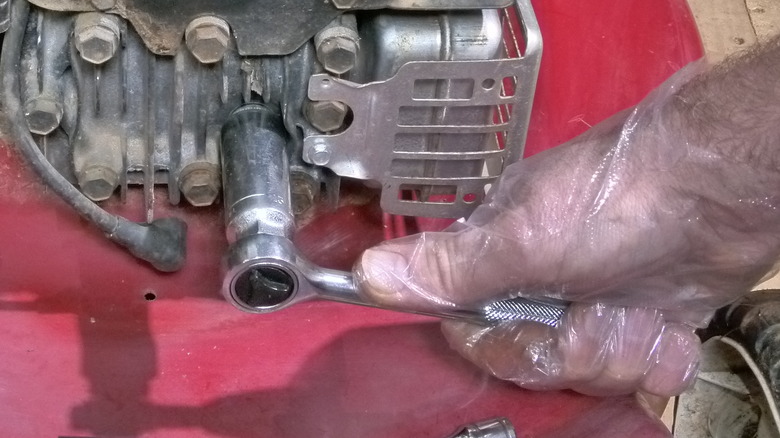
As you might expect, you remove a plug by turning it counterclockwise. (This is often referred to as lefty-loosey, which makes no sense if you're considering the bottom of the spark plug — which is moving to the right — rather than the top.) Your spark plug wrench or socket should fit snugly on the plug's hex head, a steel fitting designed in part for this purpose, as well as for conducting heat away from the plug. Note that the hex head might not be visible to you, depending on the engine design. A little shot of WD-40 near the threads will often make removing your spark plug a breeze if it seems stuck. After removing it, inspect the plug for black carbon deposits or moisture on the electrode end (the part that screws into the engine). Even if it appears to be in perfect condition, it's a good idea to swap out the plug anyway since you've already done much of the work of replacing it. Given how often plugs must be changed, it's often a good time to do this little piece of maintenance. But do note the condition of the electrodes, even if you're replacing the plug. This information might prove useful in diagnosing future problems.
It is possible to clean a fouled plug, which sometimes will return it to perfect operating condition. Use a spark plug cleaning product or brake cleaner and a cloth to clean the spark plug's terminal and electrodes. You can also use a wire brush if necessary to clean the electrodes, but avoid abrasives like sandpaper. Most of the time, though, it's better to simply replace the plug.
Check the new plug's electrode gap, and correct if necessary
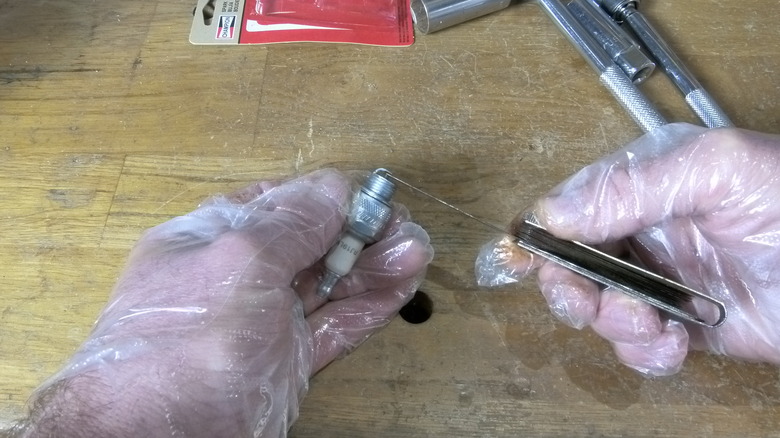
Your mower's engine requires a gap of a certain distance between its spark plug's electrodes. Your newly purchased plug should be pre-set with the correct gap, assuming you've bought the right replacement. But since the plug could have been damaged anywhere along its long path to your garage, it's important to check the gap anyway. The most common mower plug gap is 0.025 inches but check your owner's manual to verify this since there are exceptions.
To make the gap smaller, gently press or tap the L-shaped ground electrode against a non-abrasive, solid surface. To enlarge the gap, bend this electrode out slightly. Gap tools that aren't mere gauges are often designed to perform this function when you check the gap. Just verify the gap with the gap tool or gauge after you think you have it right.
Install the new plug and attach the plug wire
Screw in the new plug by hand at first. If you meet any resistance, remove the plug and try again. It's important to avoid forcing it if you feel resistance. This could strip or cross-thread the plug, or even break the ceramic insulator. Be careful not to over-tighten the new plug. In general, spark plugs shouldn't be torqued beyond 15 foot-pounds. It's best to use a torque wrench for re-installing spark plugs if you have one, but it's far more common to simply snug the plug into the engine firmly without really cranking down on it. The purpose is to compress the O-ring that keeps oil and your gas/air mixture in, and water out, while not bending or breaking anything.
To reattach the spark plug wire, simply push the boot firmly into place over the end of the plug. The electrical connection inside will usually be made with no more fuss than this. Now that you're all done, test the engine by starting it and letting it run for a moment, then clean up your work area and get to mowing!
How often to change your mower's spark plugs
You should change your mower's spark plug(s) annually at a minimum, during the regular maintenance regime. If you use the mower for more than 25 hours per season, change it (them) every 25 hours. It's also a good idea to change the plug if your mower won't start, or if it's running rougher than usual.