How To DIY Hanging Tool Storage That Saves Space And Stays Organized
We may receive a commission on purchases made from links.
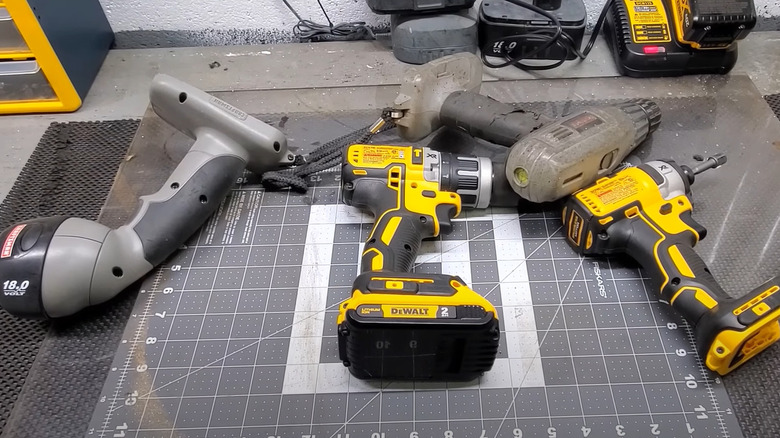
It's every craftsperson's nightmare — stepping into your workspace only to be greeted by strewn tools. The floor has seemingly vanished under the metallic sprawl of drills, jig saws, and electric circular saws. Your workbench, once a testament to your expertise, now resembles a battleground where tools wage war against productivity. And amidst this chaos, valuable square footage becomes a treasured currency. Luckily, the power to reclaim this lost space and efficiency lies in a DIY hanging tool storage. Picture T-shaped wooden blocks, methodically spaced along a firm plank to form slots ready to cradle their assigned tools. Alternatively, envision a robust plywood panel with slots meticulously mapped out with a jig saw.
Sure, you could shell out for a pre-fab garage organizer. But imagine the satisfaction of standing back and surveying a sanity-restoring, DIY wall of tools, each hanging in harmonious balance and leaving no trace of former disorder. It's also a clever way to add overhead storage space to your garage. By reimagining leftover timber from past projects, your DIY marries sustainability and budget-savviness with creative fulfillment. Renting power tools from a local home improvement store could shave off a substantial slice of the project's cost. But if the strings on your purse have room for play, invest in your own — they don't just spearhead your current project but can also be enlisted for future DIY conquests.
Making a hanging tool holder for your workshop
The success of this DIY hanging tool holder project hinges on precision. Start by surveying your collection and marking down each tool's dimensions. From here, use these dimensions to determine the spacing between your T-blocks on a wooden plank. Now, assemble dual blocks into a T-formation, joining the adjoining edges first with an adhesive like Gorilla Wood Glue (a steal at $3.47 at Walmart), then a nail gun.
Mount the T blocks onto your wooden plank, then secure each from the top using an electric screwdriver drill. The grand finale is attaching this crafted unit to the wall. First, fuse a robust plank to the back of your tool-holding unit — a solid backbone for what's to come. Afterward, securely mount a ledger board on your wall. Then, unite the tool holder's backing and the ledger board using screws of appropriate length. Finally, assign each item its royal perch. With every tool within reach, your workspace is no longer a mere garage or workshop but an oasis of order and productivity, where projects now begin with ease, greeted by the ready arms of your impeccably organized tools.
Precautions and alternatives
Before you start your project, ensure the T-blocks you fashion can shoulder the collective weight of your tools. Moreover, use strong wall fixings that laugh in the face of gravity. As for aesthetics, round off the sharp, exposed corners for a more elegant appearance. Also, bathe your masterpiece with two to three coats of protective water-based finish like the Minwax Polycrylic Protective Finish on Walmart. Just make sure to sand first to guarantee proper adhesion.
Crave more functionality for your hanging tool holder? Use a magnetic strip for small tools like screwdrivers, drill bits, scissors, spanners, and pliers. An example would be the RamPro Magnetic Tool Holder Strip, available on Amazon for $22.99. Dream bigger by making your DIY organizer a dual-sided masterpiece perched on a swivel mount for maximum storage space — picture your most-used tools quickly swinging into view.
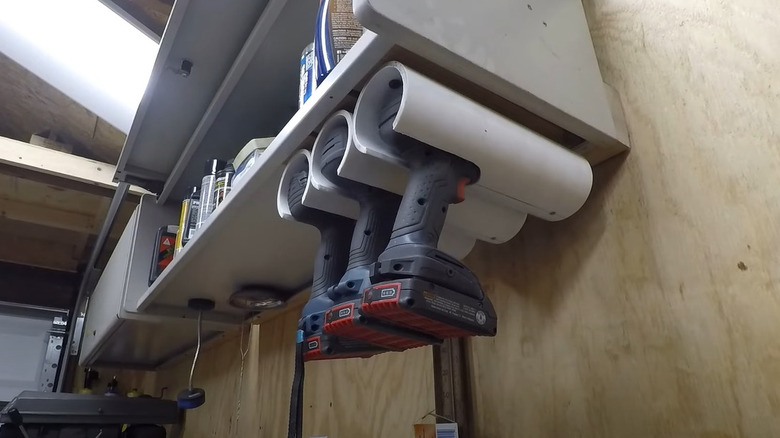
If blocks don't quite fit your style, break away and embrace another ally: Sturdy plywood adorned with jigsaw-carved slots that become the supportive stars. As this TikTok DIY illustrates, begin by outlining the slot edges with a pencil, then slice them into reality. Reinforce the plywood with a solid frame to prevent warping while readying it for reliable mounting on your garage wall. Or, for something a shade off the beaten path, sculpt slots into reasonably sized cylindrical or square PVC pipes and screw them under cabinets.