How To DIY A Sliding Pull-Out Tray To Hide The Printer In Your Home Office
We may receive a commission on purchases made from links.
Home offices, typically filled with monitors, files, and bulky office equipment like printers and scanners, can quickly become cluttered. That said, many try to find innovative ways to hide their clunky printers, which not used regularly. A convenient solution is to tuck your printer away with the easiest-ever sliding shelves. Doing so not only tidies up your space by keeping the printer out of sight but also enhances storage efficiency and ergonomics. With a pull-out shelf, your printer doesn't occupy any desk real estate, yet easily accessible whenever it's needed.
If you want to organize your home office by hiding your bulky printer inside a pull-out shelf but don't want to have one customized or don't want to shell out money to purchase a table with a built-in pull-out shelf, DIYing it is pretty straightforward! This project involves creating your own shelf and installing a pull-out mechanism into your existing home desk. All you need are tools, sliders, melamine or plywood sheets, and wooden strips.
Find the ideal location for the pull-out shelf
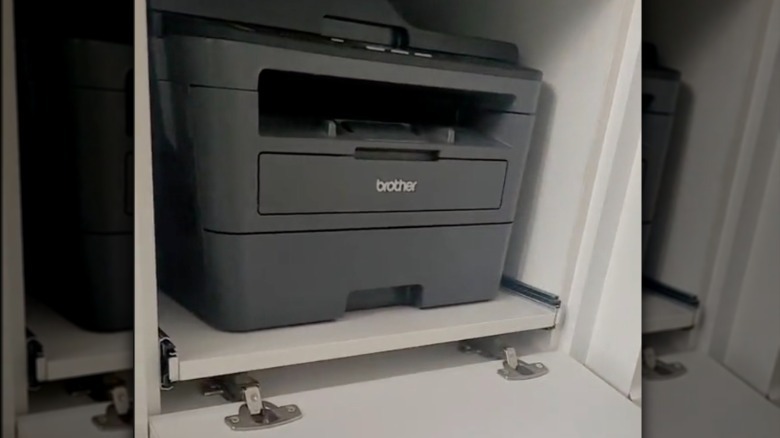
The first step in creating a pull-out shelf or tray for your printer is to select the right piece of furniture to maximize space in your home office. Finding one is essential for the functionality and smooth integration of your DIY project into your office area. It doesn't necessarily have to be your work desk, especially if you don't use the printer or scanner daily. Ideal options could include a cabinet in your current desk, a tall office cabinet, or even an existing shelf. For instance, Gary Lundgren Crafts, on YouTube, built a pull-out tray for his two printers on a shelf beside his home office desk.
Some critical considerations for choosing the ideal furniture include adequate space to accommodate your printer, proximity to a power outlet for easy connectivity, and the ability to fit the tray or shelf you'll be building. It's also crucial that there is adequate space around the furniture to allow the tray to extend fully, offering unobstructed access for placing paper and operating the printer or scanner with ease.
Get accurate measurements
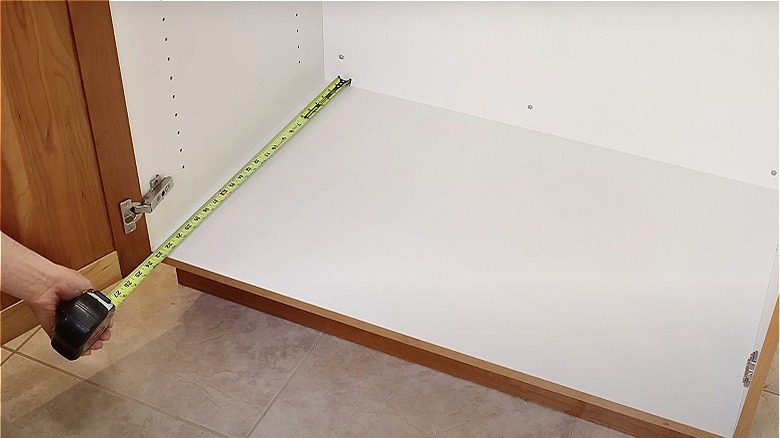
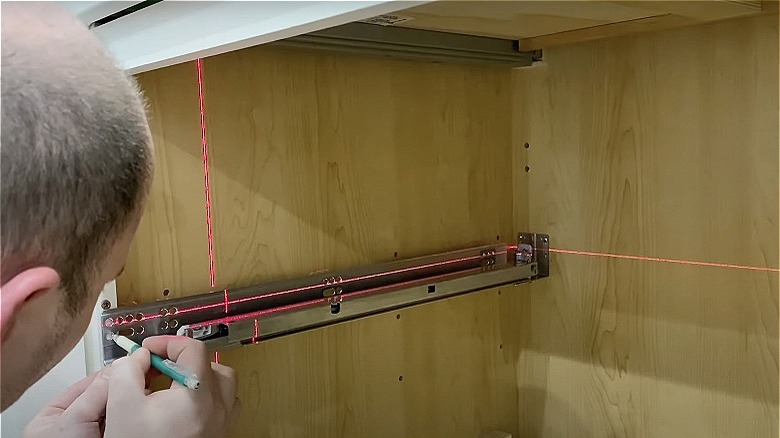
After selecting the ideal storage location, the next step is to accurately measure the internal dimensions of the cabinet or shelf space. This guarantees that your pull-out tray and printer will fit perfectly inside the cabinet. Measure and write down the width, height, and depth of the space. Since you'll be using sliders for the pull-out mechanism, you must ensure that both sides and the front and back are parallel. Also, consider any protrusions that might limit the opening of the cabinet, such as doors and hinges. These measurements will inform you about the necessary thickness of the spacers, ensuring that the tray or shelf can slide in and out smoothly.
Determine the height where you'll be placing your spacers based on the vertical space needed for the printer. Finding the accurate width of your tray is also crucial. To get this, Dan Pattinson offers this pull-out width formula in his YouTube DIY guide for making pull-out shelves: take the inside cabinet width minus the thickness of the spacers, then minus the thickness of sliders, and minus 1/32-inch for a little breathing room for the slides. For the depth of the bottom of the shelf/tray, use the depth of the cabinet for reference. Cabinets typically have 12 or 24 inches depth, with office desks likely having the latter. For 24-inch base cabinets, getting 22-inch slides with 22-inch pull-out depth is ideal.
Build the pull-out shelf
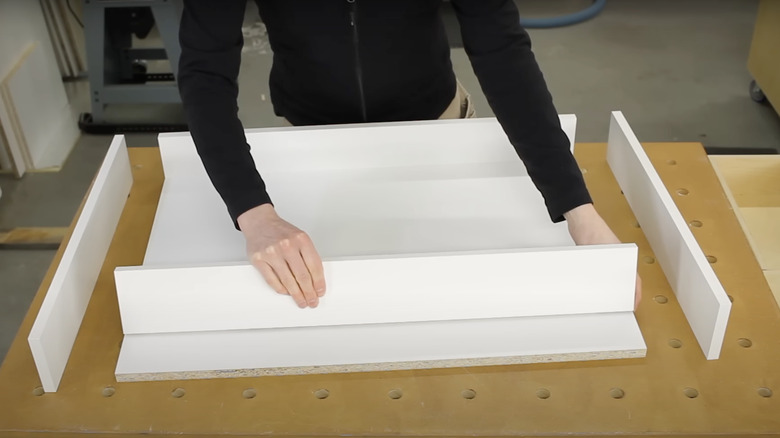
With your measurements ready, choose the design of your pull-out feature. You can opt for a simple tray without raised sides, similar to Gary Lundgren Crafts' design, or a slightly raised frame akin to Cristel Montenegro Home's pull-out shelf. Alternatively, you might consider a design with more elevated sides, as showcased in Dan Pattinson's DIY guide.
If you decide on an elevated frame, apart from the design's aesthetic value, just ensure that the printer can fit within these raised edges comfortably without hindering access to its buttons or controls. If you're going for the latter, the length of the front and back raised sides should be the same as the width of the bottom of the shelf (which you computed using the width formula above). Meanwhile, left and right raised sides should be the same length as the sliders. Sand the tray or assemble all the planks using screws. For the frames, use 1/2-inch plywood or melamine board and 1x2-inch furring strips. Assemble the pieces together.
Install the shelf into the cabinet
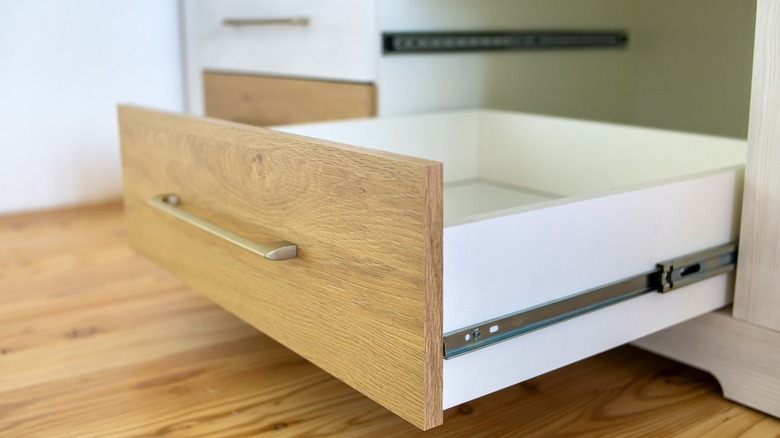
To install the slides, first separate their two components. Attach one set of the slide components to the spacers and the other to the sides of your shelf or tray. Once done, you can then install the shelf into the cabinet. However, if installing sliders on the sides of your shelf or cabinet isn't feasible or desired, you can take inspiration from Gary Lundgren Crafts' approach in his DIY pull-out shelf. Since his shelf didn't have sides to fasten the slides to, he fixed a plywood sheet to the bottom of the shelf, where he installed the sliders. The tray he constructed sits atop these sliders, allowing for smooth movement. This technique is handy for shelves where side-mounted slides are not practical or possible.
If your cabinet has no door — but you want to completely hide your printer — you can install one. If the existing cabinet door opens to a limited degree, consider replacing the hinges with ones allowing a 180-degree opening. An example would be partial wrap hinges, which you can find on Amazon for around $14.