Recreate TikTok's Genius Custom Clothing Rack To Save Space In Any Closet
We may receive a commission on purchases made from links.
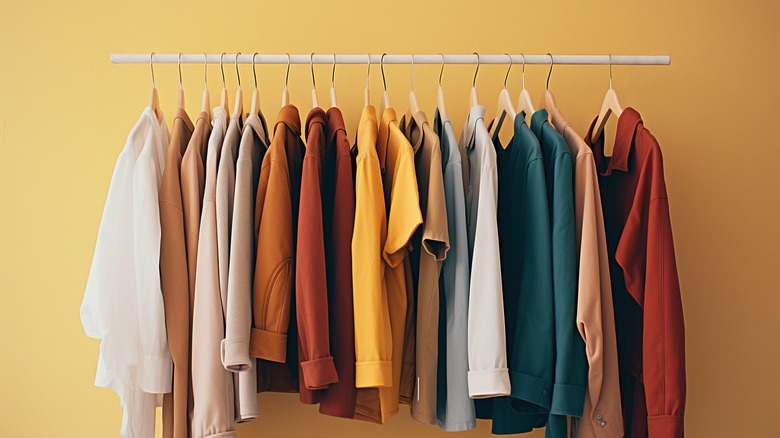
Trying out all the latest styles is the dream of any fashion lover, but you may quickly find yourself running out of closet space. When this happens, you might want to try a hack from TikTok user @hypebae, who showed viewers how to craft their own custom, DIY clothing rack as a space-saving storage item for extra garments. You can put this handy DIY creation anywhere in your home and even move it around, so it works as both a temporary and permanent solution. The rail itself should fit plenty of clothes, and keeping the rack out in the open will help you find your desired garments more quickly.
If you don't have a lot of DIY experience, don't worry — crafting this system is pretty straightforward. All you'll need is a tape measure, four thick wooden discs, an electric screwdriver, metal pipes, four black floor flanges, and some industrial pipe elbows and tees (plus clothes hangers for the end). You can purchase a bundle of these pieces on Amazon for about $25, as well as some industrial metal pipes for $27. If you need to extend your rack further, you can get 24-inch pieces for about $33 on Amazon. You can also grab the wooden discs from Amazon, which start at $18 and go up to $26, depending on the size. If you find another type of rack that you prefer, just make sure it'll screw into your wooden discs before purchasing.
Connect all the pieces to make your DIY rack
First, use your tape measure to find the center of one of your wooden discs. Then, screw your flanges onto the middle and repeat the process on all four discs. Once they're ready, you can construct your clothing rack using the pipes and connecting pieces. Construct the sides of the rack first before attaching the hanging rail in the middle. You can either stick with this simplistic design or add another layer, depending on how many garments you need to hang. If you want to add a second hanging rod, use a three-hole connecting piece on each side of the rack.
Once your rack is built, just slide it into place in whatever room you'd like and use your hangers to organize all different types of clothing (though you may have to buy extras if you have a lot of items). When everything is in place, your space will be tidy, clean, and put-together, and you'll no longer have to deal with any random items strewn across your floor.
Customize your DIY clothing rack
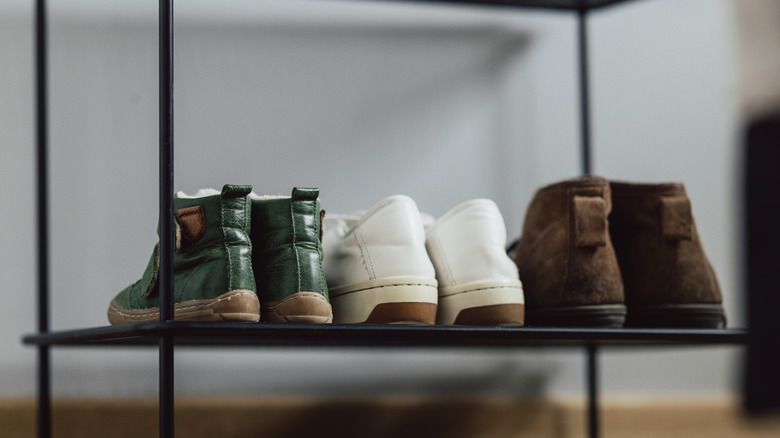
If you want to add some extra functionality to your clothing rack, one easy method is to add a shelf (or several) to the bottom, which you can do by adding a small section of extra pipe near the bottom and sliding on a wooden slab. You'll have to measure and cut the wood to size, as well as add pipe-sized holes in all four corners so it fits over the connecting pipe pieces.
This may initially take a bit of extra planning, but it'll allow you to organize all your shoes and even make room for bags and baskets. Similarly, you can choose to attach the rack to your wall rather than to wooden discs. This method would also likely use less pipe, as it wouldn't need to stick out very far. If you decide to do this, however, research how to do so safely before proceeding.
To improve your rack's aesthetic, you can even prime and spray paint your metal pipe, which is ideal if you're not a fan of black. Just make sure you do this outside and wear a mask so you don't inhale too many fumes. One concern to keep in mind when making this DIY hack, however, is your rack's sturdiness. If it seems unsteady, try adding some weights to the discs.