DIY Shelving Ideas That'll Give Your Kitchen The Extra Storage Space It Needs
We may receive a commission on purchases made from links.
If there's one place many households feel they could use more storage, it's the kitchen. With all the pantry staples and cooking gadgets, kitchen cabinets can quickly become cluttered. To add more storage space, consider installing some DIY kitchen shelving. While you can buy kitchen shelves, it's also quite easy to make your own. It will take a little more work, but the primary benefit of DIY kitchen shelving is that you can completely customize it to your space and decor style.
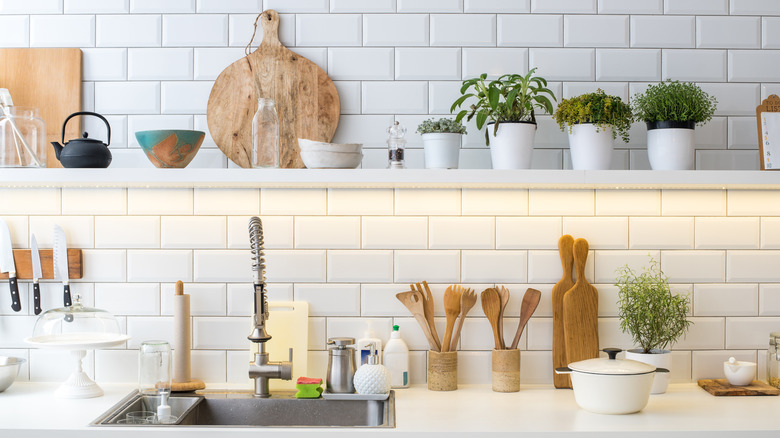
DIY open kitchen shelving is particularly modern-looking, and you can also use it to add decoration to your kitchen. Open shelving is an easy option to install (much easier than making cabinets from scratch!) and is even suitable for a first-time project for DIYers. We've rounded up some DIY shelving ideas for your kitchen, focusing on open shelving that's straightforward to make and install. Some of these ideas will help you build shelves from scratch, while others can help you upcycle old or store-bought shelves to make them more your own. Boost your storage space with these DIY kitchen shelving ideas, and once they're installed, check out a few simple ways to keep open shelving organized.
Here's how to install some simple DIY kitchen shelves
Installing your own DIY shelving can seem like a difficult task, but it's really quite straightforward. It's even possible to make DIY shelves without sawing any wood. Choose a pre-cut length of wood that's already available as-is at your local hardware store. Of course, first, measure the intended installation space to help you decide which size is best. Once you've chosen your shelf size, buy brackets to fit your piece of wood. Following this process means no cutting is necessary. If you want, you can also stain or paint the wood to your liking. This is also an excellent DIY pantry shelving idea.
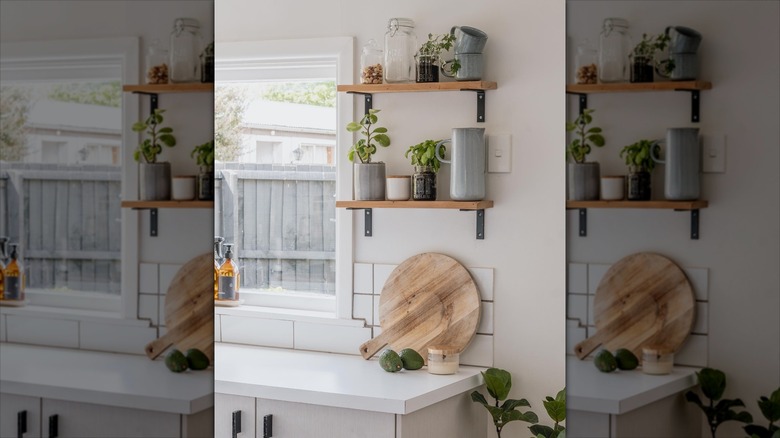
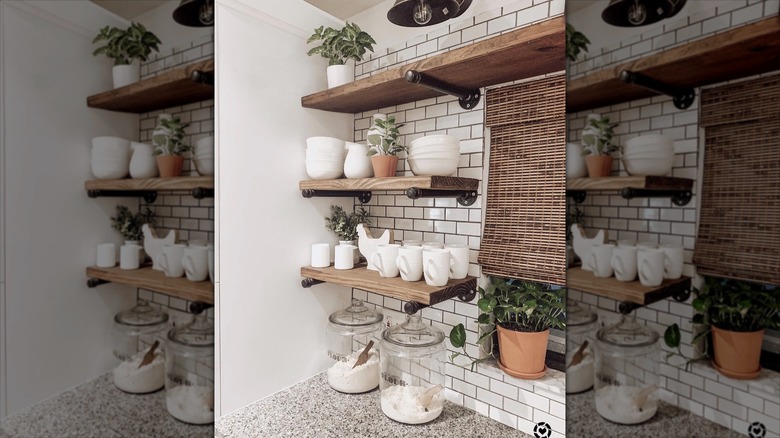
It's straightforward to make floating shelves as well
It takes a couple of extra tools to DIY floating kitchen shelves, but it's well worth it for anyone who wants to take advantage of their minimalist look. To start, you'll need to use rod-type floating shelf brackets, like the Mhmydz Solid Steel Floating Shelf Bracket, available for $13.95 on Amazon. Then, you'll need a thick enough piece of wood to drill a hole to insert the bracket into the shelf. This video from Megan Bell breaks down the directions and mentions that many hardware stores can cut a piece of wood down to size for you; otherwise, a hand or miter saw will be necessary. A large drill bit and an extension might also be needed to make a deep enough hole, but these are very affordable.
It's also possible to making floating shelves entirely out of wood
Don't want to use metal brackets? It's also possible to make floating shelves only using wood. For this project, it's necessary to cut wood to size, so you'll need a saw for this project (it's possible with a hand saw, but, of course, easier with a miter saw). It involves creating a wooden frame that is attached to the wall to create fully wood floating shelves. This is an excellent option if you want a more challenging project. This project also offers more sizing flexibility (it's not constrained by a rod size like in the previous DIY) and offers great strength since the wood support runs the entire width of the shelf.
Convert your existing cabinet into open shelving
It's so easy to convert your existing cabinets into open shelving. To get the look, ultimately, all you need to do is remove your cabinet doors! But this video from @mynorfolknest shows how to make this hack look even nicer. Remove the cabinet shelves and replace them with nicer shelves — thicker shelves can give the unit a floating look. You can also decorate the cabinet area behind the shelves with wallpaper or contact paper to further upgrade the shelving. This project is also renter-friendly; just swap it to the original shelves and re-install the cabinet doors when it's time to move out.
Take advantage of vertical space
Don't think you have enough space for open shelving? Think again! Even if you only have a minimal amount of space, you can install open shelving, and DIYing it is even better since you can choose a custom size. When you don't have much space, stack slimmer shelves vertically. You might not be able to fit as many large items, but it will still add that little bit of storage space. If your upper shelves are out of reach, you're going to want to use them for decoration or to place infrequently used items.
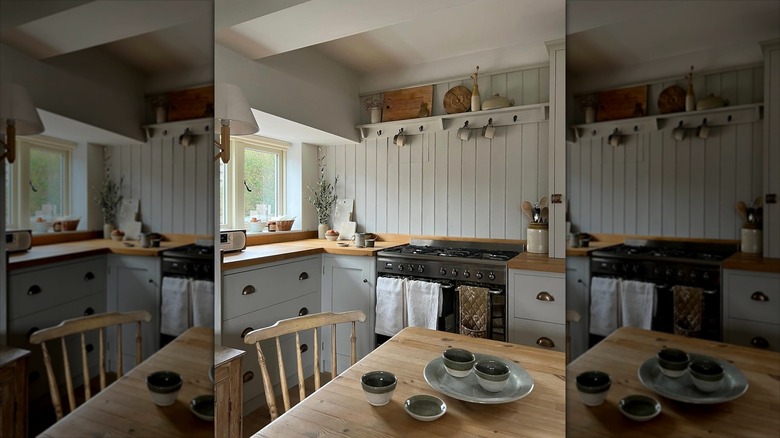
Flank cabinets or appliances
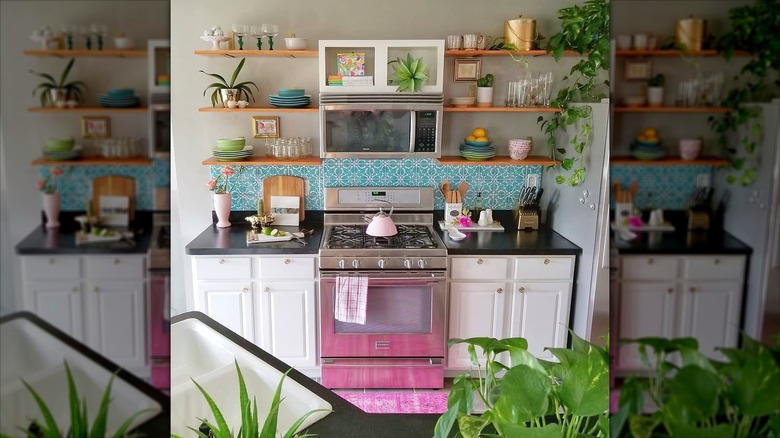
You don't need a blank wall to install open shelving; a great place to put your DIY kitchen shelves is beside cabinets or appliances. Flank them on either side to create a more balanced visual appearance. When stocking and decorating the shelves, you can throw balance out the window and play with levels, stacking different-sized items on each side so it looks more eclectic and lived-in. A couple of quaint picture frames scattered throughout the shelves give this shelving inspiration an even more creative look. Of course, you can also go for neat and even, if you prefer a tidier appearance.
Or add them in between cabinets
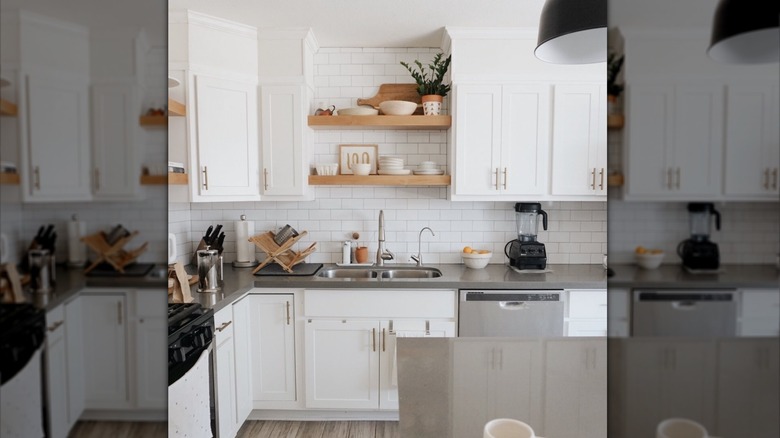
If your kitchen is primarily made up of cabinets, you can go for the opposite placement, adding open shelves in an empty space between cabinets. This takes full advantage of your wall space but makes the kitchen feel more open compared to having a full wall of closed cabinets. This placement idea works particularly well with floating shelves, so it looks like they're hovering between the cabinets. Match the shelves or some of the decor to your primary kitchen colors (like your cabinets) to make the shelving look more cohesive.
Add a rail along the bottom of your DIY kitchen shelves to add even more storage
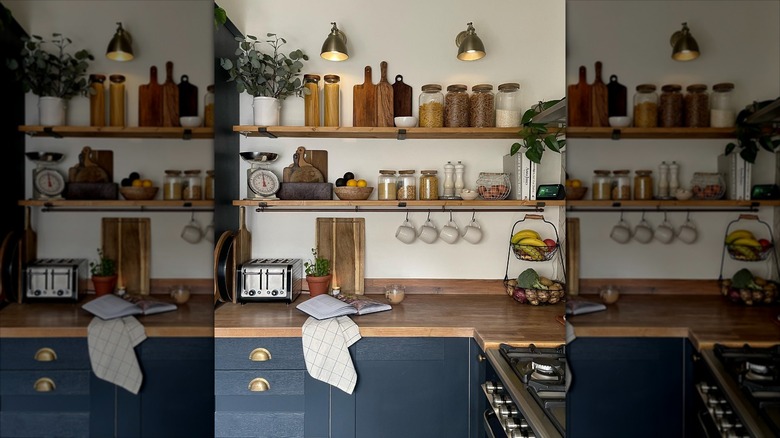
Add a rail on the bottom of your kitchen shelves to provide a spot for hanging storage. You can attach the rail to DIY shelves or pre-bought shelving, and you can choose any type of kitchen rail, depending on the length you need. The Greenco Black Wall Mounted Rail Hanger ($19.19 on Amazon) is excellent for heavier items like pots and pans, while the IKEA Hultarp ($6 from IKEA) is a shorter option. S-hooks help make it possible to hang items on the rails; the Evob S Shaped Hooks only cost $6.47 from Amazon but add a ton of hanging flexibility.
Hooks can also add more hanging space
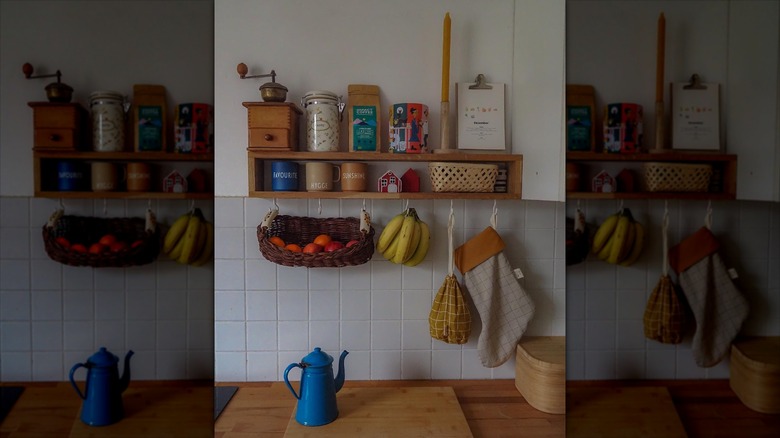
If you don't like the look of a hanging rail or don't need that much space, you can just use hooks to add hanging space. Like the previous option, this works on both DIY and pre-made shelves. A good option is ceiling hooks like the Etoolia Ceiling Hooks for $6.19 on Amazon. You can screw these hooks into almost any wooden shelf (drilling a pilot hole will make this process easier) and then use the hooks to hang kitchen towels, mugs, bananas, and baskets.
Pipe shelf brackets instantly turn a plain DIY shelf into an industrial one
Plain shelf brackets will get the job done, but if you want a more industrial look, opt for pipe shelf brackets. Their metal build and chunky appearance can turn any ordinary old shelf from basic to industrial-chic. Best of all, there's nothing special you need to do to your DIY shelves. These work just like regular brackets, so just measure and swap them out for your plain ones. The Everbilt 12 in. Black Industrial Pipe Shelf Bracket ($13.48 from The Home Depot) offers a similar look to this inspo photo.
Add a cost-effective gallery rail for a gorgeous finished look
This video from Lowe's walks you through the process of DIYing your own open kitchen shelves, but it's one of the last steps that really grabs our attention. Adding a trendy gallery rail to the shelving instantly upgrades the look and makes it more luxe, and you can use a towel bar to create a similar look. The Delta Becker Single Towel Bar is a stylish pick ($28.98 from Lowe's), and if you don't like the silver finish, you can spray paint it to your preferred color.
Craft a cool hanging shelf
For a unique open shelving look, consider hanging your shelves from the ceiling. This project involves drilling some holes into the plain wooden shelves, which you can make out of wooden planks stained or painted to your liking. Pass a strong wire through the holes, which should be spaced along the length of the shelf, and hang it from the ceiling. Keep in mind that this shelving idea won't be as stable as wall-mounted options, and you may want to store only non-breakable items on this shelf.
Add warmth with leather straps
If you want a hanging shelf look, but a little more stability, consider adding leather straps. In this video from @julieschnoor, the shelf is hung by the leather straps, which is an easy way to hang a DIY shelf that only involves drilling one hole. But like any hanging shelves, it may not be as stable as a mounted version. To get the best of both worlds, consider installing a wall-mounted shelf (a floating shelf will give the illusion that it's hanging from the leather straps). Add the leather straps for decoration, and you'll have a stabler DIY shelf.
Install a shelf under cabinets to take full advantage of space
There are a few uncommon places to add shelves that you can take advantage of for extra storage. Most people decide to install open shelving on an open spot of the wall. However, if you're out of free spaces, there's one more area that can work — under your current cabinets. This is an excellent idea for eclectic and maximalist homes; once decorated, the shelving can look a little bit crowded and busy. But it can easily add some lovely decoration to this otherwise empty space, and provide extra storage that's very easy to reach.
A coat hanging rack can be repurposed as part of a kitchen open shelving layout
A coat-hanging rack with a top shelf works as an excellent open kitchen shelf. You can DIY your own (this YouTube video from Morley Kert shows how — it takes a few tools and some woodworking know-how). Or, of course, you can just buy a coat-hanging shelf (or use an old one you already have). The Songmics Coat Rack with Shelf costs $19.99 from Amazon, and you can use it to store narrow items on top and hang mugs and tea towels from the hooks.
Upcycle a spice rack into a slim open shelf
There are plenty of clever IKEA BEKVAM hacks to add extra storage, and this is another excellent one, turning spice racks into shelves. Just build the spice rack and mount it onto the wall, but flip it over instead of installing it right-side up. Make sure to have the rod on the side further from the wall, which gives you space to hang items. As with any rail, S-hooks can help you hang more items, like baskets, mugs, and towels.
Install wall sconces to light up a decorated DIY open shelf
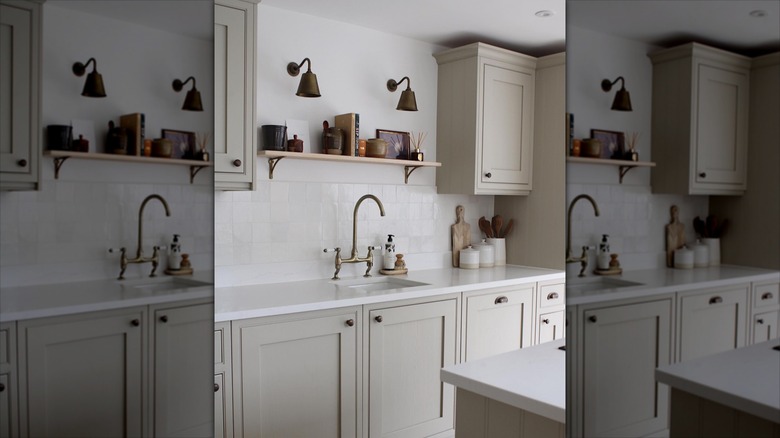
Upgrade your DIY kitchen shelving with a pair of wall sconces. Not only will it light up your decor beautifully, but it will also add some functional lighting to your kitchen. Place two or more sconces over your shelves, depending on the length. If you don't have an outlet and don't want to do any wiring, you can stick battery-powered puck lights (like the Westek LED Moon Puck Light for $8.98 at The Home Depot) into a vintage wall sconce. This allows you to add a lovely glow to your kitchen shelving without needing to plug anything in.
A pegboard is so versatile
Installing a pegboard is an easy way to add more wall storage. You can build your own, but there are also plenty of options you can buy and then customize to your liking. An option like the World Axiom Pegboard Shelf Set, which costs $24.99 on Amazon, already comes with shelves. If you want to add more, you can also buy other accessories or even DIY some extra storage pieces to hold your kitchen bits and bobs.