The Clever Way You Can Reuse Chopsticks To Attract Birds To Your Yard
We may receive a commission on purchases made from links.
The sets of chopsticks thrown into your bag of take-out add up. Whether you eat with them, or whether they stay in their paper sheathes, these bits of wood were once a tree, usually one that lived on the other side of the world. Unfathomable amounts of environmental harm go into creating these ubiquitous tools, from habitat loss through unsustainable forestry, to manufacturing, to long-distance shipping. Eking more life out of chopsticks is a great way to compensate for some of their environmental impact. Luckily, there are many handy ways to repurpose chopsticks around the house.
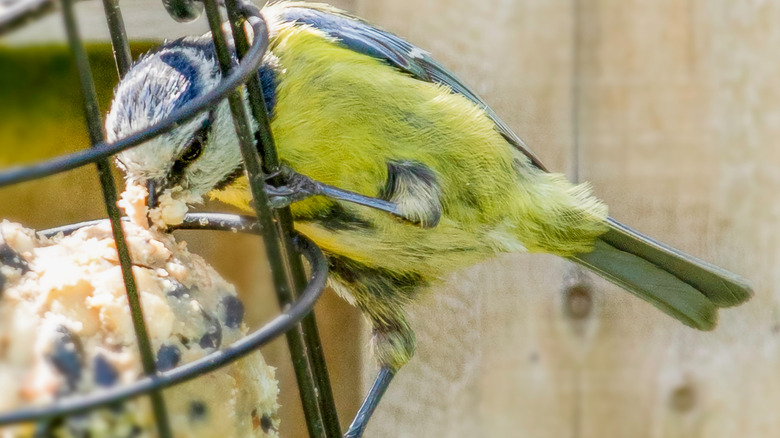
Let what was once likely part of a tree in China support backyard wildlife by crafting your chopsticks into a bird feeder! Use up your collection once and for all by making a DIY suet feeder or seed feeder. YouTuber Larry Satchwell shows you how to cobble together a suet cage with six sets of chopsticks, some wood pieces, and a few other materials and tools. He shows off his final product's appeal with shots of feasting birds enjoying his design.
Gather and prep your materials
If you have the time, tools, and patience, Larry Satchwell's design is a fun build to tackle. Suet feeders are an excellent way to help birds during migration season. His suet cage consists of two squares of wood attached vertically by chopsticks. The circular placement of the chopsticks makes this design perfect for holding suet balls.
To replicate his suet cage, you'll need two 6x6-inch wood pieces, 12 chopsticks, and an eye hook and chain to hang the final product. Grab a drill and set of bits, an awl or a nail, and a hammer. You'll also need super glue, wood glue and spray adhesive; painter's tape (3-inch width), and a printout of a 5-inch-diameter clock face.
Cover one side of both 6x6 wooden pieces with painter's tape. Stripe superglue down the center of each piece of tape and secure the two wood blocks together. The glued tape will temporarily hold the wood pieces together during drilling. Cover the face of the top wood block with painter's tape. Affix the clock face printout with adhesive glue spray to the wood block face. The hour markers on the printout are a ready-made way to know where to drill your holes for the chopsticks, and the painter's tape will make taking off the paper guide a breeze. With a nail and hammer, make a small hole where each of the hour markers on the clock meets the edge of the clock face.
Assemble your chopstick bird feeder
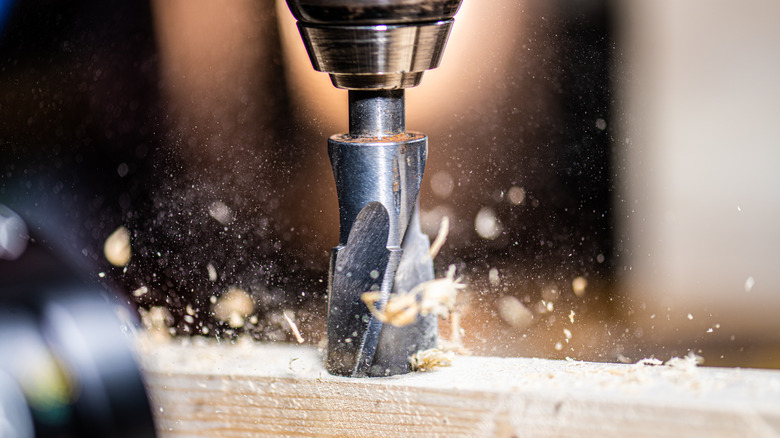
Peel the tape and clock face from your wood block, and you're ready for your next steps. Measure the two diagonals to find the centerline, and mark the center point where you'll make a hole for the eye hook for hanging the feeder. With a drill bit that's just slightly wider than the diameter of your chopsticks, drill fully through the top piece and partially into the lower piece at each of the nail indentations. Also, drill a hole at the center point for the eye hook. Separate the two pieces of wood and remove the painter's tape.
Glue and place 10 of the chopsticks in the holes in one of the 6x6 pieces. Leave two holes near one of the corners empty; these holes will be for two movable chopsticks where you can add suet. Use a nail or toothpick to add glue to the bottom holes of the other 6x6 piece, and insert the free ends of the chopsticks. Let the glue dry overnight.
The next day, screw the eye hook into the top of the feeder, place some suet inside the cage, hang the feeder on a length of chain, and wait for hungry visitors! Your new suet feeder can help keep birds in your yard longer as they fuel up for the winter months.