Breathe New Life Into An Old Door With This Shabby Chic Headboard DIY
Headboards are one of those things that can not only fulfill the very functional task of protecting the wall and providing a backrest but are also a great way to make a bedroom look more finished and create a perfect focal point in your design scheme. While headboards can be one of the most expensive parts of the bed, there are many budget-friendly DIY approaches to creating your own headboard. They include creatively repurposed doors, which due to their size and beauty, make stunning DIY headboards with a few modifications.
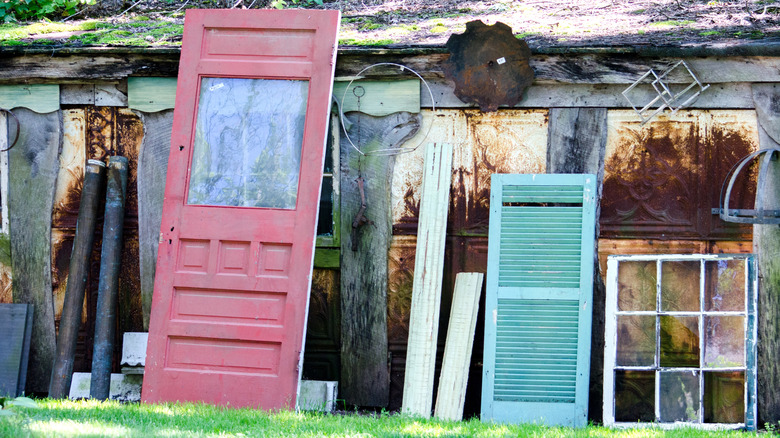
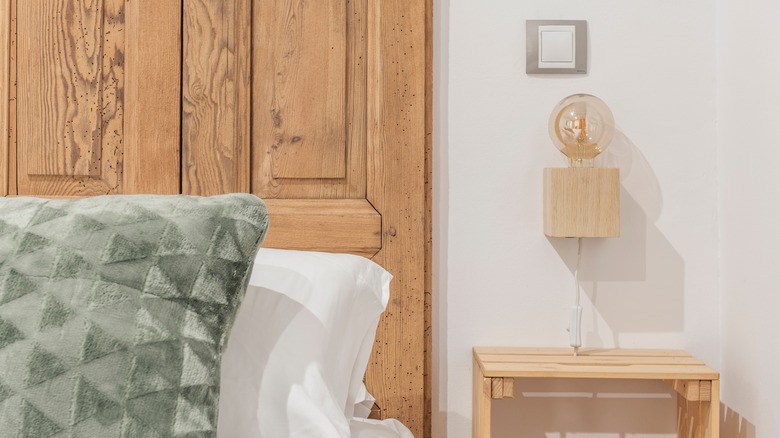
Older doors are often beautiful works of art, many from older homes made of solid wood like chestnut, oak, and walnut. Left in their natural state, they can be used as headboards that give a perfectly shabby-chic rustic look to your bedroom. They can also be modified to look exactly like a much more expensive headboard easily and on a budget. This DIY is also a great way to put to use beautiful old architectural details and save them from landfills. While you may already have some old doors lying around in storage to fashion into a headboard, you can also find them at architectural salvage shops and places like Craigslist and Facebook Marketplace.
Making a door into a headboard
To create a stunning headboard from an old door, first, you will want to measure the door to make sure it will fit your bed. While standard-height doors often work perfectly for Queen and King beds, smaller ones may require cutting off some of the excess at the top and bottom of the door. There are a few different approaches for using an old door as a headboard, including simply attaching a door as is to the wall with hanging hardware fastened into the studs. To build a more complex headboard that you can fasten to the bed itself. Use two wood 4x4 posts or 2x4 planks on the end or fastened to the back of the door that will allow you to bolt the bottom of a standard metal box frame to the posts. If you are worried about the door scraping the wall, you can also add small pieces of wood to the back that puts space between the wall and bed.
While a simple door gives a rustic, cottage-style, or flea market-style vibe, you can also add additional trim and moldings for a more luxe look that sometimes disguises the fact that it was ever an old door. Use wood glue and brad nails to attach crown molding, decorative trim, or other wood pieces along the top or sides to finish off the headboard. While many of these DIYs incorporate a door turned on its side to make a headboard, you can also use more than one vertical door cut down into a headboard, bifold doors, or even old garage doors.
Customizing an old door headboard
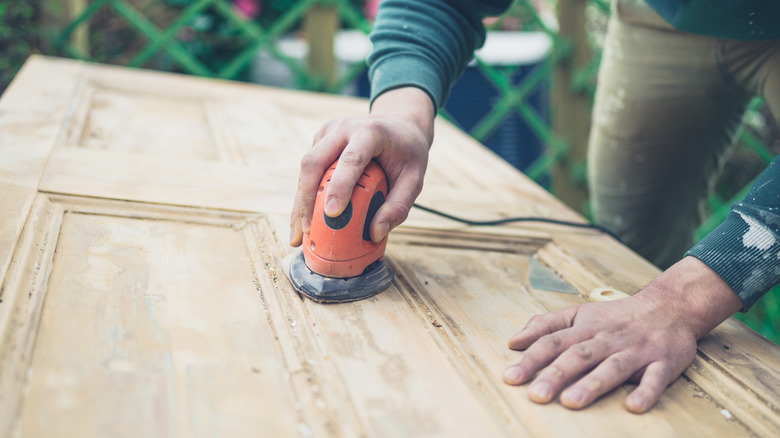
While many DIYers leave their door in a natural shabby-chic state with chips, cracks, and hardware like hinges and door plates intact, others refinish their doors completely by sanding, staining, or painting them to match their decor. Before completely refinishing your door, you will want to remove existing hardware and use wood filler to fill any holes or cracks before painting for a smooth finish.
You can also use other elements like millwork appliques, fabric or upholstery batting, and peel-and-stick wallpaper to add additional visual interest to your new headboard, which is a great way to disguise imperfections in the original door if you are going for a more streamlined, less rustic look. For a sleek modern version, try painting your door a stylish glossy or matte black. Or, for a natural look that allows the original wood grain and details to shine, sand, stain, and apply a wood wax to the door.