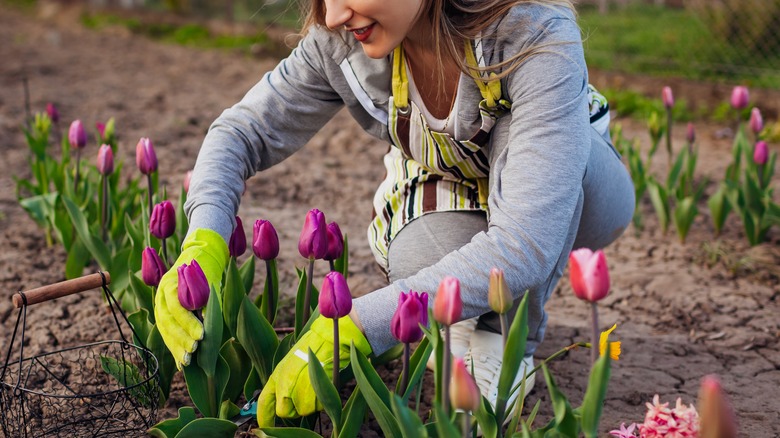
13 Tips For Preventing Common Issues That Are Sure To Harm Your Tulips
The common tulip (Tulipa) originated in central Asia and southern Europe. Tulips are simple yet timeless, adding a burst of color to any flower bed or window box. But, like all natural things, they are susceptible to disease. Tulip diseases vary in severity, cause, and remedy. Fortunately, there are various ways to prevent and cure these illnesses to keep your garden fresh and your perennial bulbs healthy for another year.
Some ways to grow healthy tulips include maintaining a routine for watering plant seedlings and monitoring the pH balance of your soil. The type of weeds growing in the soil among your tulips can tell you about the quality. It also helps to avoid crowding and planting in medium-damp soil in an area that receives full sun. Common tulip illnesses include basal rot, root rot, and contagious viruses. Here, you'll learn more about symptoms to watch for, common tulip diseases, and how to treat general and specific signs of illness in your garden bed.
Sick tulip symptoms to watch for
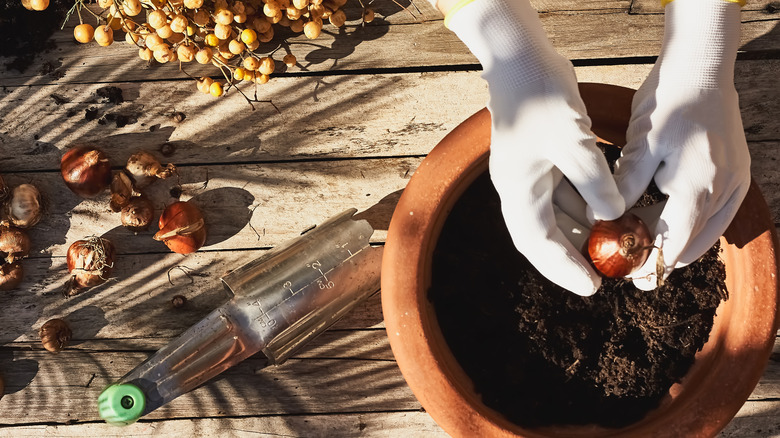
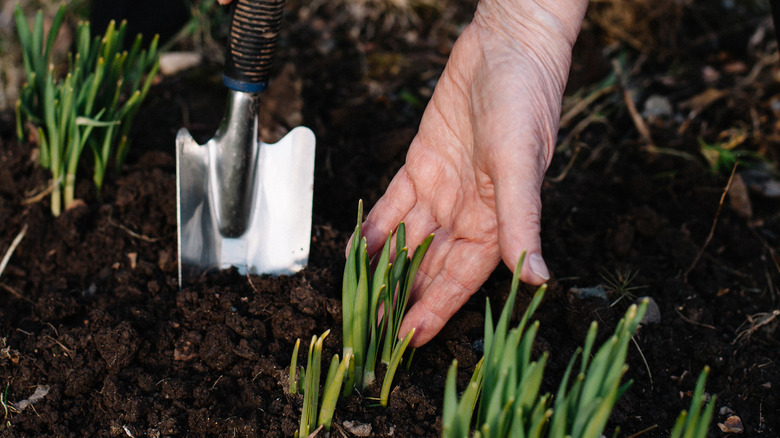
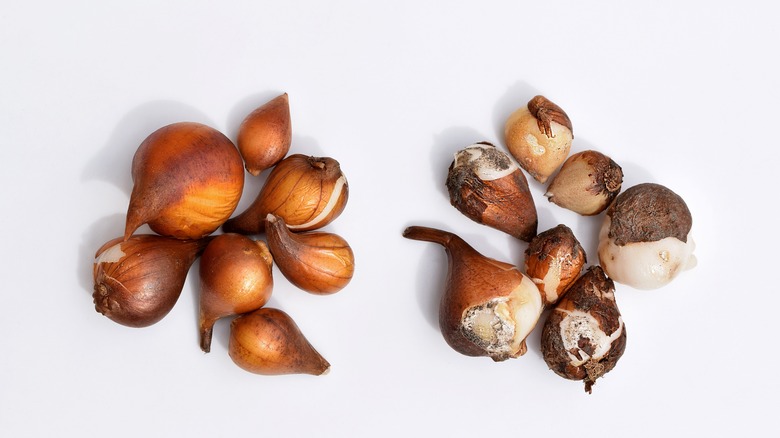
A healthy tulip begins with a healthy bulb. A plump, firm bulb with no signs of mold should grow into a healthy tulip unless there are negative external influences like home garden pests, fungus, mold, or viral infection. The healthy bulb should be planted in soil three times the length of the bulb, and grows best in soil temperatures under 70 degrees Fahrenheit. While some tulip diseases have distinct signs of illness, there are also general symptoms for which to look.
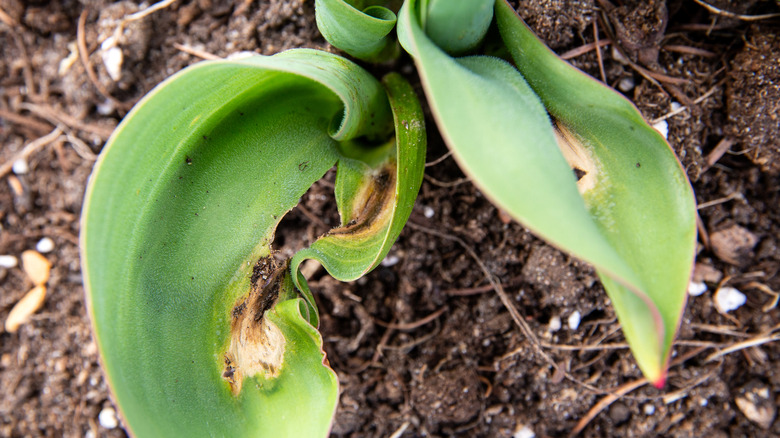
How do you know if your tulips are at risk? Common signs that a tulip is unwell include soft, spongy bulbs, furry growth on the bulbs, brown spotting on the leaves, limp stems, dry petals, black granules on leaves, distorted petal coloring, and mottled or striped leaves. If you notice these unusual characteristics, your tulips could be at risk of illness. Some tulip diseases spread to nearby plants. It might also be harmful to use diseased plant leaves in compost. It helps to know some of the more common tulip ailments to prevent these problems.
Nipping root rot in the bud
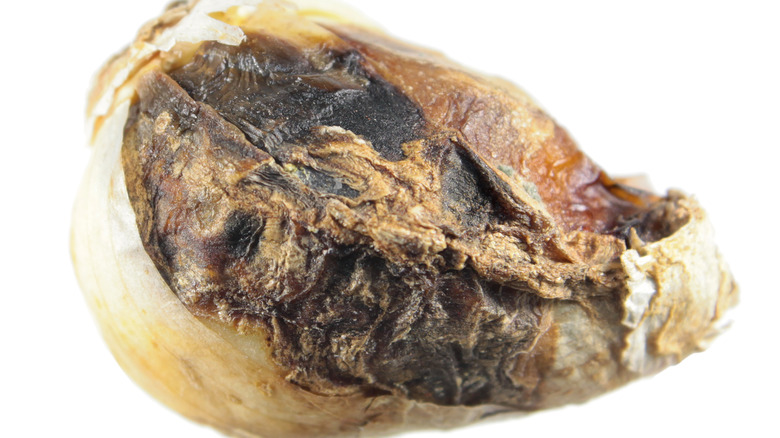
Root rot is caused by a parasitic pathogen called Pythium. It thrives in damp conditions and harms the bulb and root of the tulip plant. While Pythium is found in damp gardens, it can also be introduced to your tulips by fungus gnats and other pests. Root rot symptoms include gray patches on the bulb. The bulb may also soften in texture and produce a foul smell. Tulips with root rot rarely grow to produce the above-ground portion of the tulip plant.
Sadly, most tulips infected with this condition can't be saved. If you notice signs of root rot in the bulbs or roots of your plants, remove all infected tulips as soon as possible. There is a chance that infected bulbs will produce new roots in dry soil, but this is rare. The infected soil should be treated chemically or by sterilizing it with steam. Preventative measures include maintaining adequate drainage and never overwatering your tulips. Adding pine bark to the mix may also help if you make your compost.
Outsmarting tulip topple disorder
The aptly named tulip topple disorder causes flowers to bend or break at the stem. Topple is almost exclusively found in greenhouse tulips and is unlikely to affect bulbs in an outside garden. Even if you don't use a greenhouse, you'll want to look for early signs when buying tulip plants. Symptoms of the disorder may include noticeably translucent sections of the stem. The affected portion may shrivel, causing the stalk to bend and eventually topple.
Some research suggests tulip topple could be due to low calcium levels in garden soil. To prevent tulip toppling in greenhouse flowers, use nutrient-rich soil and follow a steady watering schedule. You can also add a calcium-infused fertilizer to potting soil. Another way to prevent toppling is to plant tulips during the fall for a natural spring bloom, rather than forcing an early bloom in greenhouse conditions. October is a good time for planting when the soil has cooled from the hot summer months.
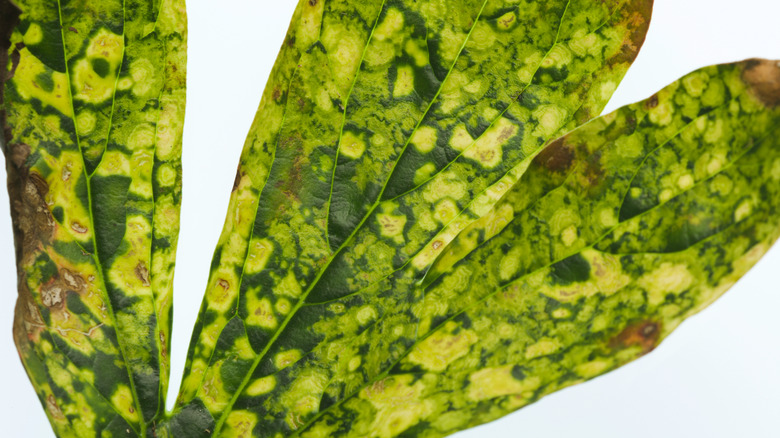
Navigating tulip breaking virus
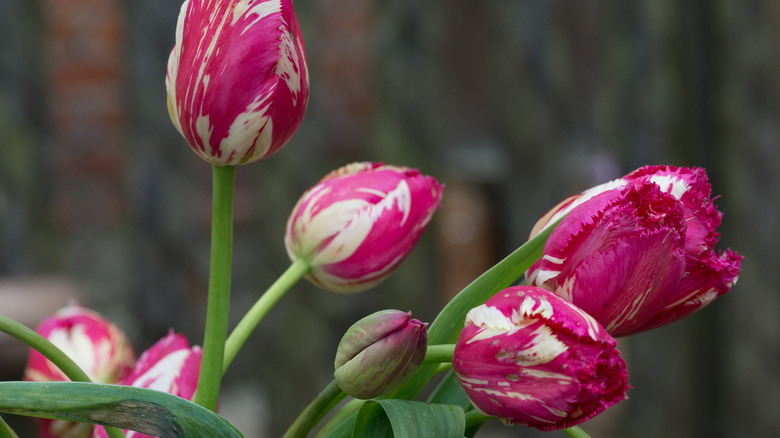
Tulip breaking virus is sometimes referred to as mosaic virus. It causes a striking, but unhealthy striping of tulip petals and leaves. If you find the TBV's appearance beautiful, you're not alone. In the 17th century, tulips infected with the virus were sought after for their unique aesthetic. The main cause of TBV is aphids. The insects transfer the virus to tulips while feeding on them. TBV may also be spread to healthy flowers through contaminated gardening tools. Symptoms of TBV include a splotchy or uneven color, even before the stripes form.
There is no treatment to remove the TBV virus from your tulips. Any TBV-infected tulips should be removed from your garden and disposed of carefully (avoid adding them to your compost pile). Some research shows TBV favors late-blooming varieties of tulips, usually plants in colors of pink, red, and purple over white or yellow varieties. It's best to separate brightly-colored tulips, white tulips, and dark tulips into different flower beds or pots to avoid the potential transfer of infection.
Eliminating tobacco necrosis virus
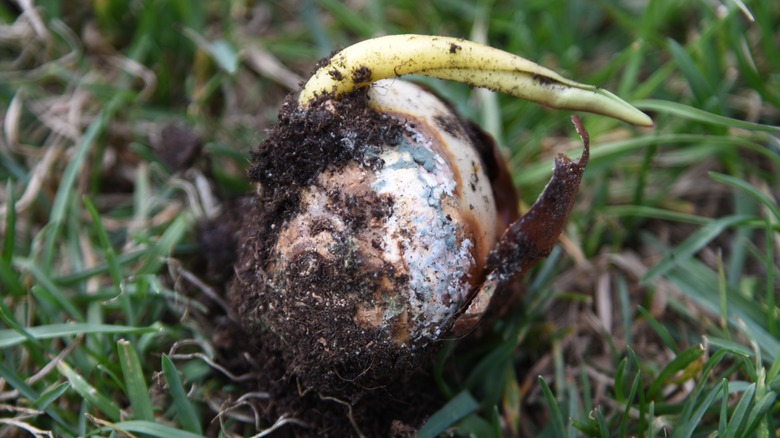
Don't let the name fool you, tobacco necrosis virus no longer affects tobacco plants, but tulips and bean plants. The Olpidium brassicae fungus causes TNV in both greenhouse and garden tulips. Spores of the fungus have a long lifespan and can thrive in your garden for years. The first sign of TNV is usually dark splotches on the bulbs. The infected tulips are stunted in growth, and plants that manage to grow have twisted stems and leaves and are covered in spots. The spotted appearance is the plant dying, leaving discolored splotches as the necrosis travels through the plant.
Like other tulip viruses, TNV is incurable. Once your tulips show infection signs, they should be removed from your flower beds. Be careful to dig up the root and bulb of the tulip to destroy the entire plant. Your best course of action with TNV is prevention. Monitoring gardens for pests like aphids and weeding regularly minimizes the risk of TNV. Long rotations are also helpful. Tulip rotation involves leaving a garden bed fallow (unused but tended) for a season or more. During this time, you plant bulbs in a new garden bed and rotate back to keep the soil fertile.
Sidestepping tulip stem nematodes (Ditylenchus dipsaci)

Garden pests cause several issues in tulips. One such pest is the tulip stem nematode (Ditylenchus dipsaci). Nematodes are parasitic worms. There are different species of nematodes, and each acts differently in gardens. Some are useful, feeding on insects that might otherwise harm your plants, and others hurt your plants. Tulip stem nematodes infest the tulip bulbs, laying hundreds of eggs inside. Symptoms of tulip nematodes begin with squishy brown patches on the bulb. Sometimes the bulbs completely rot before blooming. If the tulip grows, you may notice purple streaking, blistering, or toppling of the stem. Petals may grow twisted or stunted.
Nematodes can easily move from tulip to tulip, leaving the bulb and returning to your garden bed once finished with the flower. They can also live in soil without tulips or other plants for up to a year. For these reasons, you should remove the infected tulips from your garden. Keep gardening tools clean, and disinfect any tools that come into contact with a nematode-infested tulip. While there has been some discussion on the effects of heat on tulip stem nematodes among commercial cultivators, there is a chance of damaging tulips this way.
Putting a stop to Rhizoctonia disease in your tulip garden
Gray bulb rot, also called Rhizoctonia disease, is a condition caused by the Rhizoctonia solani pathogen. Signs your tulips are experiencing gray bulb rot include distortion and stunted growth. You may also notice sclerotia growths on the root. Sclerotia is a hardened fungal webbing that contains the food of the fungus. Tulips that manage to grow from an infected bulb are likely to result in a short, discolored stem with no blossom.
To avoid infecting your garden with gray bulb rot, closely inspect new tulip bulbs for signs of damage. Maintain regular watering and fertilizing routines, avoiding doing too much of either. Plants that have already sustained some form of damage may be more susceptible to infection. Soil infected by Rhizoctonia solani should be treated with a fungicide. Unfortunately, tulips already infected can't be treated this way. Like many other tulip illnesses, tulips infected with gray bulb rot should be destroyed.
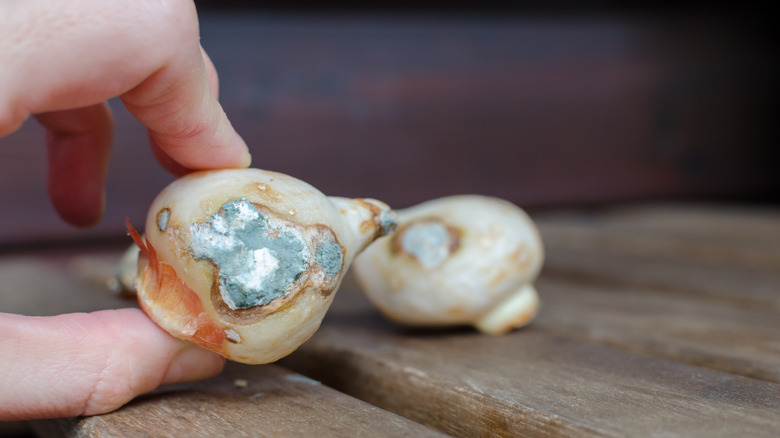
Halting blue mold in garden tulips
Blue mold is caused by Penicillium. P. corymbiferum. The mold differentiates from other tulip-infecting fungi in the very obvious blue-green mold growing between bulb scales. Bulbs may also form dark brown spots. Most bulbs won't produce healthy flower shoots, but those that manage growth are usually stunted. You may notice the edges of the leaves look dead. These gray or brown patches are necrosis, as the plant tissue begins to die.
Blue mold can impact commercial bulbs in storage, especially if conditions are moist. It's helpful to inspect new bulbs when you buy them and check for signs of damage or disease. If you're concerned about blue mold on your garden beds, fungicide treatment can help prevent it. Any bulbs already infected should be disposed of. If you can save tulips near a diseased plant, be extra careful digging up the bulb. Damage makes the bulb more vulnerable to Penicillium and other molds.
Preventing tulip bacterial blight
Bacterial blight in tulips can be caused by the Curtobacterium flaccumfaciens pv. Oortii bacteria. Symptoms of the condition include a unique yellow slime on the bulbs and white or silver streaks on the leaves. Leaves may appear wilted or brittle and cracking. Tulips with bacterial blight may not grow to full height, or form a blossom.
The best way to avoid bacterial blight is to avoid planting infected bulbs. Once planted, the blight is difficult to treat. The best way to deal with any tulip bacterial issue is by removing the infected plant and the soil it lives in. Carefully monitor weather conditions and maintain a regular watering schedule. Garden beds that are overwatered or have poor drainage are more likely to hold infected flowers. If your garden is especially wet, you might want to consider loam soil. Loam lets tulips retain the moisture they need without waterlogging them.
Fending off tulip Tobacco Rattle Virus (TRV)
Tobacco rattle virus is a pathogenic virus affecting tulips and other garden flowers. It impacts more than 400 plant species around the world. The virus can be spread by pests like stubby-root nematodes, or through the use of contaminated gardening tools. Some plants never develop symptoms, making it difficult to tell if some tulips have TRV while others don't. If symptoms do appear, they could range from mosaic petal patterns to rings and spots on the leaves.
There is no cure for TRV but preventative measures help. Always inspect new tulips or bulbs as they come into your garden. As nematodes tend to prefer damp garden beds, maintaining proper drainage helps deter them. Along with moisture management, take care with gardening tools as tending one flower bed could impact the next. Sanitizing gardening things like pruning sheers before use helps prevent the virus from spreading. If you decide to reuse an infected garden bed, plant flowers that aren't prone to TRV.
Navigating leaf scorch among tulips
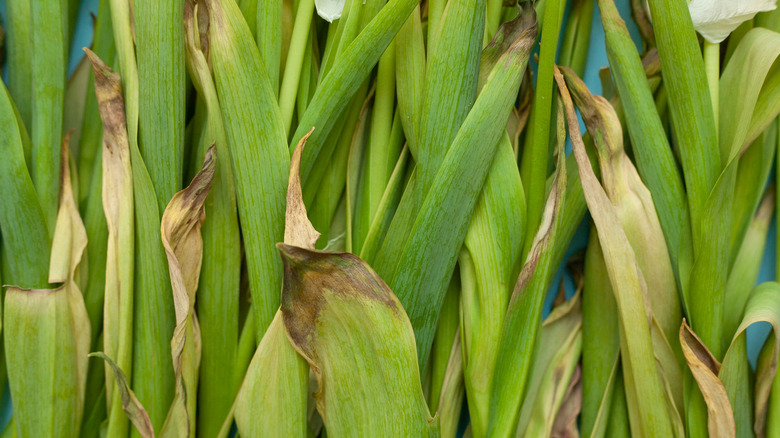
Leaf scorch (Stagonospora curtsii) is a fungal infection that can impact any bulb plant, including tulips. It is sometimes called red blotch or red fire. Symptoms of leaf scorch include deformed stems and leaves, and yellow or brown patches on different areas of the plant. You may notice the stalk of the plant looks dry and fragile. Fungal leaf scorch in tulips differs from leaf scorch in trees, which results from dry, hot weather. It is encouraged by damp weather, during which spores travel in the air, landing on plants and soil.
Remedies for leaf scorch include fungicidal treatments, as well as decreased moisture in your flower beds. You can encourage healthy tulips by planting in sunnier areas of your garden and properly spacing tulips to avoid overcrowding. As with many other fungal illnesses, tulips with advanced levels of leaf scorch should be removed and destroyed. Take care to remove the entire tulip, including the bulb.
Preventing tulip fire fungus
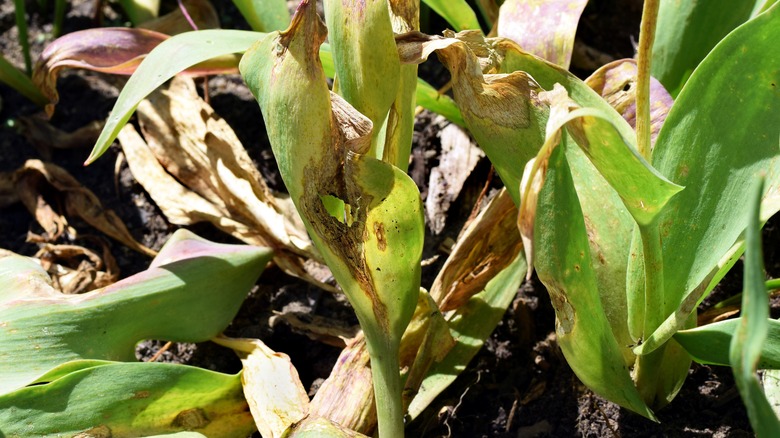
Tulip fire, or Botrytis blight, is caused by the Botrytis fungus. Signs your tulips are infected with tulip fire include small flecks or patches of brown on leaves, tan discoloration and spotting on flower petals, and, in extreme cases, gray mold. If left untreated, tulip fire eventually causes stems and blooms to collapse. Choosing your bulb carefully and starting to prep soil in spring minimizes the potential for illnesses like tulip fire, but if your garden encounters a problem, it's best to treat your flowers fast.
The best treatment for tulip fire is a fungicide spray. The spray should be applied when tulips grow high enough that leaves reach approximately four inches in height. Along with antifungal treatments, tulip fire can be prevented or remedied through hygienic treatments. Removing dead plants, infected petals, and leaves is a good place to start. It's useful to remove dying petals before they fall naturally. Maintaining a regular watering treatment to avoid overwatering minimizes the potential for mold growth. Designating regular spacing between bulbs before planting ensures tulips aren't crowded as they grow.
Avoiding basal rot
Basal rot (Fusarium oxysporum f. sp. tulipae) is another tulip-affecting fungus, but not quite as rampant as tulip fire. The fungus originates in the soil and penetrates tulips through the root bulb. It thrives in higher temperatures (above 61°F). Basal rot gets its name because once the tulip is infected, the fungus resides in the basal plate of the tulip bulb. Bulbs infected with basal rot rarely reach maturity or bloom.
Symptoms of basal rot include reddening of the leaves, starting at the tips, gummosis (a condition wherein a brown substance forms in the bulb), wilting, and stunted growth. As the plant dies, you may notice streaks at the base of the stem. Dark streaks signal the rot has spread into bulb scales and is beginning to climb the stem. The best way to avoid basal rot is to carefully inspect bulbs, avoid overwatered plants, and not purchase or plant any bulbs showing signs of rot. Preventive measures against basal rot include maintaining the pH of your soil between 6.0 and 7.0.