9 Cleaning Hacks That'll Make Your Refrigerator Really Sparkle
We may receive a commission on purchases made from links.
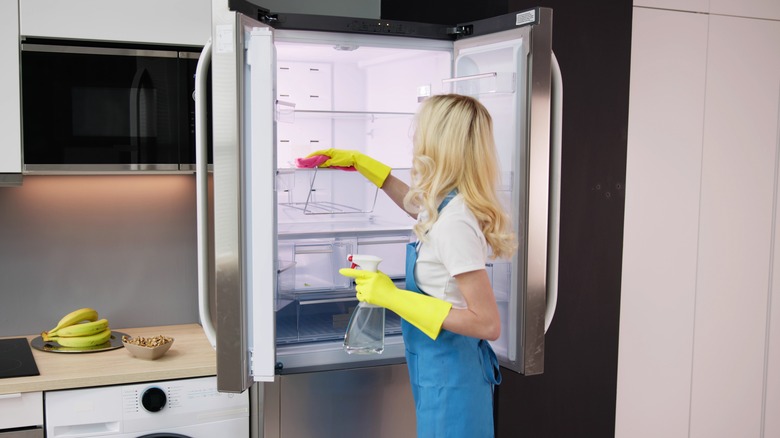
The refrigerator is one of the busiest appliances in your house. With constant use, it can become sticky and icky before you know it. In addition to avoiding the disagreeable appearance and odor of a dirty appliance, you want to maintain a healthy environment for storing foods. When it's time to give your fridge a thorough cleaning, try these hacks that employ simple tools and common ingredients.
We've rounded up a collection of recommendations for cleaning your refrigerator with inexpensive household staples that you probably already have on hand. Some of these hacks assist with killing bacteria and fungi that might grow inside the refrigerator or on the door gasket. Other hacks work well for cleaning the outside of the fridge so that it complements your kitchen decor with a shiny, polished appearance. Below we suggest effective procedures for using natural, food-safe, cleaning products like white vinegar, baking soda, olive oil, and more to clean your refrigerator so that it really sparkles.
White vinegar and baking soda are food-safe cleaners for your fridge's interior

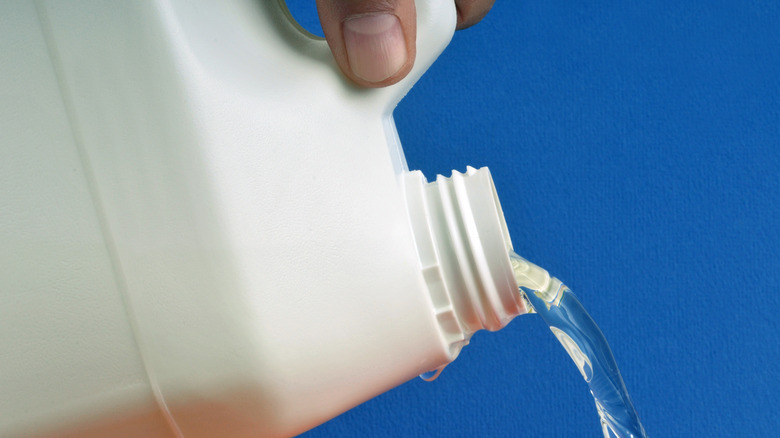
When it's time to give your refrigerator a deep cleaning, look no further than your pantry for two kitchen staples that will do the job. The distilled white vinegar that you use in recipes for pickles, dressings, and marinades stands out as an effective and food-safe cleaning agent. That's because it contains approximately 5% acetic acid to dissolve grease, grime, and sticky messes. As an alternative, you can grab that box of baking soda. Unlike vinegar, sodium bicarbonate is a base, not an acid. But it does an excellent job of dissolving dirt, while it deodorizes the interior of your fridge. Though you may think combining vinegar and baking soda would give you double the cleaning power, they should be used separately in order for each ingredient to be effective.
Your refrigerator can harbor pathogens and bacteria from food spoilage, possibly leading to illness for you or a family member. To kill germs while you wipe up messy spills and drips, create a solution of white vinegar and warm water in a 1:1 ratio. Mix it in a bucket and apply the cleaning solution with a microfiber cloth. As an alternative, you can mix the solution in a spray bottle, spray it onto the surfaces inside the fridge, and wipe with the cloth. If you'd like to use baking soda instead of vinegar, mix a solution of 2 tablespoons baking soda to 1 quart of hot water. Pour the solution into a spray bottle, spray it inside the fridge, and wipe the surfaces with a microfiber cloth.
Highly diluted chlorine bleach is safe to sanitize the fridge after a basic cleaning
For peace of mind, you want to know that the refrigerator where you store food for yourself and your family offers a sanitary and non-toxic environment. According to the Centers for Disease Control and Prevention, a mixture of highly diluted chlorine bleach and water serves as an effective sanitizer. After you've cleaned the interior surfaces with either soapy water, diluted white vinegar, or diluted baking soda, the sanitizing process adds an additional level of pathogen-fighting cleanliness.
The key to safely using chlorine bleach inside the refrigerator is to dilute a small amount of bleach in a large amount of water. The recommended ratio is 1 tablespoon of bleach to 1 gallon of warm water. As a final step in the cleaning process, wipe down the inside of the fridge with the diluted chlorine bleach. Alternatively, you can or spray it on and wipe with a microfiber cloth. This final step may give you peace of mind, knowing that you've made the extra effort to disinfect your fridge. When you're using bleach in the home, take safety precautions by wearing gloves and eye protection, as well as opening windows to provide ample air circulation.
Kill germs inside your refrigerator with hydrogen peroxide

Perhaps you want to avoid using chlorine bleach as a sanitizer for your fridge's interior. Instead, you can substitute hydrogen peroxide as a food-safe disinfectant. It kills bacteria and mold to ensure a healthy environment for food storage. Hydrogen peroxide is a natural product made from hydrogen and oxygen, the same chemicals as water (H2O). However, hydrogen peroxide has an extra oxygen molecule (H2O2) that gives it the power to oxidize pathogenic microorganisms, creating a sanitizing effect on surfaces. The familiar product that we see on the shelves of pharmacies and grocery stores consists of 3% hydrogen peroxide dissolved in purified water. The solution is packaged in an opaque, brown bottle because hydrogen peroxide decomposes in the presence of sunlight.
To disinfect your fridge, start with a general cleaning to remove all food residue and grime. Then, pour a bottle of 3% hydrogen peroxide into an opaque spray bottle. There's no need to dilute the liquid. Spray the interior surfaces of the refrigerator with the hydrogen peroxide, and allow it to sit for 10 minutes. Then, wipe off the disinfectant with a damp cloth and finish the job by drying the surfaces with a clean towel.
Haul out the vacuum cleaner to maintain your refrigerator condenser coils

You depend on the fridge to hum along every day, maintaining both cold and freezing temperatures to store the food that your family eats. Meanwhile, the refrigerator depends on a condenser to dispel the heat and circulate the refrigerant, cooling the air to food-safe temperatures. The condenser coils are an important component of the refrigerator, and they need to stay clean to function at maximum capacity. Found underneath or in the back of the refrigerator, the coils collect dust, dirt, and pet hair. When they are clogged, the refrigerator has to work overtime to maintain cold temperatures, costing you money on the electric bill.
The best tool for cleaning the condenser coils is your vacuum cleaner. Start the job by moving the refrigerator away from the wall and unplugging it to disconnect the electrical power. Depending on the model, you'll find the condenser coils in the back of the unit or underneath it. Remove the toe guard from the front of the fridge to access the underneath area. Alternatively, you might need to remove a grille to reveal the condenser coils located in the back of the appliance. Use the handheld attachments on your vacuum cleaner to clean the coils. The skinny wand is useful for removing dust from crevices, and the soft brush attachment allows you to clean the coils thoroughly without bending them. After removing the dust and debris from the condenser coils, replace the grill or toe guard and reconnect the electrical cord to the outlet.
Use toothpaste to remove scratches from the outside of a stainless steel fridge
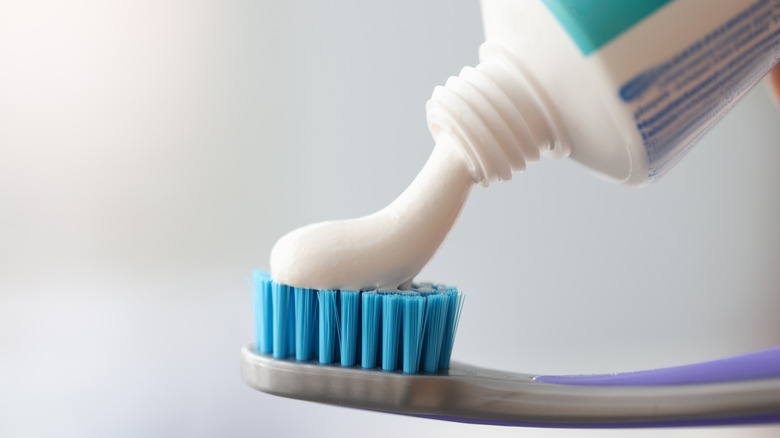
Stainless steel appliances lend a sophisticated look to modern kitchens. Over the years, owners of stainless steel refrigerators have discovered a variety of hacks for maintaining the polished sheen on the metallic outer finish of the appliances. One interesting hack is to apply whitening toothpaste to remove surface scratches. It works because the product has a mildly abrasive texture that causes it to whiten your teeth. On stainless steel, this amount of abrasion acts like fine sandpaper to remove scratches that do not penetrate deeply into the metal surface.
To use this hack, you'll need to start with a clean surface. Wipe down the outside of the fridge with a stainless steel cleaner to remove the greasy, sticky smudges that collect there. Then, apply the whitening toothpaste to the scratched area with your finger. Rub it in, moving your finger in the direction of the stainless steel grain. Next, wipe the area with a damp, microfiber cloth. If the scratches are not completely removed, you'll need to repeat the process. When you've achieved a smooth surface, you can finish the job with a light application of olive oil or stainless steel polish to bring out the shine.
Wipe away fingerprints from a stainless refrigerator door with olive oil

Think of how many times a day you and your family members touch the stainless steel refrigerator door. Especially in a busy home with kids, the fingerprints and the sticky residue mount up, leaving the outside of the fridge looking dirty. Instead of turning to harsh cleaners or abrasive materials, there's a cheap and easy hack to remove the smudges and give the fridge a sparkling, polished look. Simply open the pantry and grab that bottle of olive oil.
First, do a basic cleaning with water and dish soap to remove dirt, grime, and smeared-on food residue. Then, pour a bit of olive oil on a clean cloth or paper towel and wipe the fridge's exterior. Rub the oil-saturated cloth in the direction of the stainless steel grain. After it's coated, buff the surface with a dry, microfiber cloth. This final step will remove any oil residue and bring out a shiny, polished appearance.
Use a magic eraser sponge or sheets for quick refrigerator clean-ups

If you're looking for a quick, convenient, and easy product for cleaning the fridge, the Magic Eraser is a handy tool. It comes in the form of a sponge or in sheets. According to the Mr. Clean website, Magic Erasers are safe to use on painted metal refrigerator doors, plastic door handles, plastic water and ice dispensers, glass interior shelves, and the plastic interior walls of your fridge.
To use a Magic Eraser, simply wet the sponge or sheet with water, squeeze out any excess water, and scrub gently. There's no need to rinse or dry the surface. This tool makes it easy to clean up those annoying drips and smears that make the inside of your fridge messy. It's equally effective on the outside of the appliance to remove fingerprints and sticky gunk. The Magic Eraser sheets are especially handy for cleaning the refrigerator door handles. They are flexible enough to wrap around the handle and remove fingerprints with a quick up-and-down motion.
Eliminate odors from inside the refrigerator with these simple kitchen ingredients

When your refrigerator is really clean and contains no spoiled food products, it should not have an odor. But if there's a funky smell inside your fridge, it needs your attention. To remove the smell, wipe down the interior surfaces with a solution of white vinegar and water. But after you've done a thorough cleaning, the refrigerator might retain an unpleasant smell from previous food spoilage. If this happens, you'll want to use an effective hack that will rid the appliance of the unappetizing scent.
Several hacks involve adding components that will absorb the odors. For example, you can place an open, shallow container of either coffee grounds, uncooked oats, or activated charcoal on one of the shelves. Similarly, you might tuck an opened box of baking soda among the bottles and jars in your fridge. To absorb odors and add a pleasant scent, sprinkle a few drops of vanilla extract onto sheets of newspaper and crumple them into balls. Place them on saucers located throughout the interior of your refrigerator and freezer and leave them in the fridge for a few weeks.
Remove dust and mold from the refrigerator door gasket with ingredients you have on hand

The rubber or plastic gasket that runs around the inner edge of your refrigerator door ensures an airtight seal when the door is closed. This allows the appliance to work effectively, keeping your food cold and fresh. Over time, dust, and tiny bits of debris become stuck in the creases of the gasket. In addition to looking unsightly, the dirty gasket can develop a mold problem. When the cold air from inside the fridge comes in contact with the warmer air in your kitchen, it triggers condensation that leaves moisture on the seal. In the moist crevices of the gasket, the fungi known as mildew and black mold can grow.
If you see mold on your refrigerator gasket, you'll want to wear gloves and a mask as you clean it. Pour white vinegar into a spray bottle, and use it to spray the vinegar directly onto the mold. After allowing it to sit for one hour, scrub the gasket with a nylon-bristle brush to remove the mold. Rinse the brush frequently, and wipe away the remaining moisture with a microfiber cloth. If mold is not a problem, you can clean your refrigerator gasket with dish soap and water or with a mixture of 1 tablespoon baking soda dissolved in 1 quart of warm water.