The Beautiful Ceiling Design DIY That Will Give Any Basic Room More Character
We may receive a commission on purchases made from links.
When admiring a room, how often do you look up? Most people focus on the walls, but few pay attention to the ceiling. For many, looking for a complementary shade of white to paint the ceiling is as much attention as it gets during the design process. However, the ceiling is the fifth wall, and giving a little love actually creates an unexpected detail that can make a room standout. While there are many ways to give the ceiling a little more emphasis, adding beadboard is one of the best options. It adds character and texture and makes a room feel custom-designed.
Beadboard is a type of paneling that has thin vertical boards with small grooves in between. It was at the height of its popularity between the 1880s and 1930s and has come to be associated with the farmhouse style because of its use in rural homes. Because of that association, it's now a common material used in modern farmhouse styles or to infuse a bit of traditional charm into a contemporary space.
Adding beadboard to the ceiling can create an understated focal point. And the straight lines of the paneling can help emphasize the length or width of the room and make it appear larger. Plus, it's a relatively easy and inexpensive DIY install, so you can give any room an elevated look without having to undergo custom construction.
Installing a beadboard ceiling
Beadboard will give a ceiling old home charm without having to spend a ton of money on a grand old house to get it. This project only requires basic tools, so it's also fairly cost-effective to do it yourself. One of the largest costs, of course, is going to be the beadboard itself. Both Home Depot and Lowe's have a 48x96-inch beadboard panel for $27.98. Standard primary bedrooms are, on average, 14x16 feet. With these measurements in mind, you'll require 8 panels, which would cost about $223.84 in total for materials, which is about the cost for most projects. If you plan to hire professionals, it will cost about $1 to $3.50 per square foot for the labor to install beadboard on the ceiling.
To create this DIY ceiling design that will elevate a room, you'll need a jigsaw and brad nailer as well as a ladder to reach the ceiling. First, measure your ceiling space and determine how much beadboard you need. You may want to cut the beadboard sheets into smaller sections with the jigsaw to make them easier to work with. Then, starting in a corner, line up the beadboard. Be sure the boards and grooves are running in the direction you want, then fasten it to the ceiling with the brad nailer. Continue this process across the ceiling, sealing the seams with caulk in the end, and finish with a new, charming ceiling detail.
Upgrading beadboard ceiling
Most beadboard panels have a white finish, which works for a wide variety of interior styles. However, many of these panels are also paintable, which means you can upgrade the beadboard by painting it the exact color you want for your space. In general, it's a good idea to paint the panels before installing them, which can be much easier than doing it with a roller to reach the ceiling. Pre-painting also prevents paint dripping from the ceiling or unsightly paint drips drying in place.
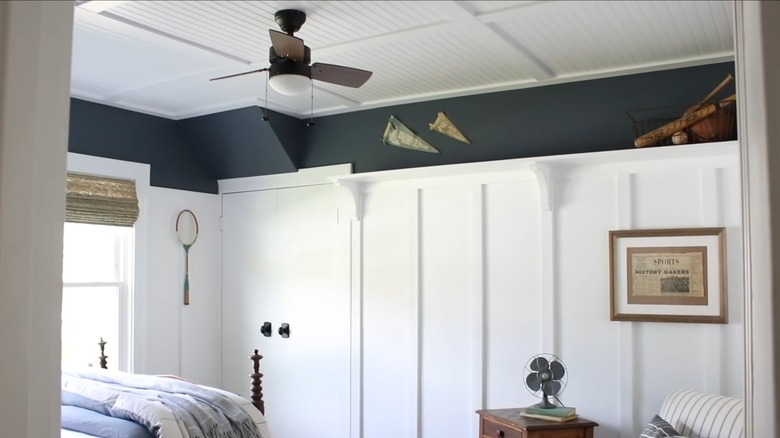
Beadboard will make a simple white ceiling feel elevated and charming, though you don't have to stick with just white. A soft shade, like The Early Stuff from Backdrop, can create a serene space, while Farrow & Ball's Preference Red can be a bolder statement. Consider pairing it with trends like painting the ceiling along with a few inches of the wall below.
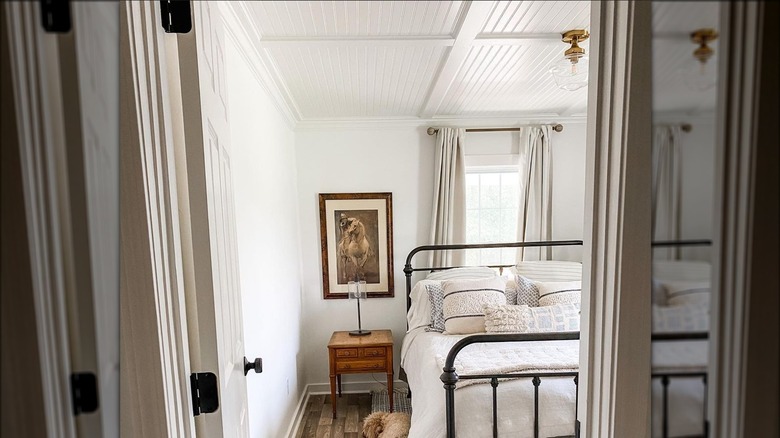
Another option to upgrade a beadboard ceiling is to combine it with a coffered ceiling. A coffered ceiling is right for your space if you're looking to add grandness and even more charming character to a room, especially if you have high ceilings. You can create DIY coffered ceilings by using 1x4-inch wood boards to create a grid-like effect on the ceiling. Once the boards are secured using a brad nailer, you can install the beadboard panels in between the wood boards. With everything installed, you can paint the wood and panels one color to match.