Can You Replace A Whirlpool Dryer Belt Yourself? Here's What You Should Know
We may receive a commission on purchases made from links.
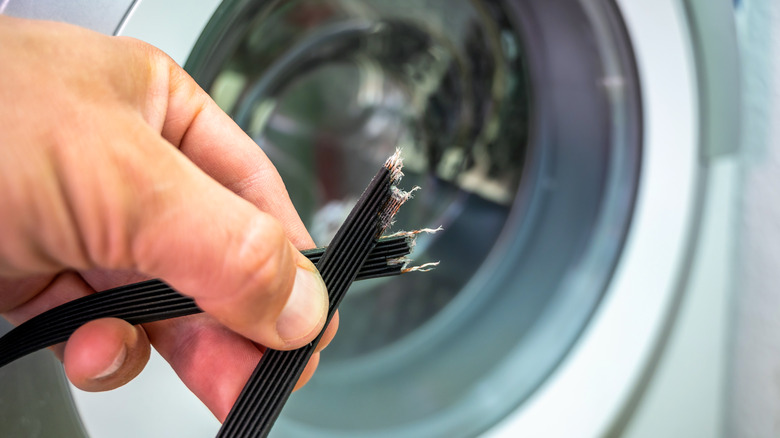
Although repairing a large home appliance may seem like a task that's beyond the typical DIY-er, replacing a dryer belt is a little easier than you may think, even on a Whirlpool model. It usually doesn't even require more than the most basic tools every homeowner should have, like a screwdriver. A dryer can't run without a properly functioning belt — this part spins the drum and keeps the laundry moving for a thorough drying process. Unfortunately, the belt may eventually fray or break because of the stress that it endures over time.
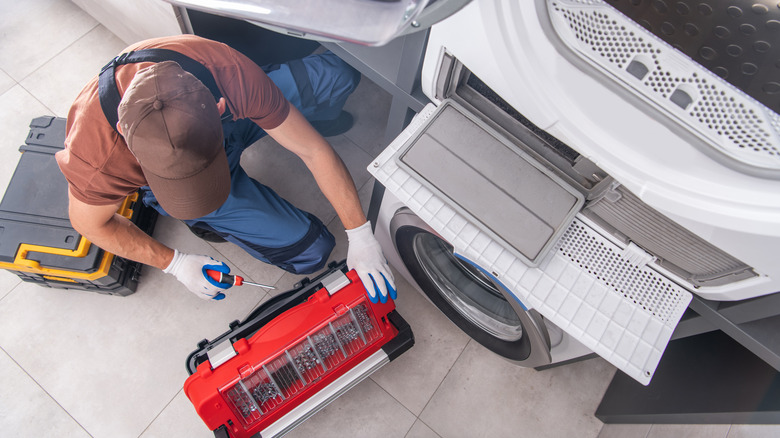
To access the Whirlpool dryer belt, you have to remove the screws holding the lint trap in place, as well as any screws holding the top and front panels on the machine. Before going into some of the more detailed steps for replacing a dryer belt on your Whirlpool appliance, we must mention that if taking apart an appliance in this manner makes you nervous, there's nothing wrong with calling a repairperson. However, if you want to save some money or believe an appliance repair pro may try to take advantage of you, this is a job you can probably tackle on your own.
Deciding if the dryer belt needs repair and replacement
Before you start taking apart your Whirlpool dryer as a weekend DIY project, you want to be certain that the problem relates to the belt and isn't one of the other signs that your dryer needs repair. One of the most common signs of a Whirlpool dryer belt problem is a banging or thumping noise as the appliance is running. If you only have a load of regular clothes inside the machine (rather than some sneakers that would explain the noise), the Whirlpool dryer belt could be loose because of fraying or stretching. Another common sign of this problem is when you can hear the dryer's motor running — but the drum isn't spinning. Without a functioning belt, the drum isn't able to move.
Other potential signs of a dryer belt problem could relate to a different issue with your Whirlpool appliance. For example, if it simply won't start a cycle, the belt might be worn or malfunctioning. But an inability to start could also indicate other issues, like a malfunctioning door sensor, a broken electrical outlet, a faulty circuit board, or another problem. Even something like a clogged vent can cause the Whirlpool dryer to stop working. If you start the belt repair yourself and realize the problem lies elsewhere, or if you notice smoke or scorch marks inside the appliance, you should call a repairperson.
Accessing your Whirlpool dryer belt
When it comes to finding the dryer belt, your particular Whirlpool dryer model may require some different steps or may have a different configuration. If you no longer have the user manual for your dryer, visit the Whirlpool website and search for a digital version. Follow the specific directions for your model versus any generic directions.
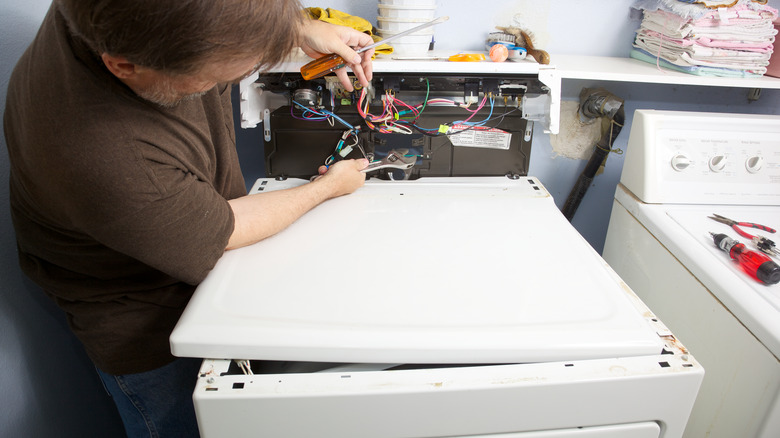
Before working on the machine, unplug it from the wall outlet and slide it away from the wall so you can gain easy access to everything. If you have a gas dryer, you don't have to disconnect it from the gas line before working on it as long as you unplug it from the electric outlet and shut off the natural gas valve that serves the appliance.
If your Whirlpool dryer has a lint filter on the top panel, remove the screws holding it in place. Many of these models don't have any other screws that hold the top panel in place. Now, insert a putty knife at the corners between the top and front panels on the machine, wiggling it back and forth until you loosen the hidden clips. Lift the top out of the way, unscrew the front panel, and remove it. Now you can access the dryer belt and replace it.
Replacing the dryer belt
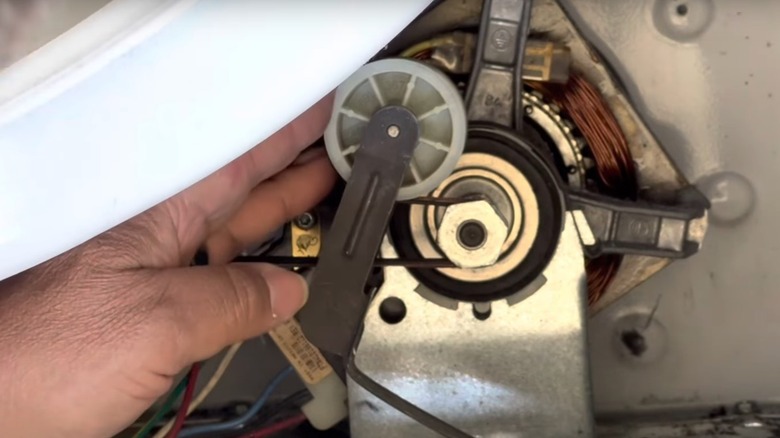
When you open the front panel, you should see the Whirlpool drum (the large cylinder in the middle of the appliance) and dryer belt. The belt wraps around the drum and through a set of pulleys, usually along the bottom of the machine. The pulleys attach to the motor, which spins them, the belt, and —in turn — the drum. Push the pulley away from the dryer to release belt tension and allow you to remove it. In some cases, you need to push a plastic idler pulley, as seen above. Remove the old belt from the appliance and pay attention to the way it feeds through the pulleys. Make sure the new one follows this same pattern.
Most models of Whirlpool dryers have a groove around the outside of the drum, and the belt slides into this indentation. Take the new belt and wrap it around the drum first, making sure it doesn't have any twists in it. The belt typically has its own groove in it, and this side should be tight to the drum. It's long enough that it'll have some slack when it encircles the drum, so use this flexibility to wrap it back around the pulleys in the same position as the old belt. Push the pulley again to release tension and create room to fit the new belt over it. When you release the pulley, it should bounce back to its original position and tighten everything. Once you're done, try spinning everything gently by hand. If it spins, you've done the replacement correctly.