DIY A Chic Decorative Storage Shelf Using Dollar Tree Picture Frames
For those of us who have a collection of small trinkets or decorations and no good way to display them, this Dollar Tree DIY is an excellent way to make a showcase space for your knick-knacks. With a few picture frames, some bamboo skewers, craft sticks, a wood sign, hot glue, and paint, you can create a gorgeous and customizable standing shelf that could sit on a table or countertop to better display your decor. This project is a fun way to repurpose Dollar Tree finds to organize your space, and it could also be used to store craft supplies or other light objects.
While you can find most of the supplies for this DIY at Dollar Tree, you may need to get paint from a hardware or craft supply store, depending on how you'd like to style your decorative shelf and since they typically only carry water-based paints. This is a great chance to customize your finished piece by choosing a color that goes well with your decor. Also, by using chalk paint and giving your shelves a worn look, you can make this shelf look shabby chic. A word of caution: Because this shelf is made from picture frames and glue, it probably isn't able to support a ton of weight and should not be hung on the wall. However, Dollar Tree items are a great way to DIY adorable home decor, and with this piece, you can make a little extra space in your home, too.
DIYing your chic decorative storage shelf
To start this project, as hack creator The Weeks Nest DIY explains on YouTube, you'll need four 4-inch by 6-inch picture frames (though if you want a bigger and taller shelf you could choose larger sizes frames.) Wood frames or faux wood can make this piece pop, though you may prefer metal frames for a different aesthetic. Your frames will act as the base for your shelf, while some Crafter's Square blank plywood signs will be the shelf itself. Since you may need several signs to cover your base, you might consider using a plywood sheet (about $7 at Joann Fabrics) and cutting it to size.
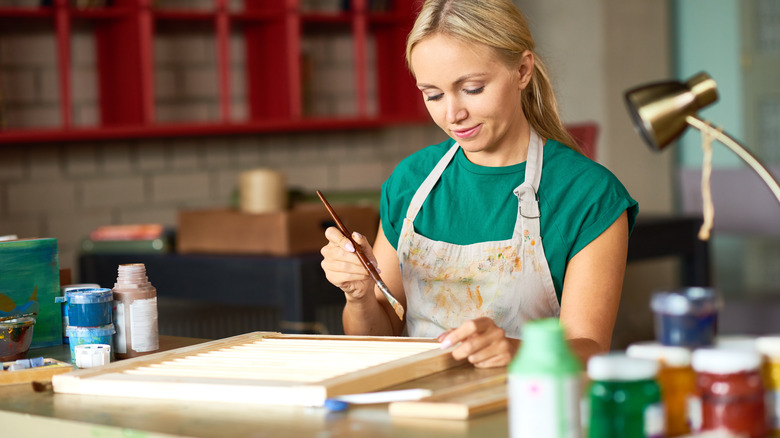
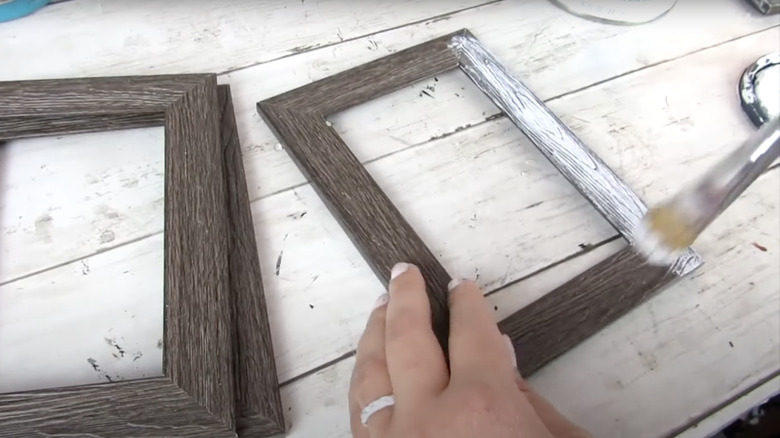
Remove the glass, backing, and the metal pieces of the picture frame that hold the photo in place, leaving you with only the wood border. Now, paint your pieces before assembling the decorative shelf. For a rustic look, try lightly brushing some white paint over your frame so that you can still see the wood beneath it. Otherwise, you might consider painting them white or another solid color to complement your household decor. You could also streak a little bit of brown or another color of paint onto the bamboo skewers to add more dimension. Your plywood signs or plank should be painted in a similar style to the frames so your shelf is cohesive. While chalk paint can give your piece an interesting textured look, you may also choose spray paint or even the acrylic or Tempera paints from Dollar Tree.
Assembling your Dollar Tree picture frame shelf
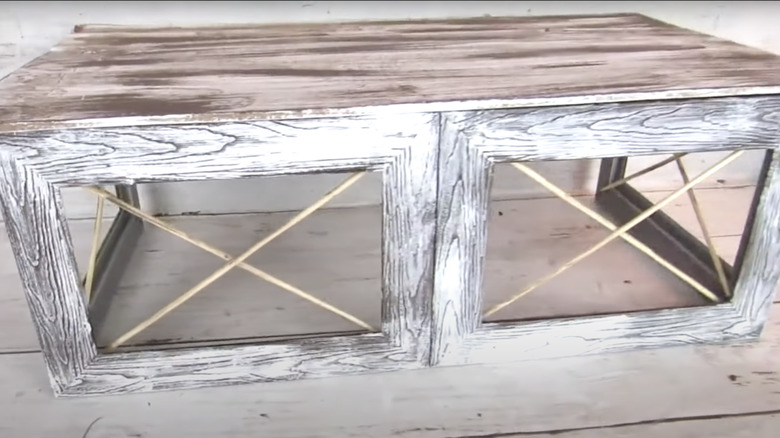
Once your pieces are dry, put your shelf together. Start by hot gluing two picture frames together along their short ends. Flip them over and attach a craft stick (cut to size) in between the frames on the back for stability. Now, glue your bamboo skewers to the back of the frame as well to fill up the open space. You might cross two sticks over each frame to make an X shape or make parallel lines across the open space, depending on the look you like. Repeat this with your two other frames. Now, glue one of your two remaining frames perpendicularly to the outside short sides of your connected pieces. This will create a three-sided base to support your shelf.
Set your base down so that the first two frames you put together act as the front, with the other two being shorter sides. Now, lay out your wood sign or plywood sheet to see how they fit and if you need to cut them before gluing them to your frames. Once the glue dries, your shelf is finished and you can display decorations, pictures, or whatever you'd like (as long as it's not too heavy). You could also tuck other items beneath the shelf inside the base. If you'd like to hide items, you could modify this hack to keep photos in the picture frames and close off the front of the shelf. Of course, this hack is just one way that you can DIY a unique decorative shelving unit to enhance the style of your home.