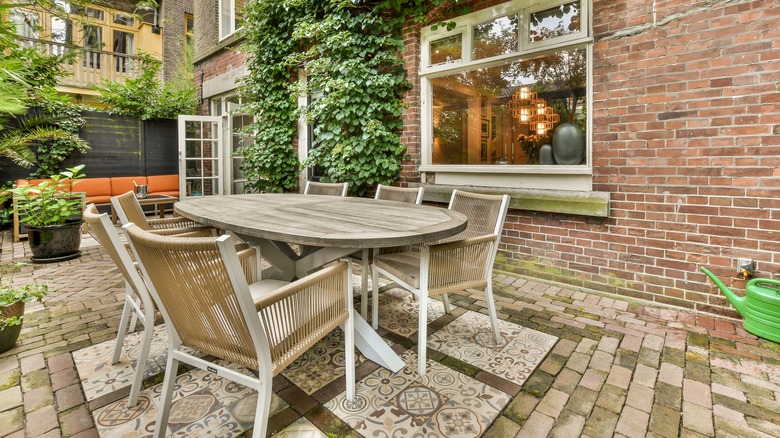
Turn Salvaged Bricks Into The DIY Patio Of Your Dreams
Coming up with the money for expensive natural stone pavers for your patio is easier said than done. Fortunately, you may not have to look far to source quality patio materials. There are many ways to upcycle leftover bricks in your home — like using them to create a patio with a stylish, rustic look. Bricks are already among the most affordable patio materials, but salvaged bricks are even cheaper than new bricks and can sometimes even be free.
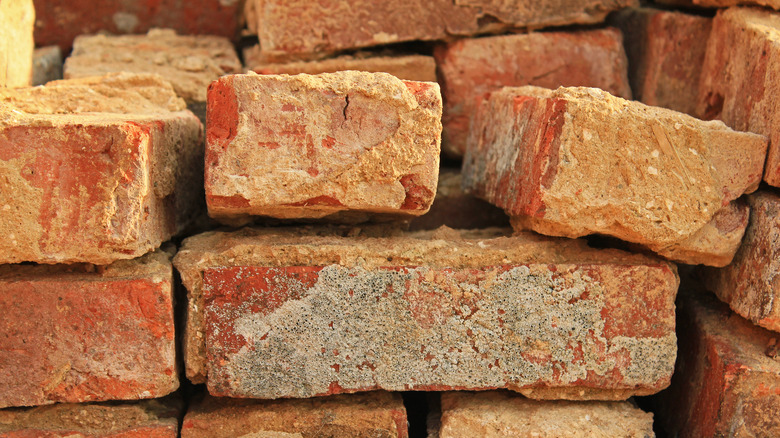
Before using reclaimed bricks to build a patio, clean them thoroughly. Remove any mortar that remains stuck on the brick using a mason's hammer. You'll simply need to tap on the mortar deposit with the hammer. Alternatively, scrub it away with a wire brush.
After the mortar has been removed, you can clean the brick with a 3:1 ratio of water to muriatic acid. Stay safe during this step by wearing eye protection and rubber gloves, and ensure it doesn't come into contact with your skin. Simply spray a brick's side with the diluted acid and then leave it for about 20 minutes before rinsing it with water. Then repeat this on the other side of the brick. if you're unsatisfied with the results of this process, simply repeat it until you're sure the bricks are clean. Keep in mind that you should avoid using a power washer when cleaning or rinsing salvaged bricks since doing so can cause erosion and discoloration.
Building your DIY brick patio
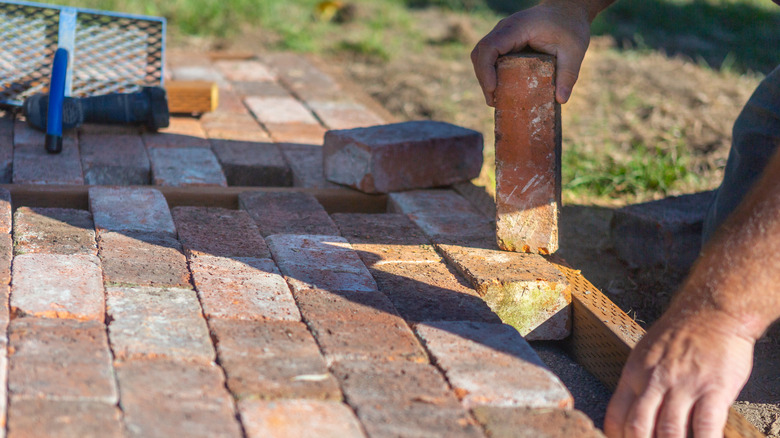
Once you have your reclaimed bricks and have cleaned them thoroughly, create a design for your patio. There are various ways to arrange the bricks, so consider several options and choose a pattern that you find aesthetically pleasing. A zigzagging herringbone pattern offers a lot of visual interest. A running bond pattern in which there are rows of offset bricks is also a very common option. Ideally, you should draw your design and consider all of the best brick patio ideas before you get to work.
Once you're ready to get started, prepare your patio and ensure you're building on level ground. Clean your patio, lay sand and gravel, and measure the area accurately. You'll need to level and compact the dirt and ensure that the space is ready for the bricks. Once you've prepared the area, you'll need to place the bricks in your desired pattern.
Be aware that bricks that are salvaged may not be perfectly level, but it's best to embrace this. It will help add to the rustic, vintage charm of your new patio. Once you've laid the bricks out perfectly, you'll need to finish the job with the help of paving sand. Paving sand helps to fill any gaps that remain between the bricks and gives it the finished look it needs to make an amazing patio. Use a broom to spread the sand evenly between the bricks and then to remove any that remains once you're done.
Maintaining your brick patio after installation
After you've completed installing your reclaimed brick patio, you should put effort into maintaining it. To do this, first clear away all furniture and items that are on it. It's best to use a simple cleaner to keep the bricks in great shape. Avoid acidic and chemical cleaners since they can harm the bricks.
Soap and water is all that's needed to keep your bricks looking great. To clean the bricks, spray them with water first and then apply dish soap. Then rinse. However, avoid using a pressure washer, as when you were initially cleaning the salvaged bricks. Remember that no matter what cleaner you use, it's best to spot test first. In the case of a brick patio, it's ideal to clean one small section at a time anyway. First, apply soap. Don't give it time to dry but scrub it with a stiff bristle brush and rinse it soon after. Whether you're just using dish soap on your brick patio or you're using other cleaners, avoid letting it come into contact with plants near your patio. Some ingredients in cleaners can kill them.
From time to time, you may also need to remove weeds from between the bricks on your patio. Pouring hot water on weeds is one solution that can help kill them.
Finally, you may want to add sand again after cleaning to ensure that the bricks remain in good shape and keep looking their best.