DIY Your Own Flagstone Paver Patio With These Steps
We may receive a commission on purchases made from links.
A patio bedecked with seating, a dining set, a fire pit, or a pergola will bring you outside even during jacket weather. You may have dreams of your own patio, but you've put it on the back burner because you thought it'd be too expensive. The price of professionally-installed patios typically doesn't dip below $3,500. If you're hankering for a satisfying DIY, you can piece together your own flagstone paver patio for a fraction of what professionals charge. This project is best for someone with a strong back, decent stores of time and patience, and a few extra sets of hands.
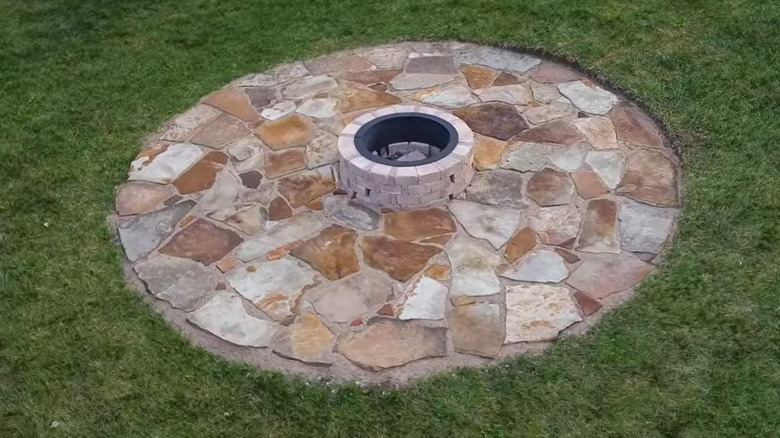
Flagstone is one of the best materials to use for outdoor patios, and we were inspired by YouTuber Average Dad's beautiful finished patio project: a 15-foot diameter flagstone pad with a smokeless brick fire pit. Since there's no exact pattern to follow for the stones' placement, the design may be easier for beginners.
What you'll need for your own patio like Average Dad's is a pallet of flagstone pavers, ½ a cubic yard of sand, and 2 cubic yards of gravel. If you include a fire pit, you'll also need 64 3 ½ by 7 inch Belgian wedge wall blocks, available for $1.60 a piece at Menards, and 64 3 ½ by 1 ¾ Belgian small wall blocks, also at Menards for $1 a piece. Raid your tool shed for a shovel, a rake, a ground tamper, a level, and a tape measure. You'll also need a can of spray paint and a pair of safety glasses. Limber up, grab some friends, and get ready to build a great new hangout spot.
Prep the ground for your flagstone patio
Mark the circle for your 15-foot patio by tying a 7.5-foot-long string to a stake inserted in the ground at where the center of your patio will be. Pull it taut, walk around in a circle, and trace the shape with spray paint. Shovel away the grass and plants from the area. You'll most likely need to take out a bit more soil from the circle; Average Dad carved out a base about 5 inches deep for the patio so that the stones would rest at the same level as the ground around it.
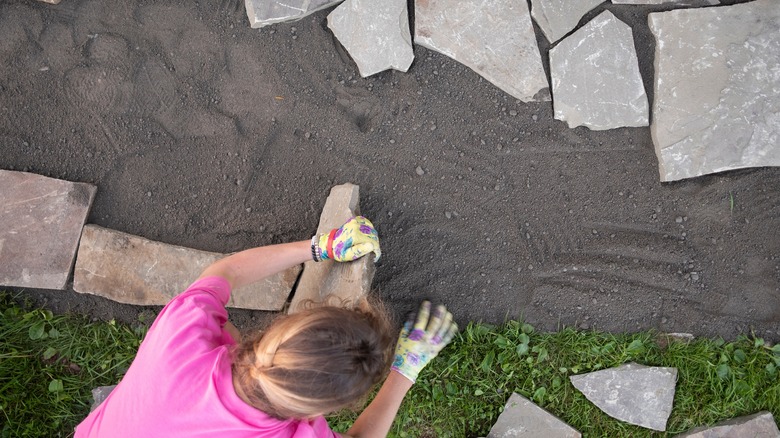
Spread a layer of about 2 inches of gravel in the circle, packing it as you go with a hand tamper; check that the surface is level as you go. If you're adding a fire pit, at the center of the circle, measure out a 32-inch-diameter circle that will be the outside edge of your pit. Lay out the Belgian bricks in a circle, alternating wedges with small blocks. Surround the circle with a layer of sand, rake it flat, and begin placing stones. Set the largest pieces along the outside edge of the circle and around the fire pit base. Adjust the sand so the stones are set firmly, leaving consistent spacing between the rocks.
Fill the smaller spaces with broken pavers; you can do this by dropping them on a brick while wearing safety glasses. Fill gaps with the broken pieces and sand. Go over the entire surface with sand, pressing and tamping it into the spaces between the stones. Add some seating and anything else you like, and you've turned your backyard into an oasis!
Fire pit finishing for your patio
If you've laid the base for a fire pit, congratulations! This feature is a great way to boost your home's value. Follow the layout you used for the base as you add two more layers of rings. However, instead of placing the bricks for each row in exactly the same spot as you did for previous rows, offset the pattern so that the bricks will hold each other in place without mortar.
Before you lay a fourth row of bricks, remove four small blocks from between the wedge blocks to create air flow that will reduce smoke. Take away two blocks directly across from each other in the circle, then shift by 90 degrees on the circle, and remove two more small blocks in the same way. Add one final row of blocks for four total rows of blocks.
You can up the safety level of your pit by purchasing a fire pit liner and a heavy-duty lid. The Koutemie outdoor smokeless fire pit liner can rein in embers and coals, and the ventilation holes along the side don't take away from the ventilation built into the sides of the fire pit itself. A product like this DcYourHome 28-inch fire pit snuffer lid could make you feel more secure post-fire. Because of the ventilation holes in the ring and the vents in the pit's brickwork, this doesn't exactly create an airtight seal when it's set in place. However, it may give you more of a feeling of security that any remaining embers and coals can't escape or reignite in a breeze and spread where you don't want it.


