How To Properly Prepare Your Subfloor For Laying Tile
Seeking tips for the perfect tile floor installation is only natural when you're getting ready to tackle a tiling project. For example, learning that you need grout when installing floor tiles is a super helpful tip that will keep dirt and moisture from harming your floors. However, one equally consequential ingredient for success has nothing to do with the tiles themselves. Preparing the subfloor properly gives you a great starting base that's sturdy and level, making it easier to complete this DIY job with quality. The steps required to prepare a subfloor for tile depend on the material in place, with concrete and plywood being the most common substrate types.
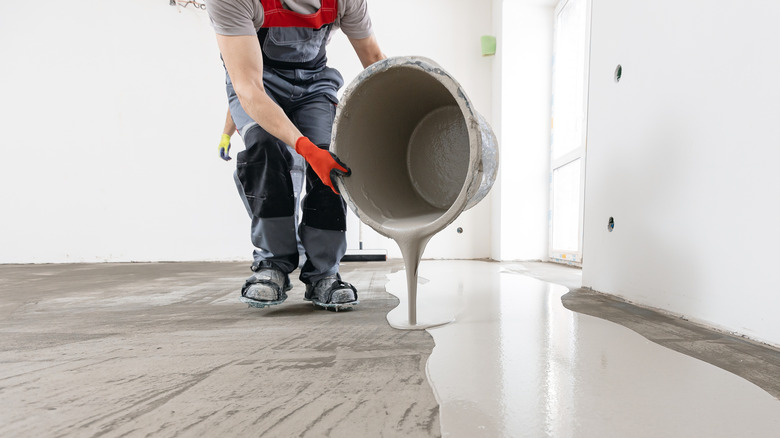
If you have a concrete subfloor, start by sweeping any dry debris from the entire area. If you want to wash the concrete with a degreasing cleaner, you can. Next, make sure the concrete is free of cracks and level before installing tiles. Fill any cracks with a concrete sealant, which you'll apply like caulk, or a concrete patching compound. Then, you'll have to correct any unevenness in the floor with a floor leveling compound. One of the issues with using a floor leveling solution is that it's not easy to install, so you may need professional assistance for this step. After the materials you use for repairs have dried and cured (this can take up to 24 hours) you should slightly rough up the subflooring surface with an etching solution or a power tool. This step makes it easier for the mortar to bond to the subfloor.
How to prepare a plywood subfloor before installing tile flooring
To prepare a plywood subfloor for a tile layout, you'll want to make sure its surface is level. Use a large level or a 4-by-6-foot straight edge to test the plywood in multiple spots, rotating the tool in different directions. Mark the spots that show dips. If the uneven areas on the plywood are small, you may be able to use a power sander on the raised areas to flatten them. If the plywood has seams, fill them with caulk to create a smooth subfloor. Scrape away any excess caulk, drywall mud, or other debris from the plywood. If the existing plywood subfloor is weak, you may want to add a second layer of plywood over the top to strengthen and stiffen the surface.
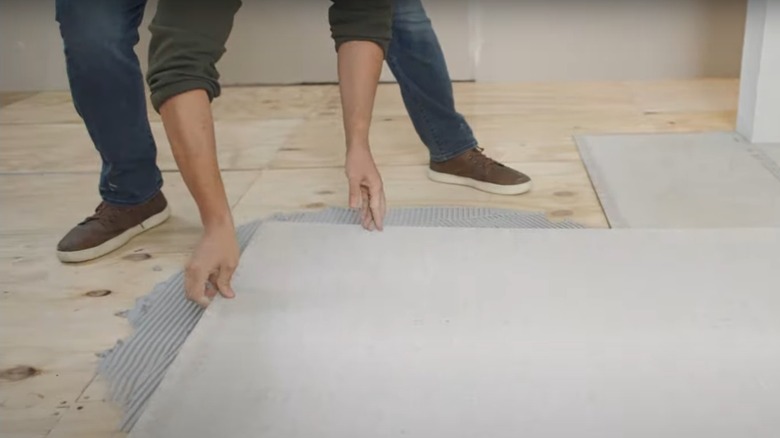
You should then add a layer of backer board (or cement board) for floors, which is a 6-millimiter-thick sheet that's manufactured from cement-based materials. Backer board is especially important to install in a room where you may experience water leaks, as it can protect the plywood from water damage that would otherwise weaken it over time. You'll attach the backer board with mortar, which you should spread directly onto the plywood. To create a strong bond between the backer board and the plywood, walk on the boards after laying them. Add screws every 8 inches around the backer boards' perimeter to further secure them. Finish the backer board installation by filling the seams between each board with mortar. Once it dries, you'll be ready to install tiles.