Transform Dollar Tree Trellises Into The Cutest Decor For Your Porch Or Patio
As the warmer months come around each year, you likely find it more and more tempting to kick back on your porch or patio and enjoy the sunshine. But to do just that, you'll need to make sure your outdoor living spaces are ready for the season. A few lawn chairs and a table are of course must-haves for any homeowner with enough room to accommodate them. However, patio and porch decor fixtures are also important, since they make the areas that are just beyond your door warmer and more welcoming. Plus, they're often great for increasing your home's curb appeal. Thankfully, you don't have to spend a fortune to upgrade the look of your garden or front step. Instead, try a creative DIY that takes five Garden Collection Metal Trellises from Dollar Tree and turns them into a decorative "chair" for your plants.
Making a decorative chair from garden trellises doesn't require any special tools and shouldn't take longer than a single afternoon. All you need to do is zip tie together two trellises for the back of the chair, cut down two more trellises for the middle of the frame, and use a final trellis for the front. Where the chair's seat would be, you can cut a hole in the wiring with bolt cutters and slot in a rounded planter to create an elegant floral display. The finished product is sure to make your entryway feel more inviting.
How to make a decorative chair from garden trellises
To get started, you'll need a pack of zip ties, a hanging basket planter, and five garden trellises from Dollar Tree. SKALON Black Cable Ties work great for this project since they blend in with the trellis wires. First, lay two trellises out flat, and fit them together with their bottom tines intertwined. Then, zip tie together the horizontal wires near the bottom of each trellis in a handful of evenly spaced places. Once that's done, remove the top arch from one of the trellises with bolt cutters. The chair's back panel is now complete.
To make the seat, take one of your spare trellises and remove its top section and bottom legs so that you're only left with wire squares. Remove the top arch and the bottom legs from another trellis, and zip tie it to the squares upside down, at a perpendicular angle. Then, zip tie the other side of the seat to the middle of the back panel. To strengthen the chair, create another square piece by removing the top section and bottom legs. Attach this to the front and back legs just above where the bottom scrollwork begins. Then, take the two arched pieces you removed from the seat and extra square piece and bend them slightly so that you can zip tie them vertically along the sides of the chair. Now you can use bolt cutters to make a hole in the chair seat that matches the size of your planter.
Adding the finishing touches to your new patio chair
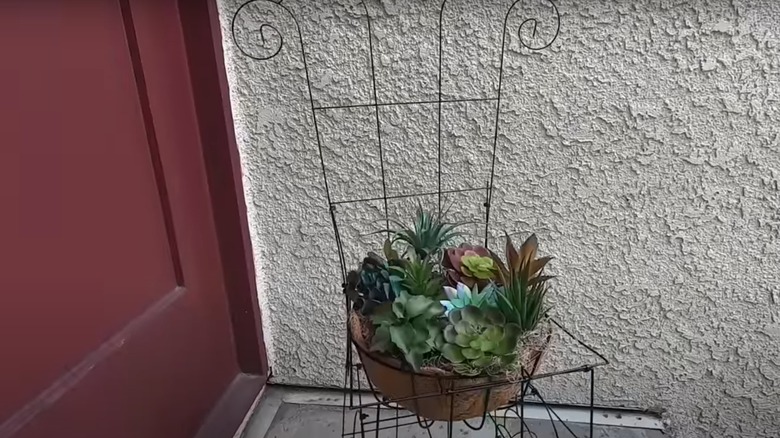
Ideally, your chair's planter will match the design of the trellises. LaLaGreen Hanging Baskets for Plants, for example, should work great since they have similar black wires. You can use the hooks included with your basket planter, if there are any, to attach the fixture to the chair. If you need to purchase separate hooks, make sure they're durable and can evenly distribute the weight. You can also use more zip ties as extra supports. To finish off the project, use scissors or your bolt cutters to cut the ends off all the zip ties.
If you'd like to upgrade the look of your new decorative chair, you could wrap a set of string lights around the arc of the back panel. Minetom Battery Operated Fairy Lights, for example, could brighten up your front porch or backyard patio on a warm summer evening. Alternatively, hang a cute wooden welcome sign from your chair. Of course, you could always put your chair in your garden and use it to try out different climbing plants you should grow on your property instead. Interested in changing the color of your chair? You'll need to use a fine grit sandpaper and metal primer to prep the trellises before you spray paint them. If you already know you'd like to use a different color before you begin the project, you can paint the pieces before you assemble them.