DIY A Mini Makeshift Greenhouse Using A Repurposed Item
We may receive a commission on purchases made from links.
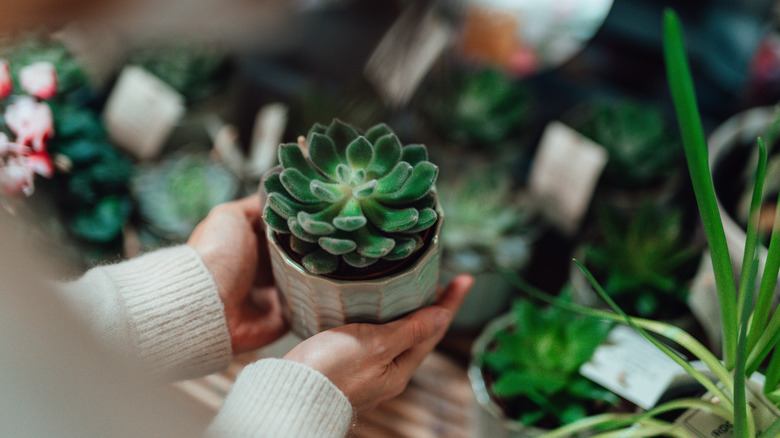
A greenhouse is a coveted gem for any avid gardener, but standard-sized structures take up a lot of space and building a greenhouse is often labor-intensive. Of all of the DIY greenhouse ideas that will transform your backyard, if you simply want a solution for a few plants or a small tray of seedlings, a mini makeshift greenhouse may be the perfect solution for you. It creates the light, humidity, and temperature requirements for growing seedling starters before transplanting or growing cool weather crops like leafy greens and herbs in spring and fall, and it repurposes certain dated items you may be clinging to: old CD cases.
One great thing about using CD cases is that they are made with polystyrene, the perfect type of clear plastic that allows light penetration without becoming cloudy. They are also easy to use in constructing a greenhouse, and your structure can be made as small or large as you'd like by using more or less cases. These retro relics are still readily available online, like a pack of 25 CheckOutStore jewel CD cases for under $30, so you can purchase them even if you don't have enough old cases on hand.
How to build makeshift greenhouse walls with CD cases

The first step in building a backyard greenhouse with CD cases is to remove any inserts and clean off the plastic with a mix of warm water and dish soap (price tags, residual glue, and dust diminish light penetration). To build a greenhouse, lay out enough CD cases to make four wall panels — for example, four closed cases for each end panel and six for each side panel. If you prefer a single-paned greenhouse, break apart the case and just use the clear top half. Be sure the hinges all face the same way in each row for an evenly aligned appearance, and glue the CDs to create each wall panel. Poly cement is specifically meant for adhering to plastics, though a glue gun also works perfectly fine.
Once the wall panels have fully dried, glue them into a rectangular box. Hold all of the panels in place with painter's tape until the glue dries completely, which should take roughly an hour if using poly cement, depending on humidity levels and temperature. You can also construct a base for the greenhouse using a piece of wood, which will add more stability to the structure. If the greenhouse seems less stable than you'd prefer, reinforce it by building a frame along the seams and outline with wooden dowels.
Making your DIY greenhouse roof
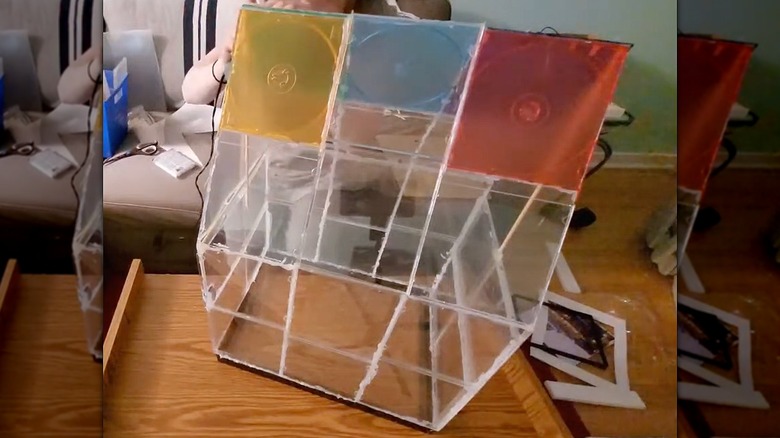
You could add another panel of CDs for a flat roof, but an A-frame design gives additional height inside your greenhouse for plants or flowers to grow. For this look, create a large triangle on top of each of the end walls. Glue one more case centered at the top, and cut three triangles from the CD cases using a craft knife to fill in the spaces on the sides of the top case and above it to form a large triangle. If cutting the cases and building out the triangle sounds too complicated, cut a sheet of plexiglass to size and glue it into place after attaching the roof.
To make the roof, open up four CD cases (or however many you need to match the length of your greenhouse) and lay them in a row so that the insides are facing up. Glue them together, but be sure to avoid getting glue in any of the hinges so you can lift the bottom half of the roof panel for ventilation. Repeat these steps with a second panel.
When both panels have dried, create the roof's apex by angling them together and adhering them on the structure with a generous amount of glue, once again using painters tape to secure the panels until they've fully dried. Finally, fill in any gaps with a generous amount of glue, avoiding areas where the liftable portions of the roof will sit, and let everything dry overnight before using your lovely new makeshift DIY patio greenhouse.