Save The Lids From Glass Jars To DIY The Coolest Decor To Beautify Your Walls

Wall clocks, while not as popular in homes in this modern age of electronic devices at your fingertips, can still be a beautiful way to decorate. While the stores are filled with new and dynamic time pieces, as well as fun vintage clock finds, you might also be looking for a DIY way to create one for your home with your particular aesthetic in mind. A YouTube DIYer came up with an ingenious project that makes a charming timepiece from multiple salvaged jar lids and a clock mechanism. The result is a stunning and romantic floral décor piece that is as beautiful as it is functional.
This artistic wall clock project can easily be adapted to any design aesthetic. While the tutorial creates a romantic floral visual that blends in with cottage-style décor, using different papers and finishing elements allows you to adjust the look to fit your needs. Not only is this project earth-friendly in its use of upcycled materials that might otherwise end up in the trash, but it's a budget-friendly alternative to pricier statement clocks from retailers.
Making a clock from jar lids
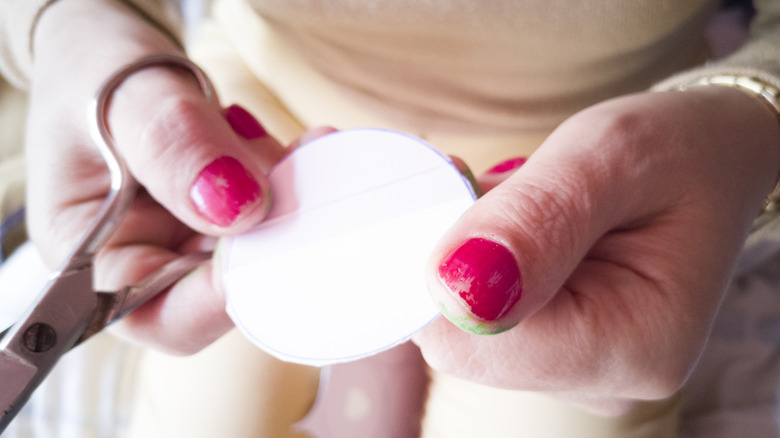
You will need 13 jar lids total, one larger one for the middle of the clock and 12 smaller lids to represent the hours that will surround it. Begin by spray painting the lids your desired shade. When they are dry, add decorative tissue paper to the center and outer lids using a decoupage technique. Smear the metal lid with white glue or Mod Podge, add the paper, and then smooth on another protective coat of adhesive over the top. To denote some or all of the hours, draw them onto the top with a marker or paint. Spray an acrylic gloss coat over all of the lids to protect them and give them a bit of sheen. The lids are finished off with some jute rope wrapped around the edges as trim and secured with a glue gun.
Assemble the outer lids in a circle formation, using hot glue to connect them together. You could also leave them separated for a retro atomic clock look. For the center lid, create a traced circle of cardboard for the back of the lid. This will hold your clock mechanism in place after you cover it in burlap and adhere it to the lid with hot glue. Punch a hole through the exact center of your lid to fit the hardware through, adding the hands on top. Use wooden sticks or dowels to radiate from the center to pull everything together.
Getting a customized look
This ingenious DIY can easily be customized, with many options for using different papers and materials. Thinner papers like tissue paper, napkins, and wrapping paper are great options, but you can also use materials like book pages, old calendars, magazines, scrapbook paper, and leftover wallpaper to get the look you desire. You can also customize the overall size of the clock by using larger or smaller jar lids to create it. With large wall clocks trending, you could also use other kinds of larger circular forms, like snack or coffee canister lids, to create an oversized version as a statement décor piece.
For a different aesthetic, vary the other elements of the project, like swapping out the rope for lace, ribbon, or corded trim. Or hang each lid separately, forgoing the wooden sticks to create a more free-floating design. This allows you to use lids in a variety of different sizes since you can space them to accommodate the hands.
Creative takes on this project could include covering the lids with faux-bois peel-and-stick paper for a sleek mid-century modern vibe. Paint the lids all the colors of the rainbow for a fun look. Or paint the lids with chalkboard paint and use a chalk marker to create the numbers for an industrial-chic design. For a bookish version, cover the lids in pages from an old book. Or use a kids picture book to create an adorable custom clock for a nursery.