Tidy Up Bathroom Countertop Clutter With An Elegant Dollar Tree Organization DIY
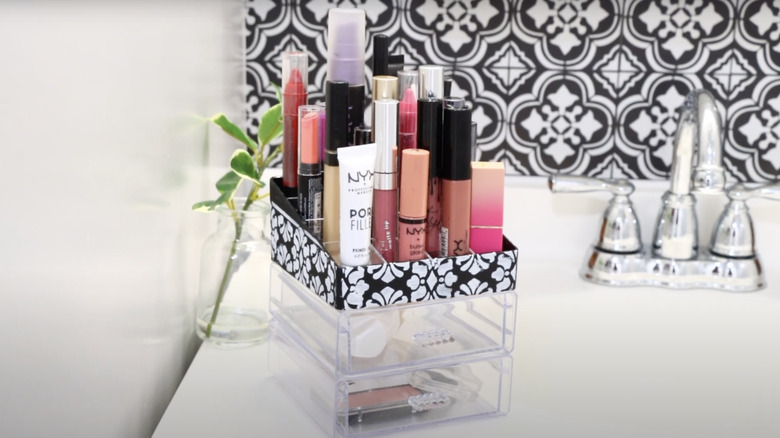
You're in a rush to get out the door this morning and once again the scramble to find that pesky mascara wand is making you late. For many homeowners, not having a designated spot for your makeup collection is bound to rank high among the bathroom design choices that make a space feel cluttered. Thankfully, you can easily declutter your bathroom countertops with some Dollar Tree items, plus a few other simple craft supplies you may even already have. DIY an elegant, budget-friendly countertop makeup organizer in a flash by gluing a plastic nail polish rack to the top of Dollar Tree desktop drawers, painting them black, stenciling on some patterns, and placing your DIY storage solution on your bathroom counter. The drawers are perfect for small, flat items like blush, mousses, and eyeshadow, while the rack on top holds your lip glosses, lipsticks, and yes, even that perpetually lost mascara wand.
An Essentials Clear Plastic Desktop Organizer Drawer from Dollar Tree forms the base of this easy DIY and costs, of course, just $1.25. Try to find a compartment-style cosmetic organizer that fits the 5 by 5 inch dimensions of the drawer organizer. For example, an Amazing Abby Glamour 9-Slot Acrylic Nail Polish Organizer costs about $14 and measures 4.6 by 4.6, leaving a little largely unnoticeable space at the edges. You'll also need some black chalk paint, some white gloss craft paint, and some baroque-style paint stencils for decorating your organizer. We like the FLONZ 6 x 8 Inch Baroque Floral Lace Décor Stencil Template for about $5. Don't forget to grab some waterproof glue or a glue gun, too.
Stencils and paint transform your Dollar Tree find into a makeup organizer you'll actually want to use
Supplies gathered, you're ready to try this trick for decorating your bathroom countertop without causing clutter. Paint the sides, front, and back of the nail polish organizer (the one with the small square compartments) with the black chalk paint. Once the chalk paint is dry to the touch, lay your stencil on one side of the organizer and paint over it with your white craft paint. Repeat on the three remaining sides. Leave the drawer organizer unpainted; the paint will scratch over time as you open and close each drawer and look unsightly. Once the stencil decoration is dry to the touch, glue the painted organizer to the drawer organizer.
Can't fit all your makeup? Get modular and make two organizers instead of one and join them together, quite literally doubling your storage space. You can also get creative with the organizer on the top. For example, this NewTalent Cosmetic Countertop Makeup Organizer for about $8 has a variety of compartment sizes, making it more flexible for a wider range of makeup products. Décor-wise, one of the simplest ways you can make this DIY your own is by changing up the paint colors for both the organizer and the stenciled pattern, choosing hues that coordinate with the existing palette of your bathroom. You could also match the stencil pattern to one already present in your bathroom, such as your countertop backsplash or the decorative tiles in your shower stall. After all, faux painting techniques make a big difference in your home by helping you tie design details together.

