The DIY Round Vanity That Anyone Could Make
If you've long had your eye on an authentic Luigi Massoni "Dilly Dally" vanity but simply can't swallow the enormous price tag, then you're in luck. With just a few simple materials and a touch of elbow grease, you can DIY the perfect round vanity for a fraction of the cost. This project isn't just more affordable; it's also an easy way to get in on the curved furniture trend. For the vanity, you will need an industrial cardboard cylinder, a round wooden tray, a timber round, fabric of your choice, cotton batting, a recycled mirror, a hinge, hot glue, and some screws. The chair can be constructed from an old round ottoman. For tools, you'll need a jigsaw, a drill, and an upholstery tacker (or a staple gun).
The round wooden tray will serve as the top drawer of your vanity. This is where you can store makeup, accessories, jewelry, and other trinkets. It also determines the diameter your cardboard cylinder and timber round will need to be. If you can't find a tray that perfectly fits your project, you can cut one out of plywood using a jigsaw or even make your own DIY round serving tray using materials from Dollar Tree.
For the seat of your vanity, you may wish to reupholster your ottoman in the same fabric. If you don't already have one lying around, ottomans are easy to find at thrift stores or for good deals online. While you could craft your own seat, repurposing an old ottoman helps to speed this project along and ensures that your seat will be supportive enough.
Upholstery transforms a cardboard cylinder into a vanity
After gathering your supplies, it's time for construction. To begin, take your cardboard cylinder and cut it in half. Next, cut out a section of each half, creating two taco-like shapes. This will allow an opening for your ottoman to slide under the vanity base when it's finished. One cylinder "taco" should be cut slightly shorter than the other to accommodate the depth of your round tray.
Attach cotton batting to the outside of the larger cylinder half and use your upholstery tacker to cover the outside in fabric. Cover the inside of the smaller cylinder half in fabric, then slide it inside the larger cylinder. Fit the two pieces together like a puzzle, attaching them with glue.
Next, place your round wooden tray (also covered in fabric) carefully on top of your cylinder base and screw it into place. Use the timber round, hinge, and screws to make a lid for the tray. Glue a mirror to the inside of your tray lid. Finally, add your reupholstered ottoman seat, and you'll have the Luigi Massoni-inspired vanity of your dreams.
Customize your vanity design
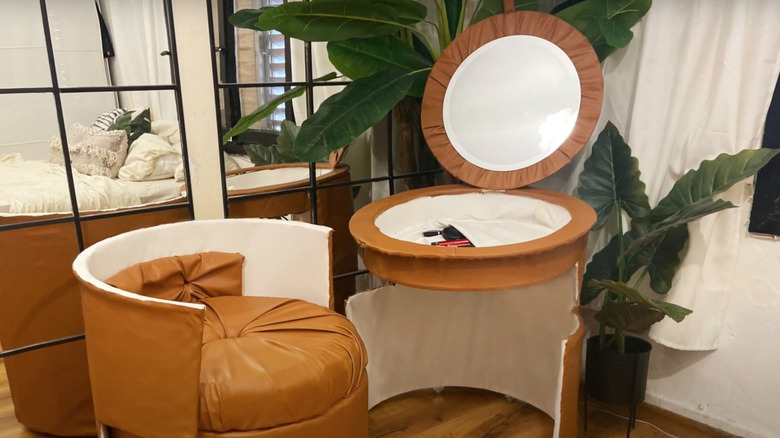
The best part of DIYing your own furniture is your ability to customize every aspect of the project. For this round vanity, you can experiment with different colors and fabrics. While velvet is a popular and classic choice, you could opt for leather, linen, cotton, or vinyl instead. If you're new to upholstery, the best material to use for your ottoman and vanity will likely be something thick and durable but easy to work with, like cotton, linen, or denim. Geometric patterns like stripes can be difficult to lay straight, so you may want to opt for a solid fabric or smaller pattern. Additionally, feel free to paint or stamp a nice pattern onto the vanity, if the fabric allows.
The exact size of this vanity is also up to you. While the original version comes in one standard size, you can make yours smaller to suit children or bigger to offer yourself more space. Other ideas include installing string lights into the storage area to light up your supplies, etching a design into the mirror, or adding a round cushion to make your ottoman seat even comfier. For a relaxing experience, don't forget to decorate the area surrounding your vanity as well. Plants, wall art, and good lighting will all help you feel your best when getting ready.