Transform Your Yard With A 6-Foot Privacy Fence — Here's How To Install Your Own
Whether you have a dog that wants to bark at everything that happens in the adjoining yards or simply want a visual barrier from curious neighbors, installing a 6-foot privacy fence is often the ideal solution. At 6 feet in height, it's not so tall that you feel like you're completely boxed in, yet it's high enough to block most people from seeing clearly into your yard. Best of all, you probably can do the work yourself, using DIY privacy fence ideas to create a private escape in your backyard at a reasonable price.
So how much does it cost to build a privacy fence? You should expect to pay $18 to $43 per linear foot for the materials and installation of a 6-foot fence. You can expect labor costs to make up $10 to $15 per linear foot of that amount. You can save quite a bit of money by choosing to install your fence yourself because labor costs can be a significant percentage of the installation cost. Metal and composite materials drive up the cost of the privacy fence, while wood is a cheaper option.
To help you avoid mistakes everyone makes when installing a fence, we put together a list of steps you should follow to build a sturdy 6-foot privacy wood fence that also looks amazing. Your fence will look so good when you're done that your nosy neighbors will happily spend hours staring at it instead of at what you're doing in your backyard.
Preliminary steps to take when building a 6-foot privacy fence
Before you start digging holes and mixing concrete for installing your new privacy fence, you should take some preliminary steps. Start by determining if you have any restrictions on where you can place it, the materials you can use, or the height. You might have to follow local building codes for residential fences. A 6-foot privacy fence made from wood is legal in most locations, but you should still check. If you live in an area governed by a homeowners' association (HOA), you may have further restrictions you'll have to design around.
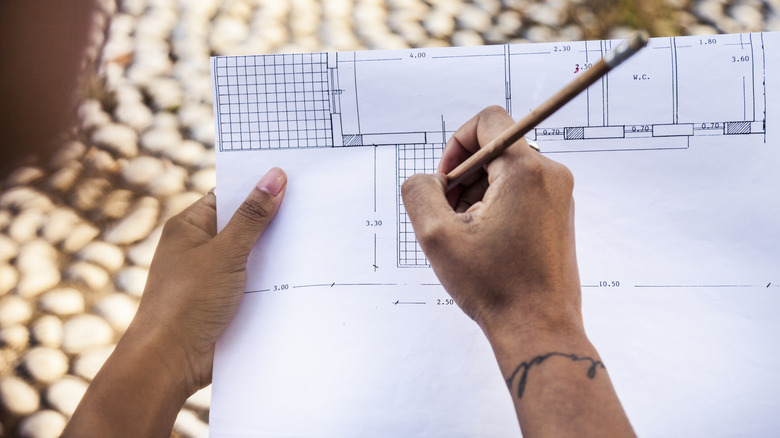
Next, figure out exactly where you want the fence and take measurements. You may need to create a drawing and submit details about the project to obtain a permit from your local building inspector. Some local governments require you to submit written letters from neighboring property owners supporting the project. You might need to hire a surveyor to mark the exact location of your property line, ensuring the plans for your fence will not infringe on your neighbors' properties.
Finally, call 811 or go to the 811 service's website to request having your underground utilities marked. It can take up to four days for all the utilities to mark the lines at your property. Depending where you live, if you dig a post hole and hit one of these lines without using the 811 service, you might have to pay for repairs and receive civil penalties.
Determine what materials you'll need to complete the fence
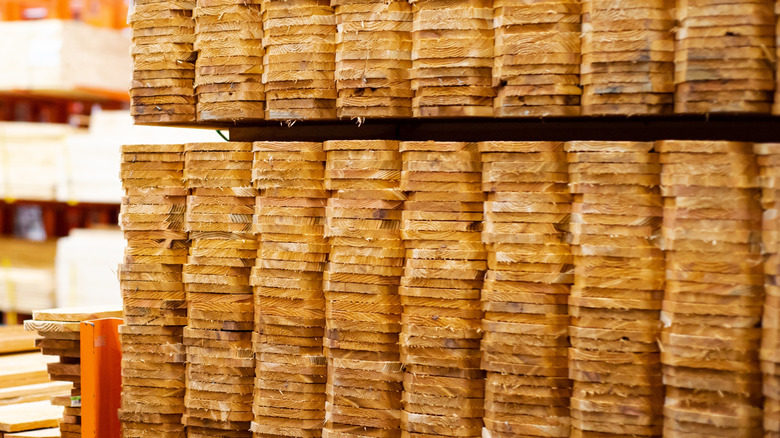
With the measurements and plans completed, you can determine the amount of materials you'll need. Figure out how many posts you'll need based on how far apart you space them. Most privacy fence designs use a standard spacing of 8 feet. However, if you're using pre-built panels, you might need to have posts spaced 6 or 8 feet apart to match the panels. You'll need an extra post at the site of each gate. You may need to purchase rails, too, which are the horizontal supports that go between each post. You'll need enough wood for the rails that matches the total length of the fence. Most 6-foot privacy fence designs use two rails, while others use three. If your fence will cover 128 linear feet, you'll need either 256 or 384 feet of wood for the rails.
If you're buying pre-built panels, determine the total length of the fence in linear feet. Divide that number by the measurement of each panel's width to figure out the total number of panels. If you have 128 linear feet of fence with 8-foot wide panels, you'll need 16 panels.
If you're using individual pickets for installing the 6-foot privacy fence, calculate the total length of the fence in inches. Measure the width of a single picket add in the space you want to use between pickets. Divide the total length by that number. A 5 1/2-inch picket width is common. If you have 1/2 inch of space between pickets, you'd use a 6-inch calculation per picket.
Dig the post holes for your 6-foot privacy fence
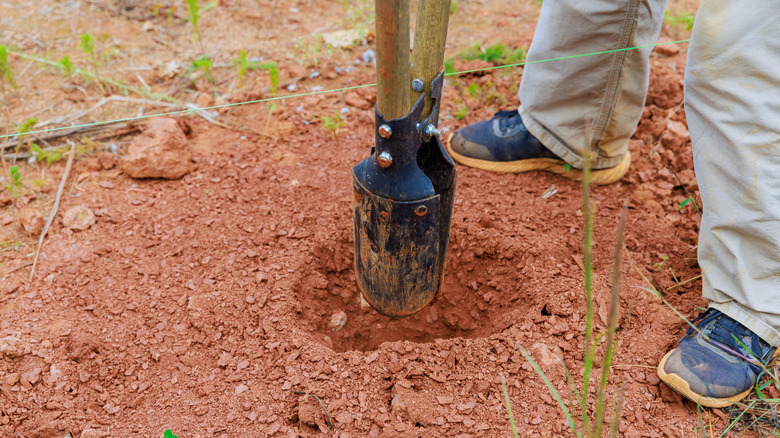
With the materials in hand, run a string along the perimeter of the planned fence. Hammer small stakes into the ground to support the string. Then pull the string tight, giving you a straight guide line for installing the 6-foot privacy fence. Measure and mark the locations for each post with line marking spray paint or additional stakes. Be sure to mark the location of any gates, too. Any post holes should be at least 18 inches away from the marked utility lines from the 811 service. If you have no choice but to place the post within 18 inches of the utility line, dig the post hole by hand — carefully.
When digging post holes, you can use a manual post hole digger or a shovel. If you have several holes to dig, you may want to rent or buy a battery- or gas-powered auger. Most people will use 4-by-4-inch square posts for this project. You should create a hole that's about three times as wide as the width or diameter of the post. For a 4-inch wide post, a 12-inch diameter hole is recommended.
You should make the hole about 1/3 as deep as the height of the post. With that in mind, an 8-foot post should have a hole about 2 1/3 feet deep. You'll fill the bottom of the hole with about 4 inches of gravel before dropping in the post and pouring the concrete, so the 8-foot post is the best size for a 6-foot privacy fence.
Insert the posts into the holes and secure them with concrete before adding the rails
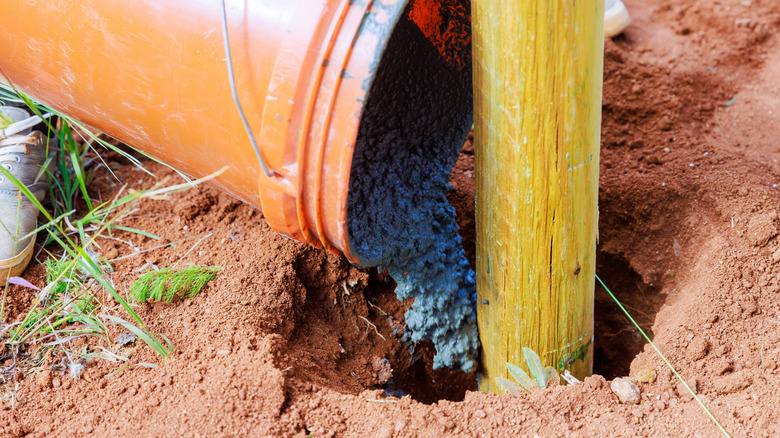
Start with the corner posts for the perimeter of the fence. Place the post in the hole over the gravel and make sure it's straight by using a bubble level. Then attach pieces of wood to the post and to stakes you pounded in the ground to hold it upright. Pour the concrete in the hole according to the directions on the product. You'll usually then add water. Use the bubble level again and make any necessary adjustments right away.
If you use a quick-setting concrete product, it should set in 20 to 40 minutes. If you use too much water or the humidity is especially high, it may take longer to set. You should wait for about four hours before you begin placing force on the posts. Some people recommend waiting a full 24 hours before adding the rail boards. You should cover the concrete with dirt, sand, or gravel, creating a slope that keeps water from pooling on the concrete.
After the concrete fully sets, remove the supports. You can then attach the rails. (If you're using pre-built panels, you probably won't need to add rails.) The lower edge of the top rail should be 5 feet, 4 1/2 inches off the ground. Place the top edge of the lower rail about 9 1/2 inches from the ground and a third rail (if you're using a third rail) in between the two, creating an even spacing among the rails. You can use nails or screws to affix the rails.
Attach the fence panels or pickets and add stain or paint
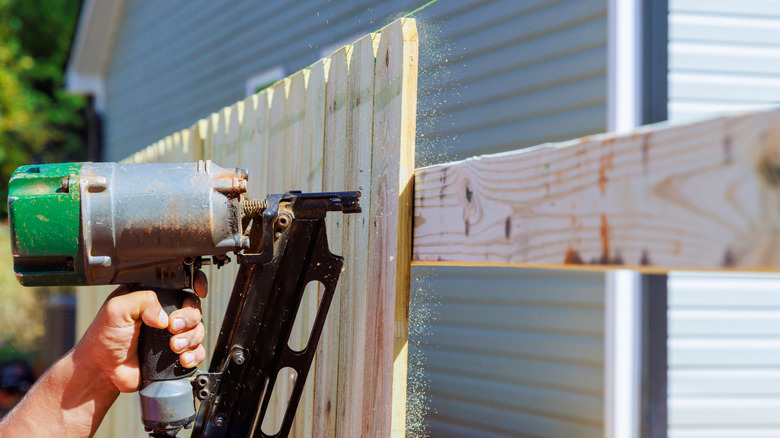
With the rails in place, you can begin attaching the individual pickets. Place the first board at a corner and keep moving along the length of the fence. Use 1 1/2- or 2-inch screws or a nail gun to secure each picket at the location of each rail. Put the picket in place, leaving it about 1/2 inch off the ground to avoid rot from moisture contact. Secure the picket on the top rail first and use a bubble level to adjust it until it's straight. Then add a second nail or screw at the lower rail. Before attaching the next picket, use a spacing block to ensure a consistent space between each picket. Install the gate when you reach its location.
If you chose to install pre-built panels instead of individual pickets, you can attach them directly to the posts with screws. Some panels use hooks and brackets, so follow the directions that ship with the pre-built panels. You may have to cut a panel if it's too long when you reach the corner. After hanging all of them, you can attach trim pieces to the top and bottom of the pickets, if desired, for a finishing touch. You can add post caps, too. Pre-built panels may have finished trim edges already.
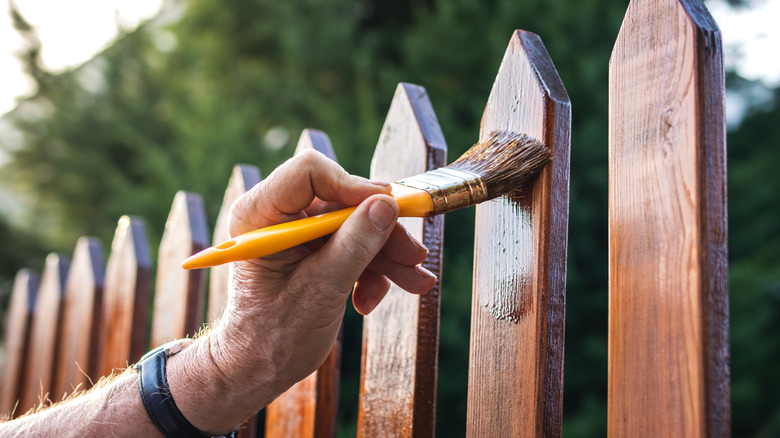
After you're done with installation, you may want to stain or paint your wood privacy fence. Paint lets you choose any specific color you like, while stain creates a more a natural look and holds up better in tough weather.