Upcycle Thrifted Wood Cheese Boards Into Beautiful Kitchen Decor
We may receive a commission on purchases made from links.
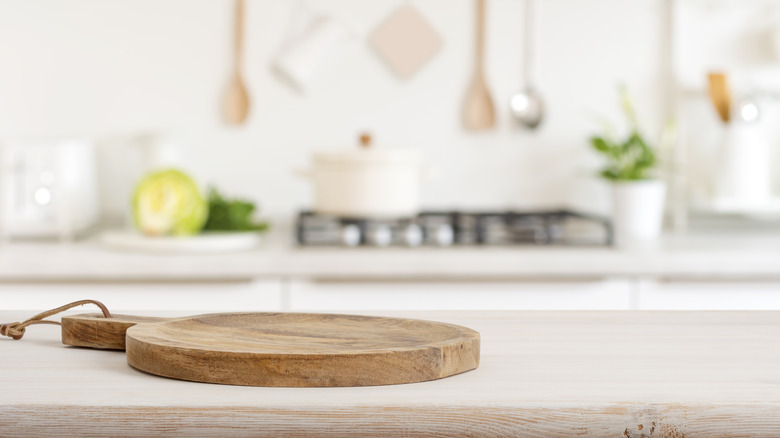
Tired of seeing a blank stretch of wall above your kitchen counters? If you don't have intricate tiles or a backsplash in this area, bringing wall art into your kitchen dresses up the space and makes it a little more interesting. The right pieces will complement your kitchen's design style and add visual variety to the heart of your home. Plus, you can often make unique pieces by upcycling items that you're no longer using at home. For example, you can transform old wooden cheese boards into ornate frames with your custom design in the middle. Whether you decoupage patterned party napkins onto the board or paint a custom design in the middle, the boards end up looking perfectly customized to fit your style.
If you don't have any old cheese boards at home, check for options at your local thrift shop. For the decoupage project, you can choose a decorative napkin design and background paint color that you love, but it's usually a good idea for your selections to match your kitchen's existing color palette. If you want to paint a design, you can freehand the image or use stencils or vinyl to create the decoration. To assemble your decor pieces, you'll also need some fine-grit sandpaper, a couple of adhesive strips, a foam brush, and decoupage glue. Mod Podge gloss sealer is a great option since it acts as both a sealer and finish. The completed project creates a charming display piece for your kitchen. Plus, it might help refresh your kitchen by adding texture to the space.
How to decoupage cheese boards to make kitchen wall decor
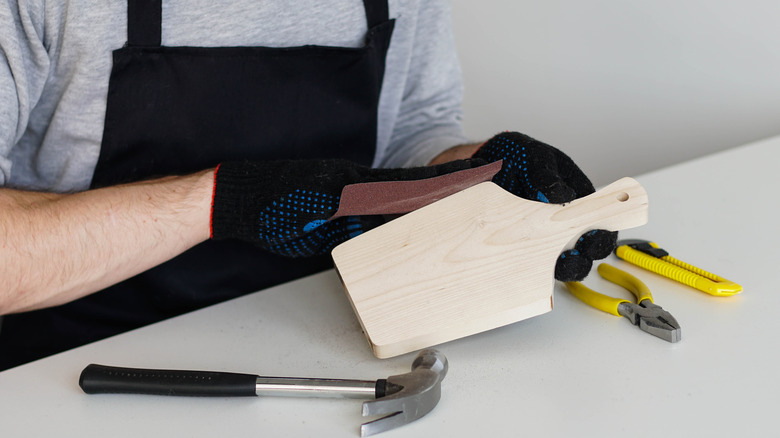
Before you get started, clean your cheese boards with warm, soapy water to remove any food remnants, and let them dry completely. Once they're ready to go, you can begin by gently sanding the middle section of the board. If your cheese boards don't have a clean dividing line or ridge near the edge to create a natural border, you can use painter's tape to cover up a sections of the boards around the edges. Then sand the remaining part in the middle. In the area where you just sanded, apply your preferred color of acrylic paint. You can also paint or stain the border a different color for a little contrast.
Next, take out your patterned napkins, and separate them into layers so you have a thin piece of paper with the pattern on it. Then, cut out the images or shapes you want to use from the thinnest layer. You'll be applying the cutouts to the painted part of the boards. Make sure to find a position or arrangement for them that you're satisfied with before proceeding.
Then, apply a layer of decoupage glue with a foam brush where you're going to paste the napkin cutout. Put the paper down gently, and push out any folds or bubbles with your finger or a small pin. Apply a couple more thin layers of your glue to the top, and let it dry. Finally, hang up your project in your kitchen with your adhesive hanging strips. You can use an adhesive hook or a nail and some twine if the boards are a bit too heavy for the strips or if you want a decorative hanger showing.
Styling your new decoupage decor piece
Part of what makes this decor piece so unique is how easy it is to customize. For starters, you can switch up the paint and napkin patterns on each board so they complement the hues of your countertops and cabinets. If you want to make the sides of the board a bit softer looking, try sanding them down around the edges and staining them. To round off square cheese boards, you should cut them down with a jigsaw first. If you don't want to hang up your boards, display them on floating shelves alongside other essential decor items for kitchen shelf styling.
If you can't find a napkin paper pattern that you like, use a few vinyl stickers instead. Your decoupage glue should work perfectly for adhering them to the wood. If you want to ensure that the stickers stay on permanently, use a layer of varnish over the top of them after the glue has dried. Although you can hang up your cheese board decor on just about any wall in your kitchen, you might want to avoid putting the fixtures right behind your sink or stove. Mod Podge and other decoupage glues usually don't make the surface they're on waterproof, which means splashes, steam, and extra humidity could damage your project.